
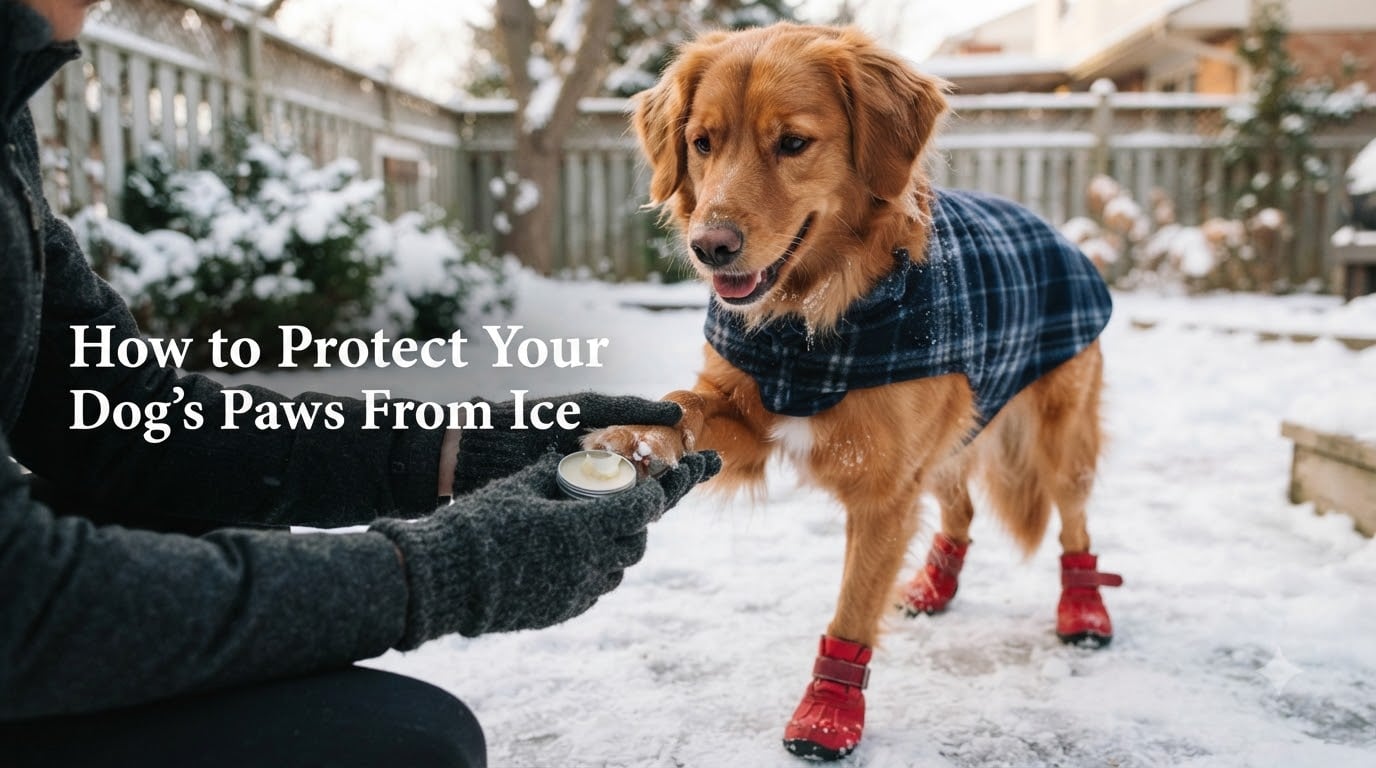
Walking your dog through a frozen winter wonderland can turn painful fast the moment ice, rock salt, or chemical deicers meet bare paw pads. Cracked skin, chemical burns, and frostbite are real risks that show up in my own vet’s waiting room every January.
I tested a stack of paw balms, three boot brands, and four ice melt products through two Minnesota winters with my 60-pound mutt. This guide breaks down exactly how to protect your dog’s paws from ice using the same steps that worked for us and the methods veterinarians actually recommend.
Table of Contents
Why Ice and Salt Are Dangerous to Dog Paws?
Ice and salt are dangerous to dogs because they cause chemical burns, frostbite, and painful cracking on paw pads that lack protective fur. Cold surfaces pull heat away from the foot, while deicing chemicals dry out and erode the pad’s tough outer layer.
Standard rock salt (sodium chloride) and calcium chloride pellets are the worst offenders. When lodged between toes, they dissolve into a concentrated brine that sits against the skin. Dogs then lick their paws to clean them, which means they ingest those same chemicals.
Even plain ice poses a problem. Repeated contact with sub-freezing surfaces constricts blood flow to the paw pad. Without enough warm blood reaching the tissue, ice crystals can form inside cells and cause frostbite within minutes on exposed paw pads.
Veterinary sources like the Animal Humane Society confirm that paw injuries from ice and salt spike every winter, especially in cities that rely heavily on rock salt for sidewalks and roads.
The Three Main Winter Hazards to Paw Pads
Chemical deicers that burn and dry out paw pads, with sodium chloride and calcium chloride being most common
Ice and frozen ground that can cause frostbite or cuts from hidden sharp edges
Ice balls that form between toes and pull hair and skin when a dog walks
How Dog Paws Stay Warm (The Science)?
Dog paws stay warm in snow through a built-in system called countercurrent heat exchange, where warm arterial blood flows right next to cooler venous blood returning from the foot, transferring heat before it reaches the paw pad.
Iditarod veterinarians explain this trick clearly: arteries carrying hot blood from the heart run alongside veins carrying cold blood back. Heat transfers across the thin vessel walls, so blood reaching the paw is already partially cooled and blood returning to the body is pre-warmed.
This is why sled dogs can run hundreds of miles on frozen ground without losing their feet. The system keeps core body temperature steady while limiting heat loss at the extremities. It works well, but only down to certain temperatures and only when the dog is moving and healthy.
Puppies, senior dogs, small breeds, and dogs with heart conditions or diabetes have weaker circulation. Their paws lose heat faster and recover slower, which is why they need extra protection like boots or shorter walks in extreme cold.
Signs of Paw Damage to Watch For
The first signs of paw damage from ice are redness between the toes, pale or grayish pads, limping, and excessive licking after walks. Catching these early prevents minor irritation from turning into a full chemical burn or infection.
I check my dog’s paws every single walk during winter. A quick 10-second scan catches most problems before they get serious.
Paw Damage Warning Signs Checklist
Limping or lifting paws mid-walk, which means the surface is too hot, cold, or painful
Red, raw, or bleeding pads from chemical burns or ice cuts
Cracked, flaky, or peeling skin on the pads or between toes
Ice or salt chunks stuck between paw pads that need immediate removal
Excessive licking or chewing at the paws after coming indoors
Pale, white, or gray pads that signal reduced blood flow or early frostbite
If you spot pale pads, do not rub them. Move your dog to warmth and call your vet, since deep frostbite needs professional care fast.
How to Apply Paw Balm (Step-by-Step)?
Paw balm protects dog paws from ice by creating a waxy barrier that blocks salt and ice while moisturizing the pad to prevent cracking. Apply it 30 minutes before any walk to give the product time to absorb.
Popular options include Musher’s Secret, Bag Balm, and plain petroleum jelly. Each creates a water-resistant shield against salt and ice, and they moisturize dry pads at the same time.
Step-by-Step Paw Balm Application
Clean the paws with a damp cloth and dry them fully before applying anything.
Warm the balm between your fingers for a few seconds so it spreads easily and absorbs faster.
Rub a thin layer directly onto each paw pad, between the toes, and around the nail beds.
Wait 30 minutes before heading outside so the wax can fully bond with the pad.
Reapply every 3 to 4 hours on long outings, or whenever the paws look dry.
I keep a tin of Musher’s Secret by the front door year-round. One small tin has lasted us two winters of daily application, which works out to a few cents per walk.
Skip human lotions that contain fragrances or zinc oxide. If you want a budget option, plain petroleum jelly works in a pinch and creates the same barrier effect as commercial paw balms.
Choosing and Fitting Dog Boots
Dog boots are the most complete way to protect your dog’s paws from ice because they cover the entire pad, the toes, and the surrounding fur all at once. They block salt, ice, and ice balls in a single step.
The hard part is getting your dog to keep them on. Most boots use Velcro straps and flexible soles that grip slippery sidewalks. Brands like Ruffwear, Muttluks, and Kurgo consistently earn strong reviews from active dog owners.
How to Measure Your Dog’s Paws for Boots
Place the paw on a piece of paper with the dog standing and weight bearing.
Mark the widest part of the paw from one side to the other.
Mark the length from the heel to the tip of the longest toenail.
Use the wider measurement when comparing to brand sizing charts.
Check the fit by sliding two fingers between the strap and the leg for a snug but not tight seal.
Getting a Resistant Dog to Accept Boots
Most dogs need a slow desensitization plan before boots feel normal. Reddit’s dog training threads are full of this exact struggle, so do not feel bad if your dog kicks the boots off at first.
Day 1 to 3: Place the boots near the food bowl so your dog associates them with good things.
Day 4 to 7: Touch each paw briefly and reward with a treat, no boots yet.
Day 8 to 10: Put one boot on for 30 seconds, remove, and reward heavily.
Day 11+: Add boots one at a time indoors for longer periods before taking them outside.
Twelve walks is usually the magic number. Most dogs walk normally in boots once they accept the new sensation.
Post-Walk Paw Care Routine
The single most important post-walk habit is wiping your dog’s paws with a warm, damp cloth or pet wipe every time you come inside. This removes salt and chemicals before they soak into the pad or get licked off.
I keep a small basket by the door with a microfiber towel and a bowl of warm water. The routine takes 90 seconds and prevents 90 percent of salt-related paw problems in my experience.
Quick Indoor Post-Walk Routine
Wipe each paw with a warm, damp cloth to remove salt and slush.
Check between toes for ice balls or debris that need gentle removal.
Dry the paws fully with a clean towel to prevent moisture from sitting on the skin.
Reapply paw balm if you used it earlier and the barrier looks worn.
A 30-second paw check saves hours of vet bills later. Salt left on paws overnight is the most common cause of the painful cracks I see on clinic intake forms.
Pet-Safe Ice Melt Alternatives
Pet-safe ice melt uses ingredients like magnesium chloride or urea instead of sodium chloride, which means it melts ice without burning paws or poisoning lawns. These products cost slightly more but prevent most winter paw injuries.
If you control the walkway at home, switching your deicer is the single highest-impact change you can make. Your dog, your lawn, and your concrete all benefit from the gentler chemistry.
Best Ice Melt Choices for Dog Households
Magnesium chloride pellets work down to about minus 13°F and cause far less paw irritation than rock salt.
Urea-based melts are also safe for paws and double as a fertilizer for your lawn.
Sand or kitty litter provide traction without any chemical exposure, though they do not melt ice.
Calcium magnesium acetate is the gentlest option and is commonly used near sensitive plants.
Skip any product labeled with high percentages of sodium chloride or calcium chloride. The concentration you see on public sidewalks is usually much higher than what your dog can tolerate on a walk.
Emergency Paw Burn Treatment
For a paw burn from salt or ice melt, rinse the paw with lukewarm water for 5 minutes, then apply a thin layer of petroleum jelly, and call your vet if you see bleeding, limping that lasts more than an hour, or pale gray pads.
This is the fastest at-home treatment when you do not have paw balm on hand. I have used it twice on my dog after surprise encounters with heavily treated sidewalks.
What to Do When Your Dog Has Salt Burns
Bring the dog inside and put them in a warm, dry area right away.
Rinse each paw with lukewarm water for 5 full minutes to wash away the salt residue.
Pat the paws dry gently with a soft towel, no rubbing.
Apply petroleum jelly or paw balm to create a new protective barrier.
Watch for signs of poisoning like vomiting, drooling, or lethargy, since dogs may have licked salt.
Call your vet if the pads are bleeding, the dog is limping, or symptoms last more than an hour.
Most mild salt irritation clears up within a day with this routine. Severe burns or paw blistering require veterinary care the same day.
Quick Solutions for Potty Breaks in Extreme Cold
For quick potty breaks in extreme cold, apply paw balm, wipe paws immediately on return, and skip long walks when temperatures drop below 0°F. A backyard outing of two to three minutes is plenty when wind chill is severe.
I use this exact playbook on polar vortex mornings when the air hurts to breathe. Short, focused trips beat long walks every time when the temperature tanks.
Clear a small yard path ahead of time with a shovel so your dog has a safe surface to stand on.
Lay straw along the path as a backup option for especially cold days.
Apply paw balm right before stepping out, even for a one-minute break.
Wipe paws the moment you come back inside to remove any new salt or ice.
Layered up properly, healthy adult dogs can handle three to five minutes of outdoor time in sub-zero weather for a potty break. Anything longer calls for boots or a skipped walk that day.
Frequently Asked Questions
What can I put on my dog’s paws to protect against cold weather?
Paw balm, petroleum jelly, or a thin layer of wax-based products like Musher’s Secret protect dog paws from cold weather by creating a barrier that blocks ice and salt. Apply the product 30 minutes before your walk so the barrier fully bonds with the paw pad.
Can I put human socks on my dog for winter?
Human socks are not ideal for dogs because they do not grip well, slide off easily, and can trap moisture against the skin. Purpose-made dog boots with non-slip soles stay on better and let the paw breathe during winter walks.
Are dogs’ paws ok on ice?
Dogs’ paws are not ok on bare ice for long periods because sub-freezing surfaces can cause frostbite, while hidden sharp edges can cut pads. Brief contact is fine, but layer in paw balm or boots for any walk longer than a few minutes.
How do snow dogs’ paws not freeze?
Snow dogs’ paws do not freeze in normal winter conditions because of countercurrent heat exchange, where arteries and veins run next to each other and transfer heat before it reaches the paw pad. This system fails in extreme cold, when dogs are sick, or when they stop moving.
What does sidewalk salt do to dog paws?
Sidewalk salt dries out paw pads, irritates the skin between toes, and can cause chemical burns when dogs walk on treated surfaces. Dogs that lick the salt off also risk vomiting, drooling, and salt poisoning in serious cases.
Which ice melt is safest for dogs’ paws?
Magnesium chloride and urea-based ice melts are the safest options for dog paws because they melt ice without the harsh burning action of sodium chloride or calcium chloride. Sand and kitty litter also work for traction without chemical exposure.
Final Thoughts on Winter Paw Safety
Protecting your dog’s paws from ice comes down to three habits that take less than five minutes per walk: a barrier layer before you head out, a quick wipe-down when you come in, and a daily scan for early warning signs. Paw balm, dog boots, and pet-safe ice melt handle the heavy lifting.
Pick one method to start this week, whether that is a tin of paw balm by the door or a pair of properly fitted boots for longer walks. Build the routine for two weeks, then layer in the next habit. Small consistent steps keep your dog walking comfortably all winter long.