
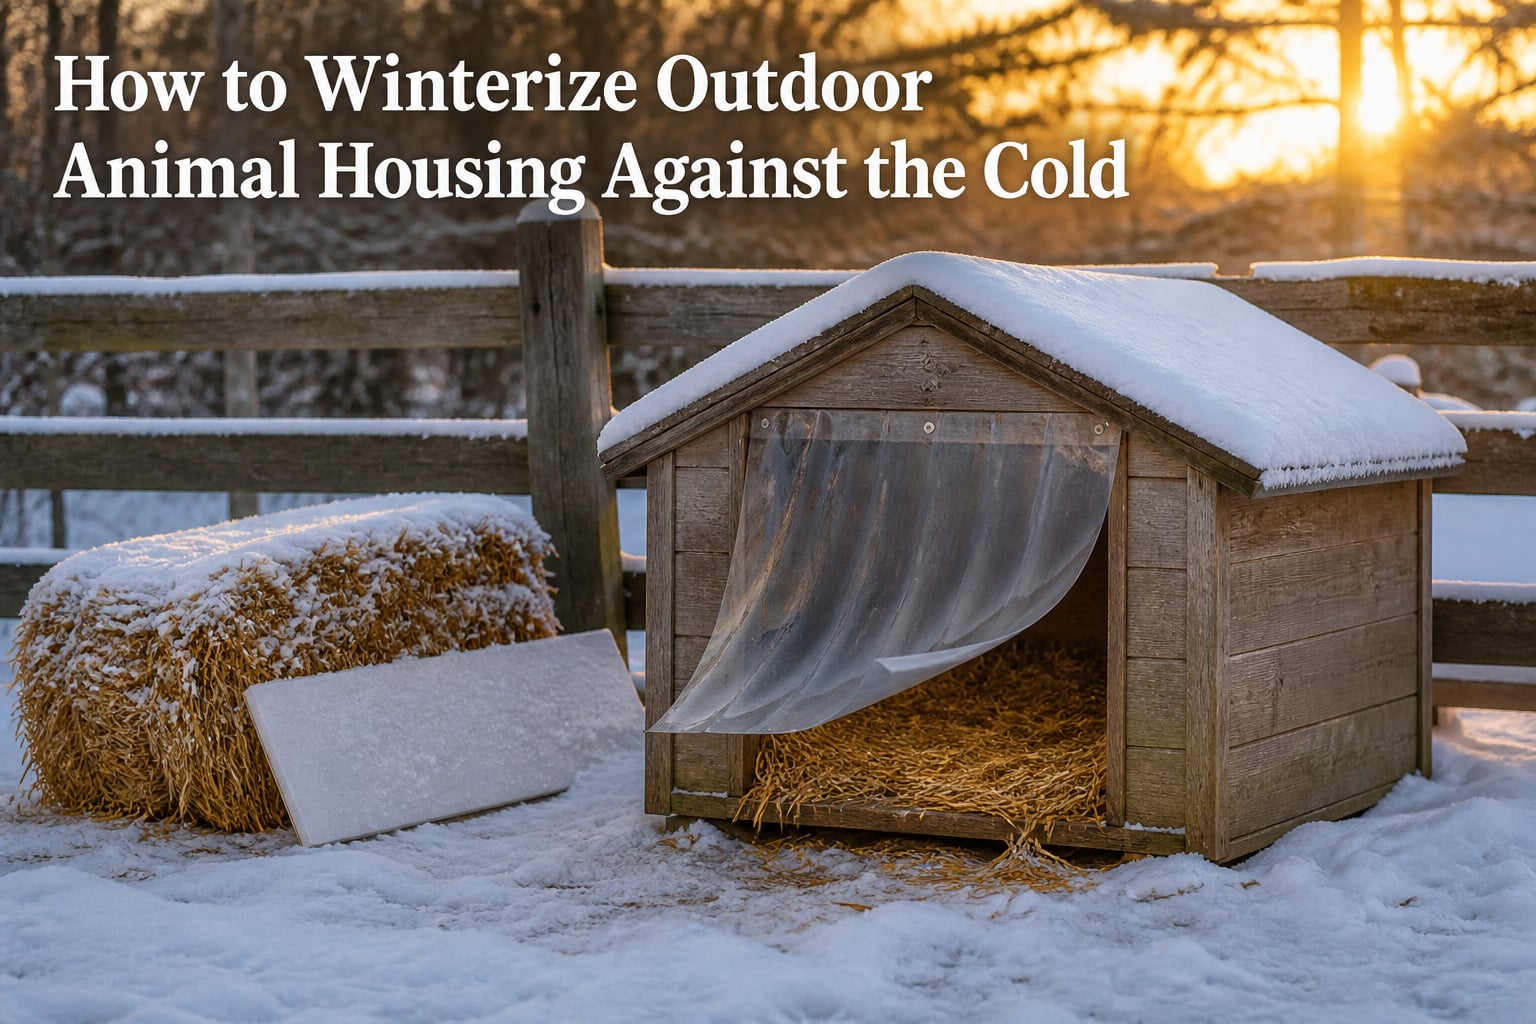
Learning how to winterize outdoor animal housing against the cold saves lives. Every year, veterinarians treat hypothermia and frostbite cases that could have been prevented with a few hours of prep work before the first hard freeze.
I grew up with a working farm dog who refused to come inside, even when temperatures dropped below zero. My dad spent every October rebuilding that dog house, and watching him taught me that winterization is less about buying expensive gear and more about sealing gaps, choosing the right bedding, and blocking wind where the animal actually sleeps.
This guide walks through exactly what our team does each fall to prepare outdoor shelters. You’ll learn insulation techniques, the truth about straw versus hay versus blankets, how to handle feral cats, and a checklist you can complete in one afternoon.
Table of Contents
Why Winterizing Outdoor Animal Housing Matters?
Cold weather kills outdoor animals faster than most owners realize. Hypothermia sets in once a dog’s body temperature drops below 99°F, and small animals like cats and rabbits can develop frostbite on ears, tails, and paws within hours of exposure to sub-freezing wind.
Different species handle cold differently. Northern breeds like Huskies and Malamutes tolerate far more cold than short-coated Chihuahuas or greyhounds. Barn cats and feral cats often do well if they have a dry, draft-free shelter, but a wet cat in 20°F weather is a medical emergency waiting to happen.
Waiting for the first hard snowstorm is a mistake. Plan to winterize your outdoor animal housing at least two weeks before overnight temperatures consistently drop below 40°F. That buffer gives you time to fix problems before tests really begin.
Assess Your Current Shelter Before Winter Hits
Before adding insulation or new bedding, spend 15 minutes evaluating what you already have. I like to use a three-point inspection that covers structure, gaps, and fit.
Check the Structure
Look at the roof, walls, and floor. Are there soft spots, rot, or animal damage? A compromised wall holds insulation poorly and lets moisture in. If the shelter is falling apart, no amount of straw will keep your animal warm.
Find Every Draft
Run your hand along seams, joints, and the door opening on a windy day. Anywhere you feel air moving in is a heat leak. Common offenders include the seam between the wall and roof, gaps around the door frame, and where the floor meets the wall.
Verify the Fit
The shelter should be just large enough for the animal to stand up, turn around, and lie down. A bigger shelter lets body heat dissipate. Measure your animal’s height and length, then ensure the interior is roughly 25% larger than that.
Test the Roof for Leaks
Spray it with a hose or check after the first rain. Moisture inside insulation is the enemy of warmth. A wet dog is a cold dog, even if the shelter is technically insulated.
Insulation Techniques That Actually Work
Insulation is the single most effective winterization step. Foam board insulation (the rigid pink or blue panels sold at hardware stores) is what I recommend to nearly every owner I talk to. It is cheap, easy to cut, and has an R-value of about R-5 per inch.
Where to Add Foam Board
Line the walls, floor, and ceiling with 1-inch thick foam board. Cut it to fit snugly so there are no air gaps. For larger dogs or harsher climates, use 2-inch panels to push the R-value closer to R-10.
Cover the Foam
This is the step most DIY guides skip. Dogs and cats chew foam board, and ingesting it can cause intestinal blockages. Cover all foam with a thin layer of plywood, paneling, or even heavy-duty plastic sheeting stapled to the studs.
Add a Vapor Barrier
Warm air holds moisture, and that moisture condenses inside cold walls. Staple a 4-mil plastic sheet between the foam board and the interior paneling. This stops condensation from soaking your insulation and losing its R-value.
Why R-Value Matters
R-value measures resistance to heat flow. Higher R-value means better insulation. For most outdoor dog houses in temperate climates, R-5 to R-10 is enough. If you live in a northern climate where temperatures regularly drop below 0°F, push for R-15 or higher.
Bedding Options: Straw vs Hay vs Blankets
The bedding decision matters more than insulation in some cases. A common error I see is well-meaning owners stuffing dog houses with blankets, towels, or fleece. The truth is that these materials absorb moisture, freeze solid, and actually make animals colder.
Straw Is the Gold Standard
Straw is dry, hollow, and traps air efficiently. It does not absorb water the way hay does, and it stays fluffy even in freezing weather. Pour a 6 to 12 inch layer on the floor and let the animal burrow into it. Straw is what Alley Cat Allies and most veterinarians recommend for outdoor shelters.
Hay Is the Wrong Choice
Hay looks similar to straw but absorbs moisture and tends to mold. Once wet, hay mats down and loses insulating value. It also harbors bacteria and can cause respiratory issues. If you have a choice between hay and straw, always choose straw for bedding.
Blankets Can Backfire
Blankets and old towels feel warm to the touch, but they trap moisture from the animal’s breath and body. In freezing temperatures, that moisture turns into ice. A frozen blanket is colder than bare wood. Skip blankets for outdoor shelters entirely.
How Deep Should Bedding Be
For dogs, pack straw at least 6 inches deep in winter. For cats and small animals, 4 to 6 inches is enough, but you should add enough that the animal can completely burrow and disappear from view. Burrowing preserves body heat in a way that simply lying on top of bedding cannot.
Elevate the Shelter Off Cold Ground
Ground contact steals heat faster than almost any other factor. Concrete and frozen soil pull warmth away from the shelter floor, even with thick bedding. The fix is simple and takes about 30 minutes.
Place the shelter on a wooden pallet, two 4×4 runners, or a few cinder blocks. The goal is to create a 3 to 6 inch air gap underneath. Combined with the foam board insulation on the floor, this dramatically reduces heat loss.
For feral cat shelters, raise them slightly off the ground as well. We have built shelters using a single 2×4 frame that lifts the box just enough to keep water from pooling underneath while still allowing cats to enter through the small doorway.
Blocking Drafts, Wind, and Moisture
Even a well-insulated shelter loses heat if cold wind blows directly into the sleeping area. This is where door flaps and doorway placement come in.
Install a Door Flap
Cut a piece of heavy plastic (like a carpet runner or a flap from a feed bag) and attach it to the top of the doorway. Leave a 1-inch gap at the bottom so the animal can push through. The flap weighs down between entries and blocks wind.
Face the Door Away from Wind
Before securing the shelter permanently, watch which direction the prevailing wind comes from in your area. Position the door on the opposite wall or at least at a 90-degree angle. In most of North America, that means facing the door south or east.
Seal Gaps With Caulk
Exterior silicone caulk around the base of the walls and any seams where panels meet. This is a 10-minute job that prevents cold air from seeping in through hairline cracks.
Check the Roof Edge
Add an overhang or a small strip of flashing where the roof meets the walls. Driving rain and snow can sneak into the smallest gap and soak insulation from above. A tarp secured over the roof is a stopgap until you can do a proper repair.
Food and Water Considerations for Cold Weather
Animals burn more calories in winter just staying warm. A working dog that eats two cups of kibble in summer may need three or four cups in winter to maintain body weight and core temperature.
Increase portion sizes gradually as temperatures drop. For outdoor cats, switch to a slightly higher-fat food if you can. Winter is also when dehydrated animals get into trouble, even with water available, because cold water discourages drinking.
Stop Water From Freezing
A heated water bowl is the easiest solution. Modern models are energy-efficient, with chew-proof cords and thermostats that only run when temperatures drop below freezing. Without electricity, swap to a dark-colored bowl placed in the sun and check it twice daily. Break any ice immediately.
Wet Food Freezes
If you feed wet food, expect it to freeze within an hour in sub-freezing weather. Either switch to dry food in winter or feed smaller portions more frequently so the animal eats it before it freezes.
Signs of Cold Stress in Outdoor Animals
Even with the best winterization, watch for warning signs that an animal is struggling. Catching cold stress early prevents an emergency vet visit.
Shivering is the first obvious sign. Whining, lethargy, and a hunched posture follow. Some animals will lift their paws off the ground repeatedly because the cold hurts. Cats in particular may seem withdrawn or stop using the shelter, which usually means they are too cold to settle.
Frostbite shows up first on the ears, tail, paws, and nose. The skin looks pale, gray, or bluish. If you suspect frostbite, bring the animal inside and warm the area with a damp warm cloth, never hot water or a hair dryer. Follow up with a vet visit to check for tissue damage.
Any animal that refuses to enter the shelter, shivers constantly, or seems disoriented needs to come inside. Hypothermia kills, and these are the warning signs that things have gone too far.
Heated Options: When and How to Use Them Safely
Heated accessories are not always necessary. In climates that stay above 20°F, a well-insulated shelter with deep straw is usually enough. Below 0°F, or for short-coated breeds, sick animals, or young animals, supplemental heat helps a lot.
Heated Pet Pads
Look for outdoor-rated, chew-resistant heated pads with a metal-cored cord. Place the pad under the bedding so the animal lies on top of it. Never put a heating pad on top of the animal or where it can be chewed. Most pads use only 25 to 60 watts and cost pennies a day to run.
Heated Water Bowls
These are the safest and most useful heated product. They keep water liquid down to about 20°F without supplemental heat. Plug directly into a GFCI outdoor outlet, never an extension cord.
Hot Water Bottles for Short-Term Warmth
Wrap a hot water bottle in a towel and place it under the bedding. It radiates warmth for 4 to 6 hours, which is enough to get through a cold night. This is a great backup if you lose power during a winter storm.
Electrical Safety Rules
Always plug heating products into a GFCI outlet. Inspect cords for chew damage monthly. Never use indoor extension cords outdoors. If a cord is frayed, replace the product rather than taping it.
Winterize Housing for Specific Animals
Different animals have different needs. Dogs and cats share some techniques, but rabbits, chickens, and feral cats each present their own challenges.
Dogs
Match the shelter size to the dog. A Labrador needs a much larger shelter than a Chihuahua, but in both cases the interior should be just big enough to retain body heat. Add a door flap, deep straw, and elevation. Northern breeds often need less help than short-coated breeds.
Outdoor and Feral Cats
Cat shelters should be small, around 2 feet by 3 feet, with an entrance no bigger than 6 inches wide. Two cat shelters are better than one large one because cats prefer not to share warmth. Use straw, not hay, and face the door away from wind.
Rabbits
Rabbit hutches need extra insulation on three sides and a covered, draft-free sleeping area filled with straw. Bring rabbits into a garage or shed if temperatures drop below 20°F. Rabbits are far more cold-sensitive than their fluffy coats suggest.
Chickens
Chickens handle cold better than heat, but they need ventilation above their heads to release moisture from respiration. Seal drafts at roost level but leave a small vent near the roof. Avoid heat lamps if possible; they are a leading cause of coop fires. A flat-panel coop heater mounted securely is safer.
Winter Hazards and Mistakes to Avoid
Some common winter practices are dangerous. Antifreeze is sweet-tasting and fatal in small doses. Wipe up any spills immediately and store containers where animals cannot reach them. Switch to pet-safe propylene glycol antifreeze in cars and equipment used near animals.
Space heaters inside shelters are a fire risk. They tip over, chew-damaged cords spark, and straw ignites easily. If you need supplemental heat, use a purpose-built pet heating pad with a chew-proof cord instead.
Wet bedding is one of the most overlooked hazards. Check the shelter every few days and replace damp straw with fresh dry straw. Frozen bedding is colder than no bedding at all.
Heating lamps inside chicken coops and horse stalls cause thousands of barn fires every year. If you must use one, secure it with two independent fasteners and keep it far from straw, cobwebs, and wood. Test it monthly.
DIY vs Purchased Shelters
Building a basic winterized shelter from scratch is one of the most affordable options for pet owners. The bulk of the material cost is foam board, plywood, and a bale of straw. That shelter will last many winters with basic maintenance and can be repaired easily when something wears out.
Insulated plastic dog houses are a ready-to-use option that handles weather well, but they can be hard to modify and may crack in extreme cold. Wooden houses cost more but offer better insulation and customization.
For feral cats, the math is simple. A standard feral cat shelter built from one storage tote, foam board, and straw takes about 45 minutes to assemble. It is one of the most cost-effective ways to help outdoor cats survive freezing nights.
Buy if you need a shelter quickly, lack tools, or want a guaranteed warranty. Build if you have a weekend, want customization, and care about long-term durability. Both options work when properly insulated.
Winterization Checklist Before First Frost
Here is a one-time checklist you can knock out in two to three hours. Gather everything first, then work top to bottom.
Foam board (1 to 2 inches thick)
One bale of straw
4 mil plastic sheeting for vapor barrier
Exterior caulk and caulk gun
Heavy plastic or canvas for door flap
Plywood or paneling to cover foam
Pallet or cinder blocks to elevate shelter
Caulk, screws, staple gun, utility knife
Heated water bowl (optional)
Pet-safe heated pad (optional)
Inspect the shelter for drafts, leaks, and damage. Add foam board to walls, floor, and ceiling. Cover all foam with a chew-proof layer. Caulk seams. Install door flap. Elevate the shelter. Add 6 to 12 inches of straw. Test the roof with a hose. Check again after the first storm.
Frequently Asked Questions
What is the cheapest way to insulate a dog house?
The cheapest way to insulate a dog house is to line the walls, floor, and ceiling with 1-inch rigid foam board and cover it with a thin layer of plywood to prevent chewing. Add a 6 to 12 inch layer of straw on the floor. This combination is inexpensive and provides an R-value of around 5, which is enough for most climates above 0 degrees Fahrenheit.
Is straw better than hay for outside dog bedding?
Yes, straw is much better than hay for outside dog bedding. Straw is dry, hollow, and traps air for insulation, while hay absorbs moisture, mats down, and can mold. Hay also tends to harbor bacteria that can cause respiratory issues. Use straw for warmth and dryness, and avoid hay for outdoor animal bedding.
What can I put outside to keep a feral cat warm?
To keep a feral cat warm outside, place a small, insulated shelter roughly 2 feet by 3 feet with an entrance no larger than 6 inches wide. Fill the shelter with 4 to 6 inches of straw, not hay or blankets. Elevate the shelter off the ground, face the door away from prevailing wind, and position it in a hidden, sheltered spot like under a porch or against a building wall.
How do I keep an outside dog house warm in winter?
Keep an outside dog house warm in winter by adding rigid foam board insulation to all four walls, the floor, and the ceiling, then covering it with plywood. Install a heavy plastic door flap to block wind, elevate the shelter off the ground, and pack the floor with 6 to 12 inches of straw. Skip blankets because they trap moisture and freeze solid in cold weather.
How can I tell if my dog is too cold outside?
You can tell your dog is too cold outside if it shivers, whines, holds a paw off the ground, hunches its body, or seems lethargic. Frostbite shows up as pale, gray, or bluish skin on the ears, tail, paws, or nose. If you see any of these signs, bring the dog inside immediately and warm it gradually with blankets and contact with your own body heat, then call your veterinarian.
Final Thoughts on Winterizing Outdoor Animal Housing Against the Cold
Winterizing outdoor animal housing against the cold comes down to a few core principles: insulate the walls, floor, and ceiling; elevate the shelter; use straw instead of blankets; block wind with a door flap; and keep water from freezing. None of these steps require special training or expensive equipment.
Pick a weekend in the next two weeks, gather the materials, and work through the checklist. Your outdoor animals depend on the shelter to keep them safe, and a few hours of work can save you a late-night trip to the emergency vet when temperatures plummet.