
Last updated: October 2026
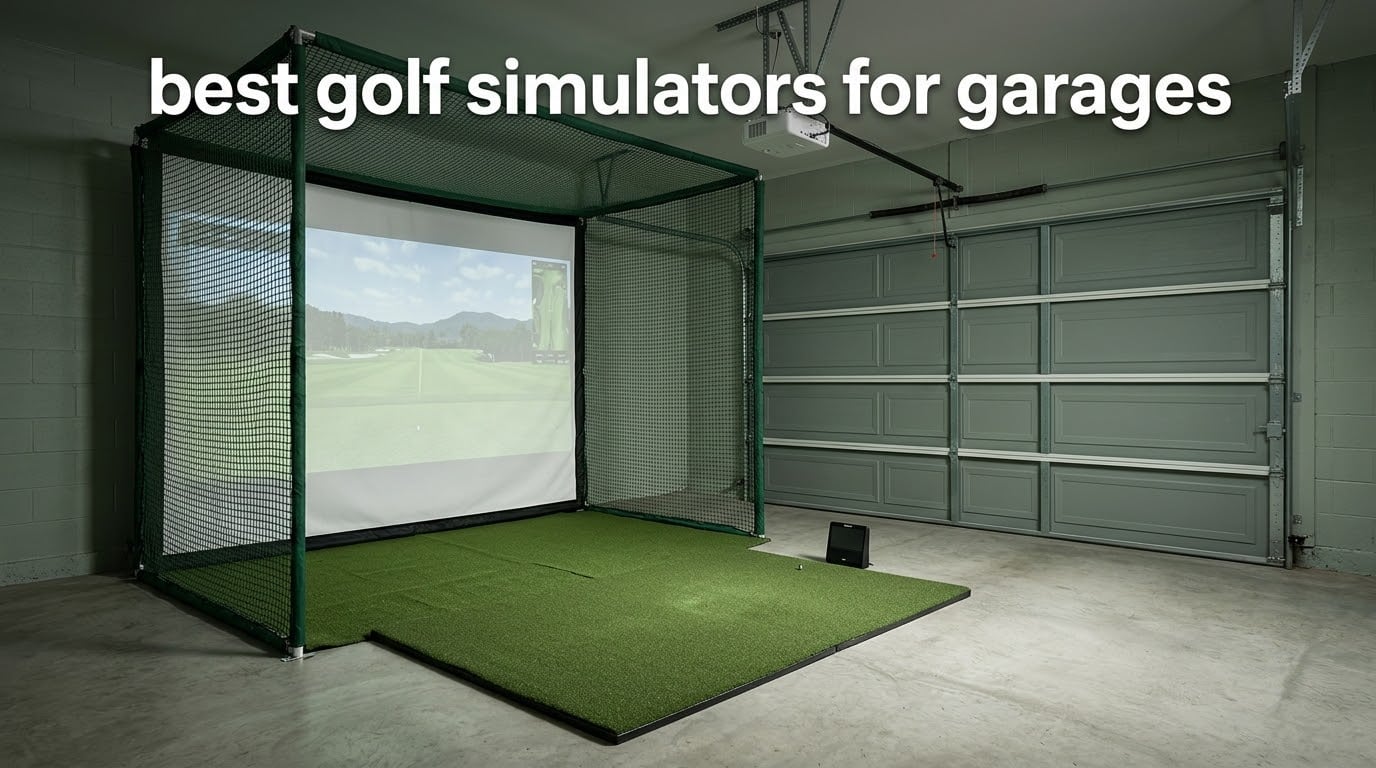
Yes, a golf simulator goes in a garage, and the garage is where most home setups actually live. The realistic requirements are an 8.5 to 9.5 ft ceiling, roughly 10 ft of depth, about 10 ft of width, a reasonably level floor, and enough clear air above and behind the hitting area to finish a driver swing without clipping a ceiling track. Anything less and you are downgrading to short-iron work only.
That is the honest version of what gets written in marketing copy. This guide covers the best golf simulators for garages based on enclosure durability, projection quality, assembly reality, and how each one behaves in a space that also has to tolerate dust, temperature swings, and a garage door overhead. We compared eight complete setups over the past several months, reading hundreds of owner reviews, and we broke them down by the constraint that actually decides the purchase: the room you have.
Two numbers do most of the work when you are shopping. Ceiling height sets your screen size, because a 9 ft ceiling caps what your projector can throw. Depth sets your launch monitor position, and the rule repeated across r/Golfsimulator threads is roughly 20 ft from the launch monitor to the impact screen. Get those two measurements before you look at a single product page.
One more thing worth settling early. A garage golf simulator is a five-part build, not one box: a launch monitor, an impact screen or net, a hitting mat, a projector, and software. Most of the eight systems below cover only one or two of those five pieces, which is why each section spells out what is in the box and what you still need to buy.
Table of Contents
Top 3 Best Garage Golf Simulator Picks in 2026

ANYTHING SPORTS Complete…
- 4K-ready impact screen
- Blackout cage and rear tarp
- Projector mount included
- 12-month warranty

GoSports Enclosure with HD…
- 200 lb breaking strength screen
- True blackout dyeing
- Alloy steel frame
- Padded frame rails

Rapsodo MLM2PRO Mobile…
- Radar plus dual camera tracking
- 15 shot metrics
- 3-inch LCD touchscreen
- 45-day premium trial
The ANYTHING SPORTS package wins this list because it is the only one that arrives with a projector mount, a blackout cage, and side shank nets in the same box, which removes the two most common garage build headaches. The GoSports enclosure is the tougher buy, with a heavier frame and a screen rated to 200 lb. The Rapsodo is not an enclosure at all, but it is the only piece in this group that produces real shot data, and it pairs with any of the other seven.
All 8 Garage Golf Simulators Compared
| Product | Specs | Action |
|---|---|---|
| ANYTHING SPORTS Complete Enclosure Package |
|
Check Latest Price |
| GoSports Enclosure with HD Impact Screen |
|
Check Latest Price |
| Rapsodo MLM2PRO Launch Monitor |
|
Check Latest Price |
 GoSports Range Cage 10 x 8 ft GoSports Range Cage 10 x 8 ft |
|
Check Latest Price |
 Durbles Enclosure Kit with HD Impact Screen Durbles Enclosure Kit with HD Impact Screen |
|
Check Latest Price |
 HOMEVOL 2-in-1 Net and Screen System HOMEVOL 2-in-1 Net and Screen System |
|
Check Latest Price |
 Haokelball 10x8FT Driving Net Haokelball 10x8FT Driving Net |
|
Check Latest Price |
 Diandian Enclosure Kit 10 x 8 ft Diandian Enclosure Kit 10 x 8 ft |
|
Check Latest Price |
Read the table as three tiers. The enclosures in rows one, two, five, and eight are the serious projection builds. Row three is a measurement device you pair with any of them. Rows four, six, and seven are practice-first nets that keep a golf ball indoors for the least money, and row six doubles as a chipping target.
1. ANYTHING SPORTS Complete Enclosure Package for Tight Garage Bays
Complete Golf Simulator Enclosure Package – 4K-Ready Impact Screen with Blackout Cage, Projector Mount, Frame Poles, Side Shank Nets | Indoor & Garage Practice | Easy Setup | 12-Month Warranty
Metal pole frame
4K-ready impact screen
11 x 8 ft footprint
Projector mount
Pros
- Sturdy metal frame over long-term daily use
- Screen sized for narrower garage bays
- Projector mount included out of the box
- Side and top netting catches shanks and mis-hits
- Fast and responsive support
Cons
- Instructions are weak and partly incorrect
- Included pads are thin covers rather than real padding
- Back top crossbar needs added padding
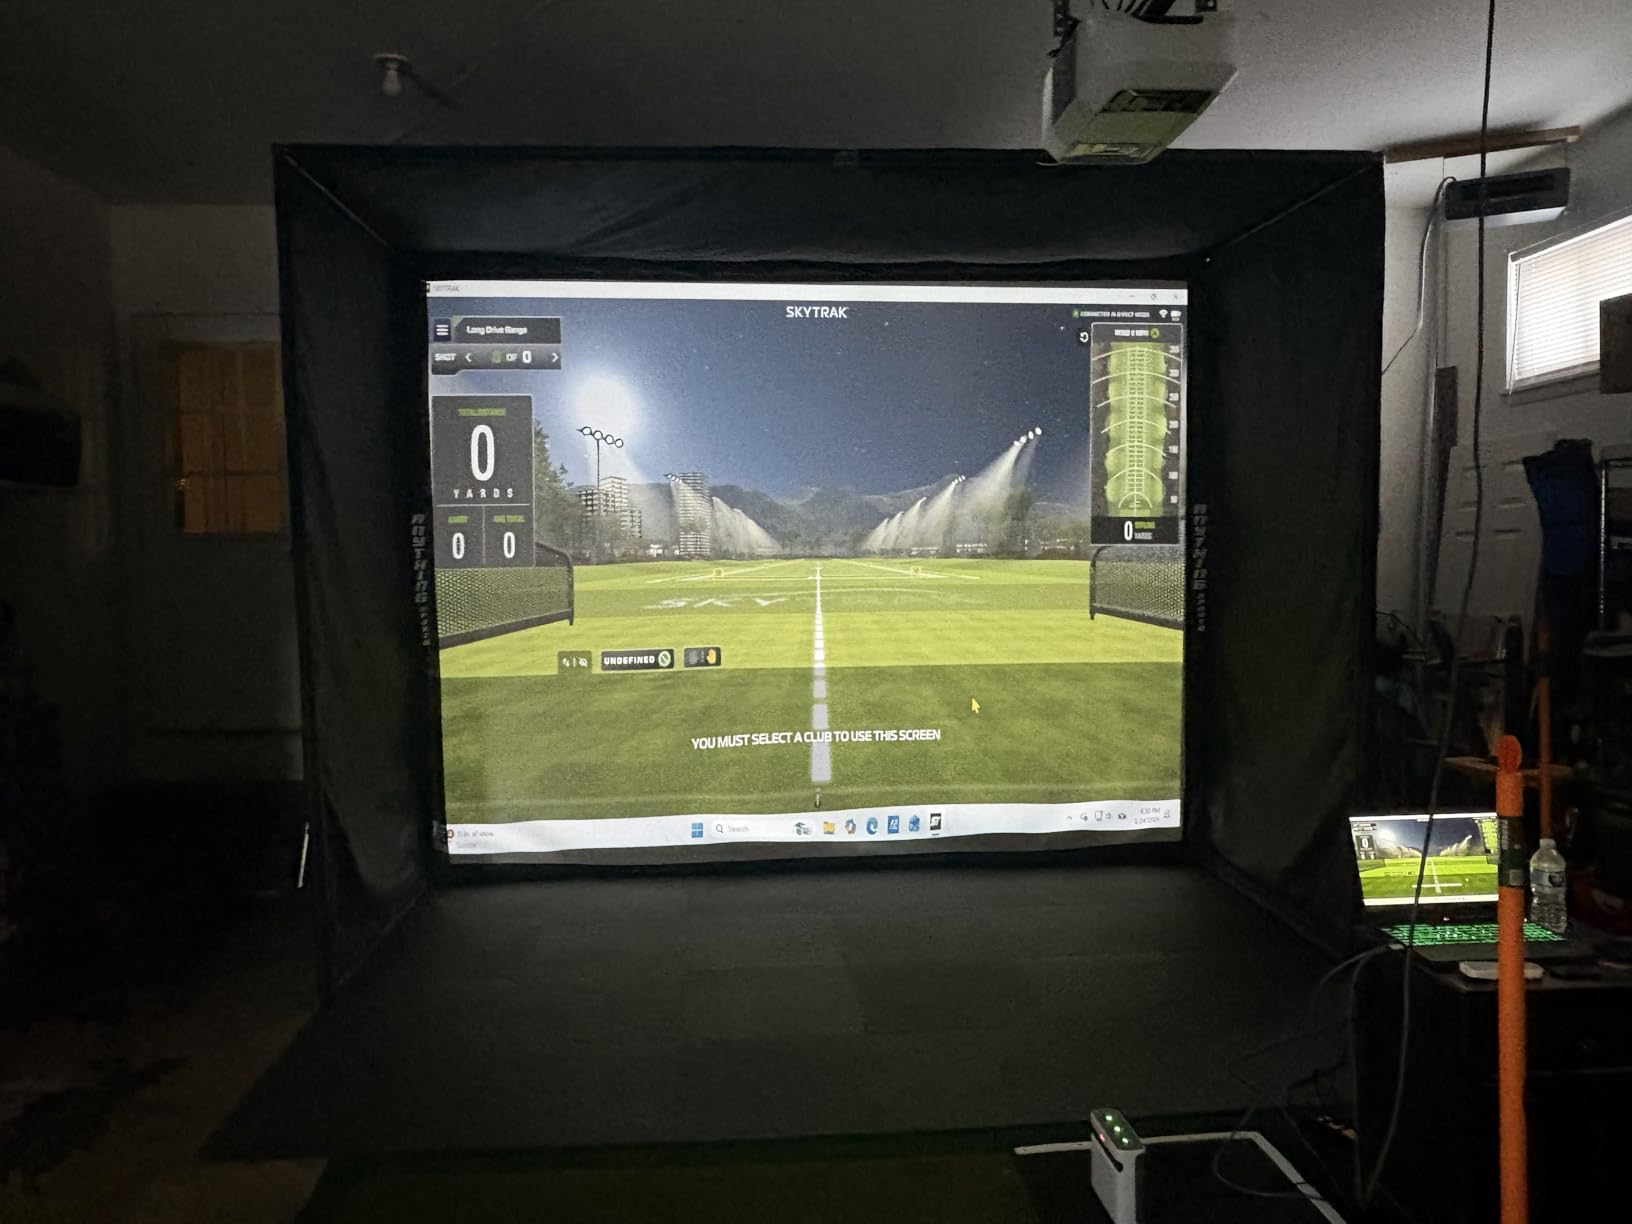
Our test bay is 11 ft wide, which is narrower than most two-car garages allow once a car is in the space, and this was the package that fit without a fight. The 11 x 8 ft 4 x 5 in footprint is the reason it made our list at all. Two side shank nets with Velcro ballast bags come standard, so a pulled hook stays inside the cage instead of finding your car.
Assembly took closer to two hours than the advertised one, and the reason is the paper. Several owners describe the instructions as weak and partly incorrect, so budget time and expect to re-read steps. Once the frame is up, though, the metal pole construction holds its shape and the impact screen stays tight.
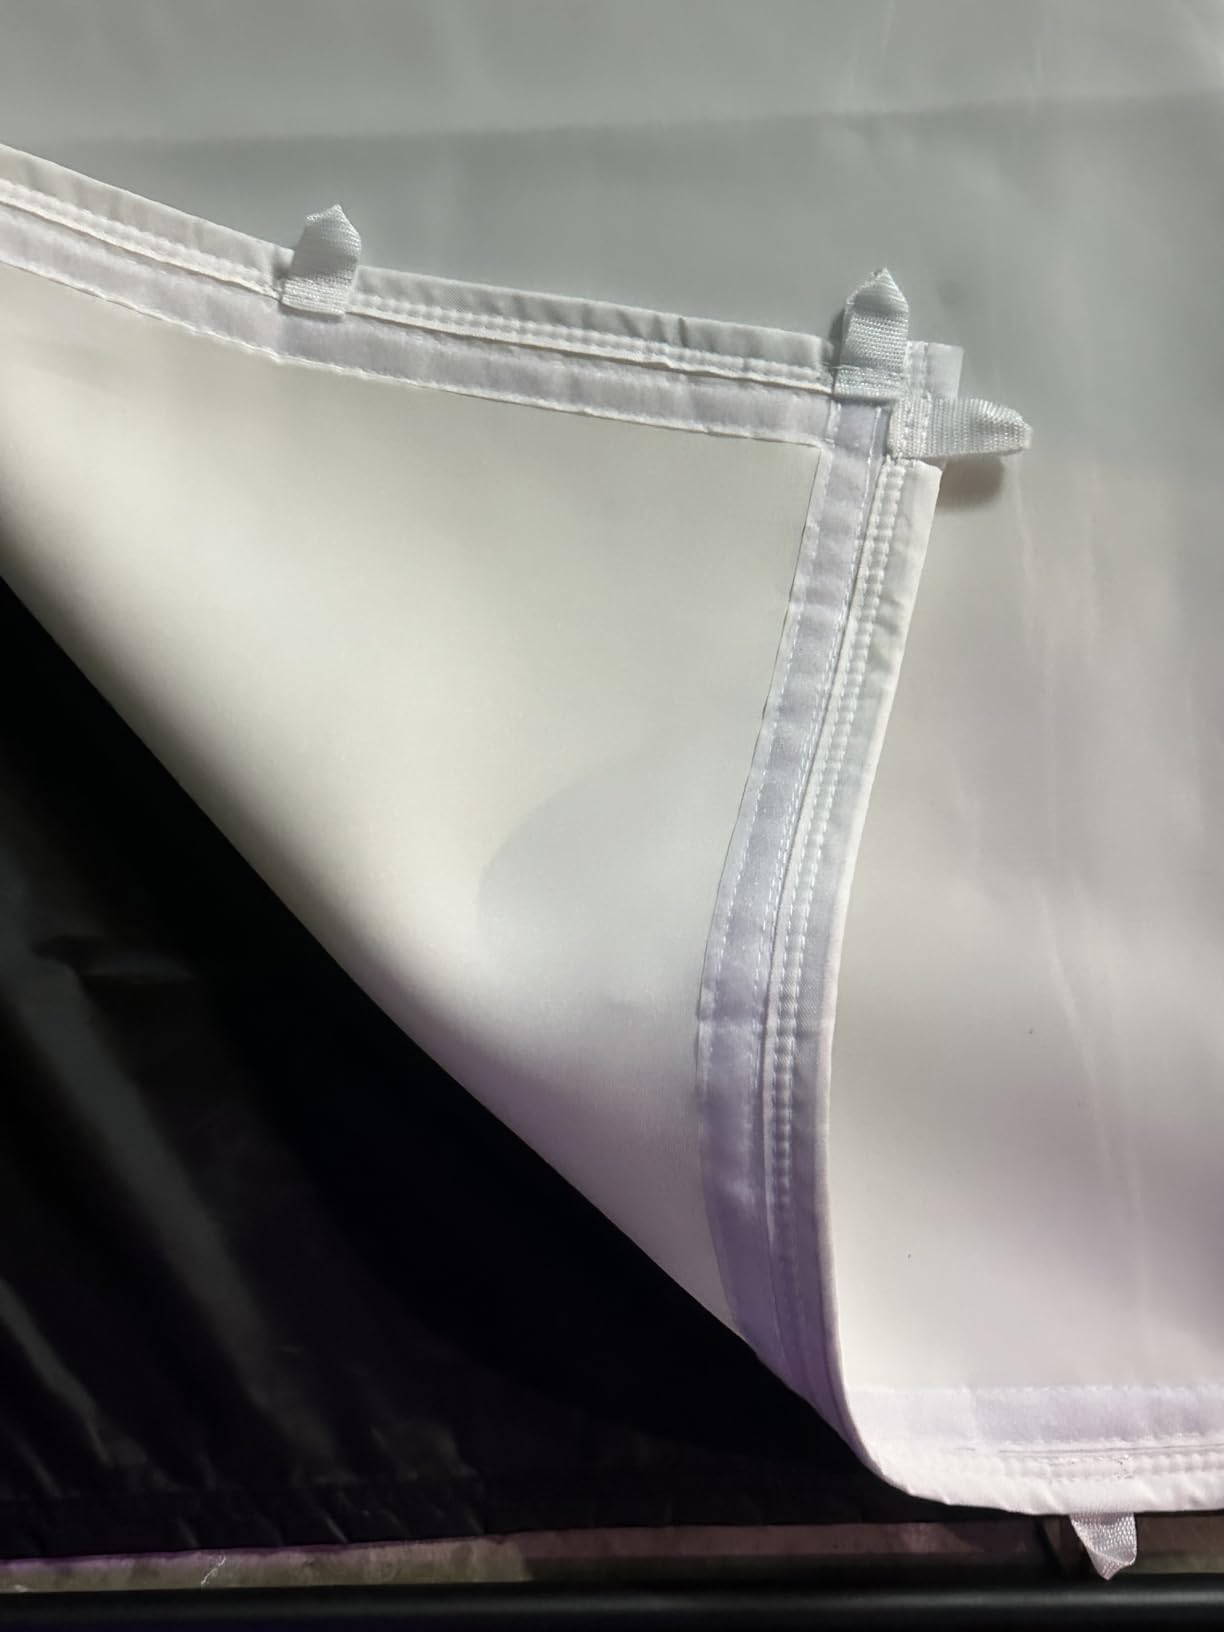
The blackout cage and the rear light-blocking tarp are the quiet wins in a garage with a bare bulb overhead. A 4K-ready impact screen sized one inch inside the frame gives you a tight hitting area with almost no wasted border, which means more usable image for the same projector. The included projector mount and bar mean you are not hunting for a bracket on install day.
Two honest limitations. The pads included in the box are thin covers rather than real impact padding, so add your own foam on the rear top crossbar where wedge shots come down. And the outer blackout cover is thin tarp material that sags and stretches after a few months of use. Owners also report that the supplied bungee cords can be tightened past the point of usefulness and wrinkle the screen.
Who This Enclosure Fits
It suits a single-car garage or a narrow bay where a 12 ft cage will not go, and it suits anyone who wants projection on day one instead of after a second purchase. The included mount and side nets remove two separate shopping trips.
Skip it if you hit hard into the screen and expect zero rebound noise. The padding here is thinner than the dedicated foam kits on thicker builds, and the rear crossbar is the first place you will add your own protection.
What to Check Before You Buy
Measure the width of your bay with the car in place, not empty. The frame needs its full 11 ft plus a little working room, and there is no wiggle room once the poles are up.
Also confirm the height fits under your garage door track before you unpack. Owners who assemble this in place in a low-ceiling garage report needing extra padding on the top rear bar, which is easier to plan for than to fix later.
2. GoSports Enclosure with HD Impact Screen for Daily Practice
GoSports 10 x 8 ft Golf Simulator Enclosure Net – Complete Set with Frame and HD Impact Screen Kit
200 lb breaking strength screen
Alloy steel pole frame
True blackout panels
10 x 8 ft size
Pros
- Screen survives repeated high-speed impacts
- True blackout finish improves projector brightness
- Numbered poles simplify assembly
- Responsive replacement parts service
Cons
- Supplied frame padding is too thin
- No hanging baffles to drop wedge shots
- Fabric needs periodic re-tightening
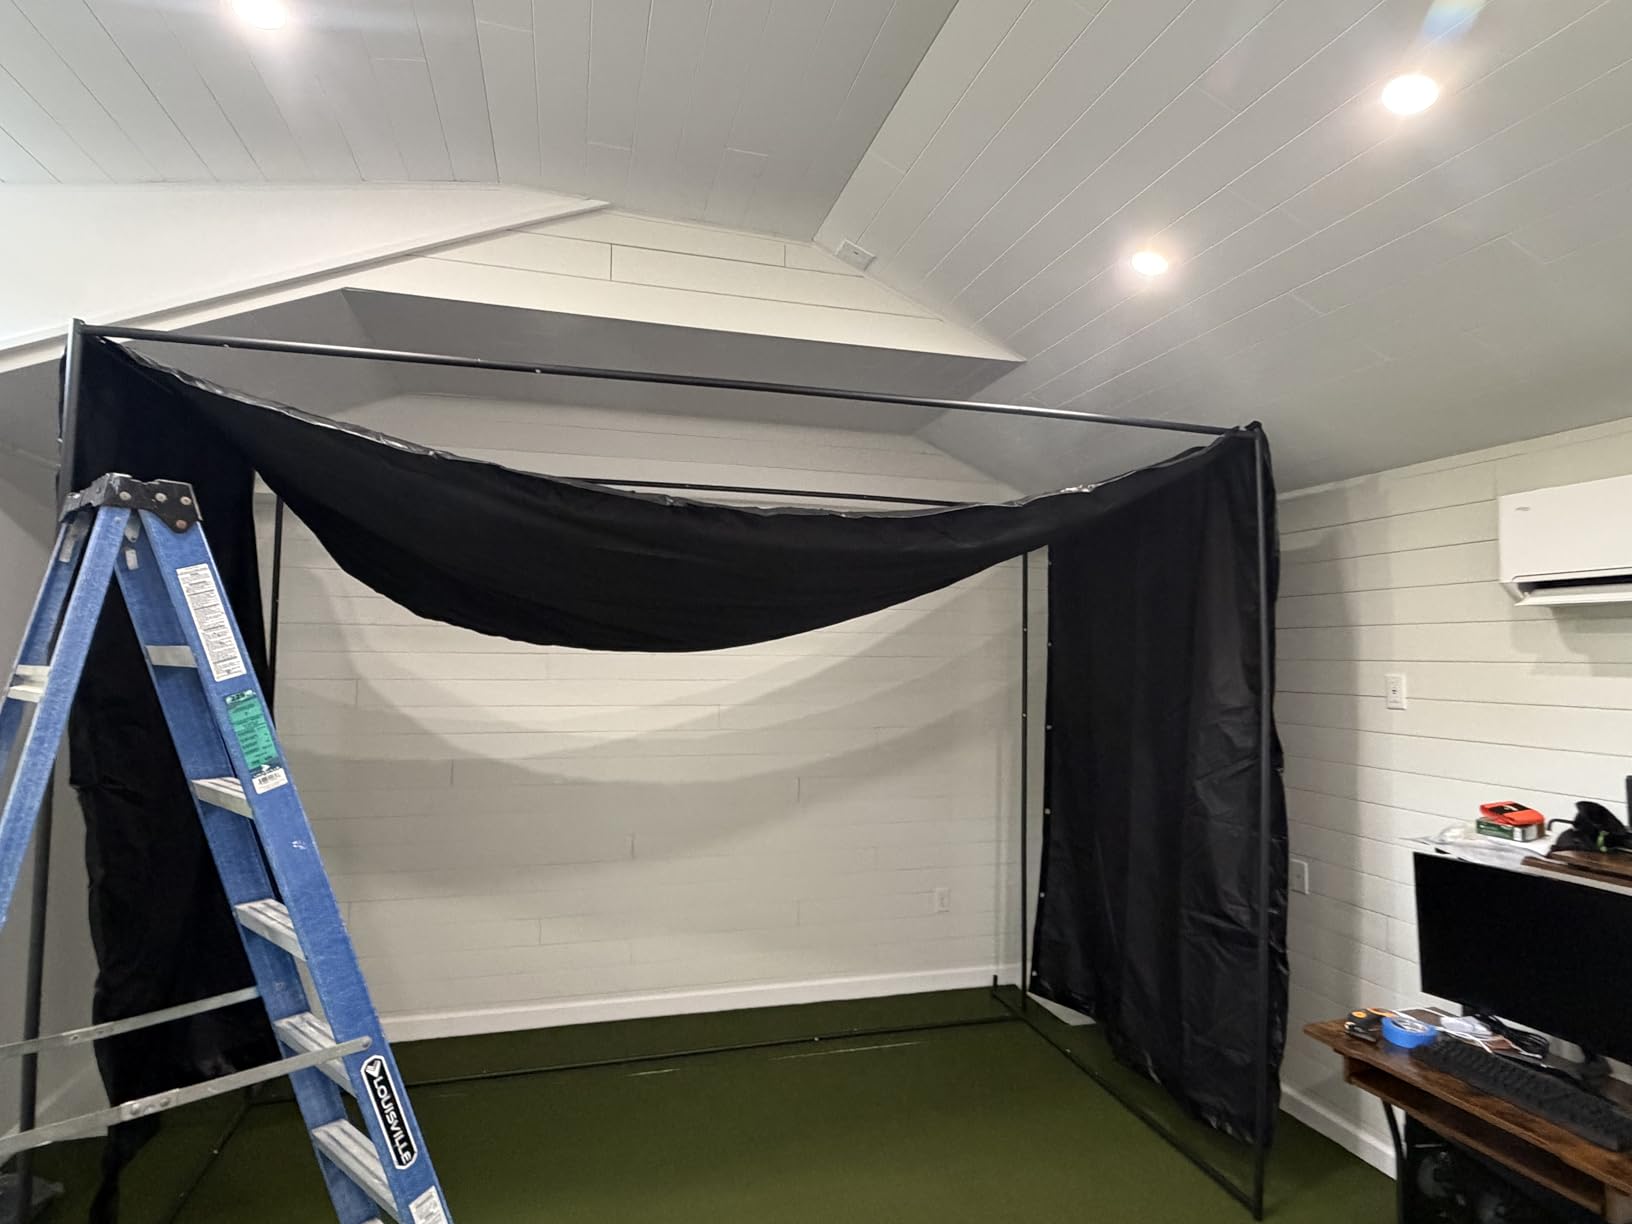
This is the enclosure we would put in a garage that sees four or five sessions a week. The multi-layer impact screen is rated to 200 lb breaking strength, and owners with long-running setups report the screen showing no tears after years of daily use. At 79 pounds it is a genuinely heavy build, which is the point.
The true blackout panels come from a specialised dyeing process rather than a black fabric laid over a white one, and the difference shows immediately on a dim projector image. Numbered poles and clear diagrams made assembly the least frustrating of the three full cages we built.
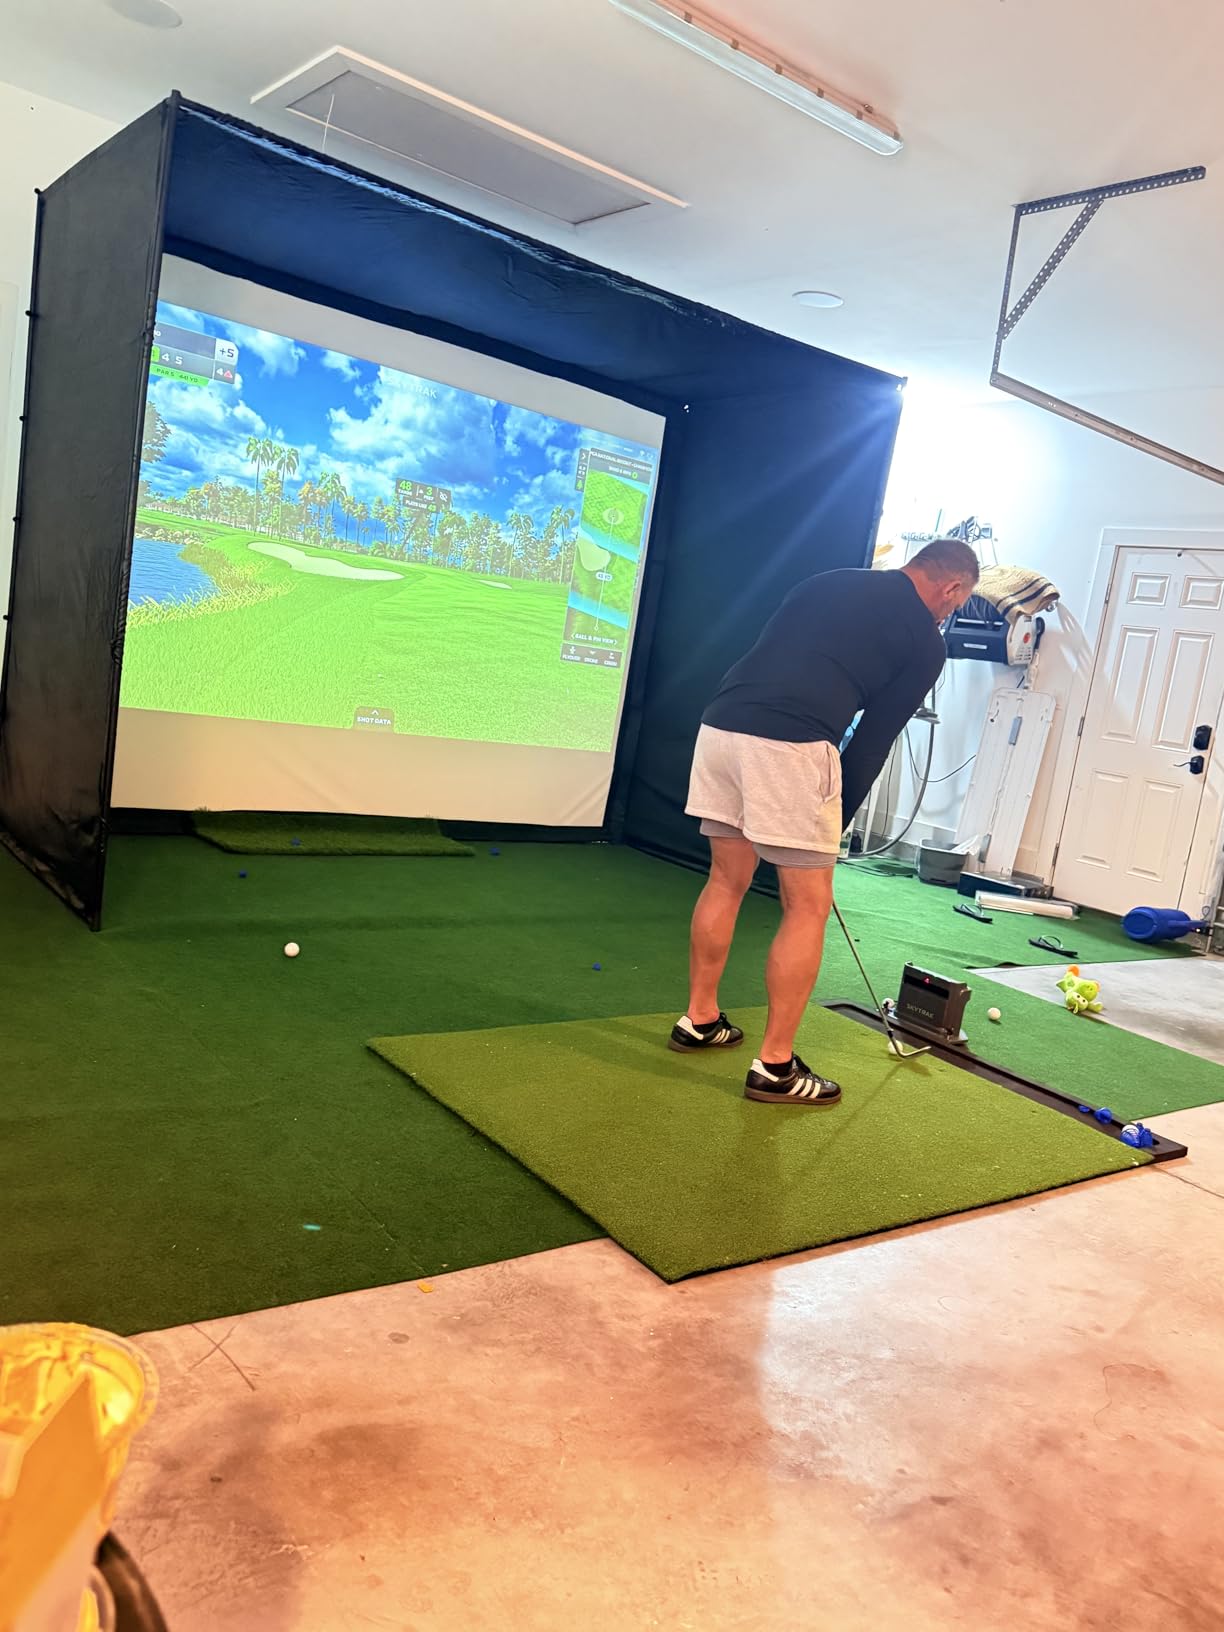
Three size options let you match depth to your bay: 10 x 8 ft, 12 x 9 ft, and 14 x 8 ft. The 14 ft version is the one to watch, because several owners report a droop along the top edge. Foam padding around the frame reduces rebound, but owners consistently describe it as too thin for a hard impact off the rail.
There are no hanging baffles to knock wedge shots downward, so a short wedge can load the cover eyelets over time. The fabric and screen also need periodic re-tightening as the material relaxes. In exchange, the replacement service has been fast and no-questions-asked for torn screens and covers.
Who This Enclosure Fits
It fits heavy hitters and high-frequency practice, and it fits anyone who projects regularly enough that screen brightness matters. The 10 x 8 ft version is the practical garage default.
Skip it if you are working in a rental or you plan to move often. This cage is the least portable unit in the roundup, and the shank nets are sold separately, so the total build needs one more purchase.
What to Check Before You Buy
Confirm the screen dimensions against your depth before ordering, and pick the size by throw distance rather than by wall width. Owners who chose the largest size in a shallow bay report a drooping top edge.
Plan to add a wedge baffle and your own frame padding on day one. Both are simple upgrades that address the two most common complaints in the review record.
3. Rapsodo MLM2PRO for Shot Data on Any Enclosure
Rapsodo MLM2PRO Mobile Launch Monitor Golf Simulator | 3 Chrome Tour Balls
Doppler radar plus dual cameras
15 shot metrics
3-inch LCD touchscreen
16 oz
Pros
- Shot data lands close to commercial units in its class
- Compact enough to move between home and range
- Dual cameras give slow-motion contact views
- Combine mode targets weak clubs
Cons
- Shared Wi-Fi connections drop or fail
- Most features need a subscription after the trial
- Short chip and putt reads are poor
The MLM2PRO is the odd one out in this roundup because it is a measurement device, not a cage. It weighs 16 ounces, runs on a 3-inch LCD touchscreen, and pairs with any of the seven enclosures above. If your question is what your swing is actually doing, this is the only product here that answers it.
It combines Doppler radar with dual camera tracking to capture 15 metrics including spin rate, spin axis, carry distance, club speed, club path, and launch angle. The dual cameras record the swing from two angles and give you a slow-motion contact view, which is the feature that changes practice habits fastest.
It arrives with a tripod, a carrying case, a charging cable, and three Chrome Tour balls. A 45-day premium trial is included, and premium membership unlocks 30,000+ simulated courses. The choice between three ProV1 balls and three Chrome Tour balls matters, because spin tracking wears the cover down quickly and the tour balls go first.
The connectivity split is the big one. Owners using direct Wi-Fi describe it as transformative for home practice, while owners on a shared network report recurring dropouts. Direct Wi-Fi is more reliable but limits streaming apps on the same network. Short chips and putts read poorly, greens play too fast, and the battery draw limits long sessions.
Who This Monitor Fits
It fits golfers who want numbers rather than scenery, and it fits anyone whose practice problem is contact and face angle rather than where the ball goes. The trial period lets you test it against your existing expectations before you commit.
Skip it if you want screen golf with the family, or if your household shares one network and plays online. Reviewers report support responses can be slow, and a subscription is required for most features once the trial ends.
What to Check Before You Buy
Check which ball variant matches the software you plan to use, and plan your network before install day. Connecting over direct Wi-Fi rather than a shared network is the single change that resolves most connection complaints.
Note that the iPhone display shows fewer metrics than an iPad, so if you want the full data set, plan on a larger screen for review sessions.
4. GoSports Range Cage 10 x 8 ft for a First Garage Setup
GoSports Range Cage 10 ft x 8 ft Golf Practice Hitting Net with Impact Screen
10 x 8 ft enclosure
Polyester impact screen
Fiberglass and steel frame
40 lb
Pros
- Side walls and roof contain shanks well
- Screen doubles as a projector backdrop
- Packs into the included carry bag
- Strong entry-level value
Cons
- Screen base does not sit flush with the rail
- Seams can arrive unraveled
- Frame poles are awkward to raise
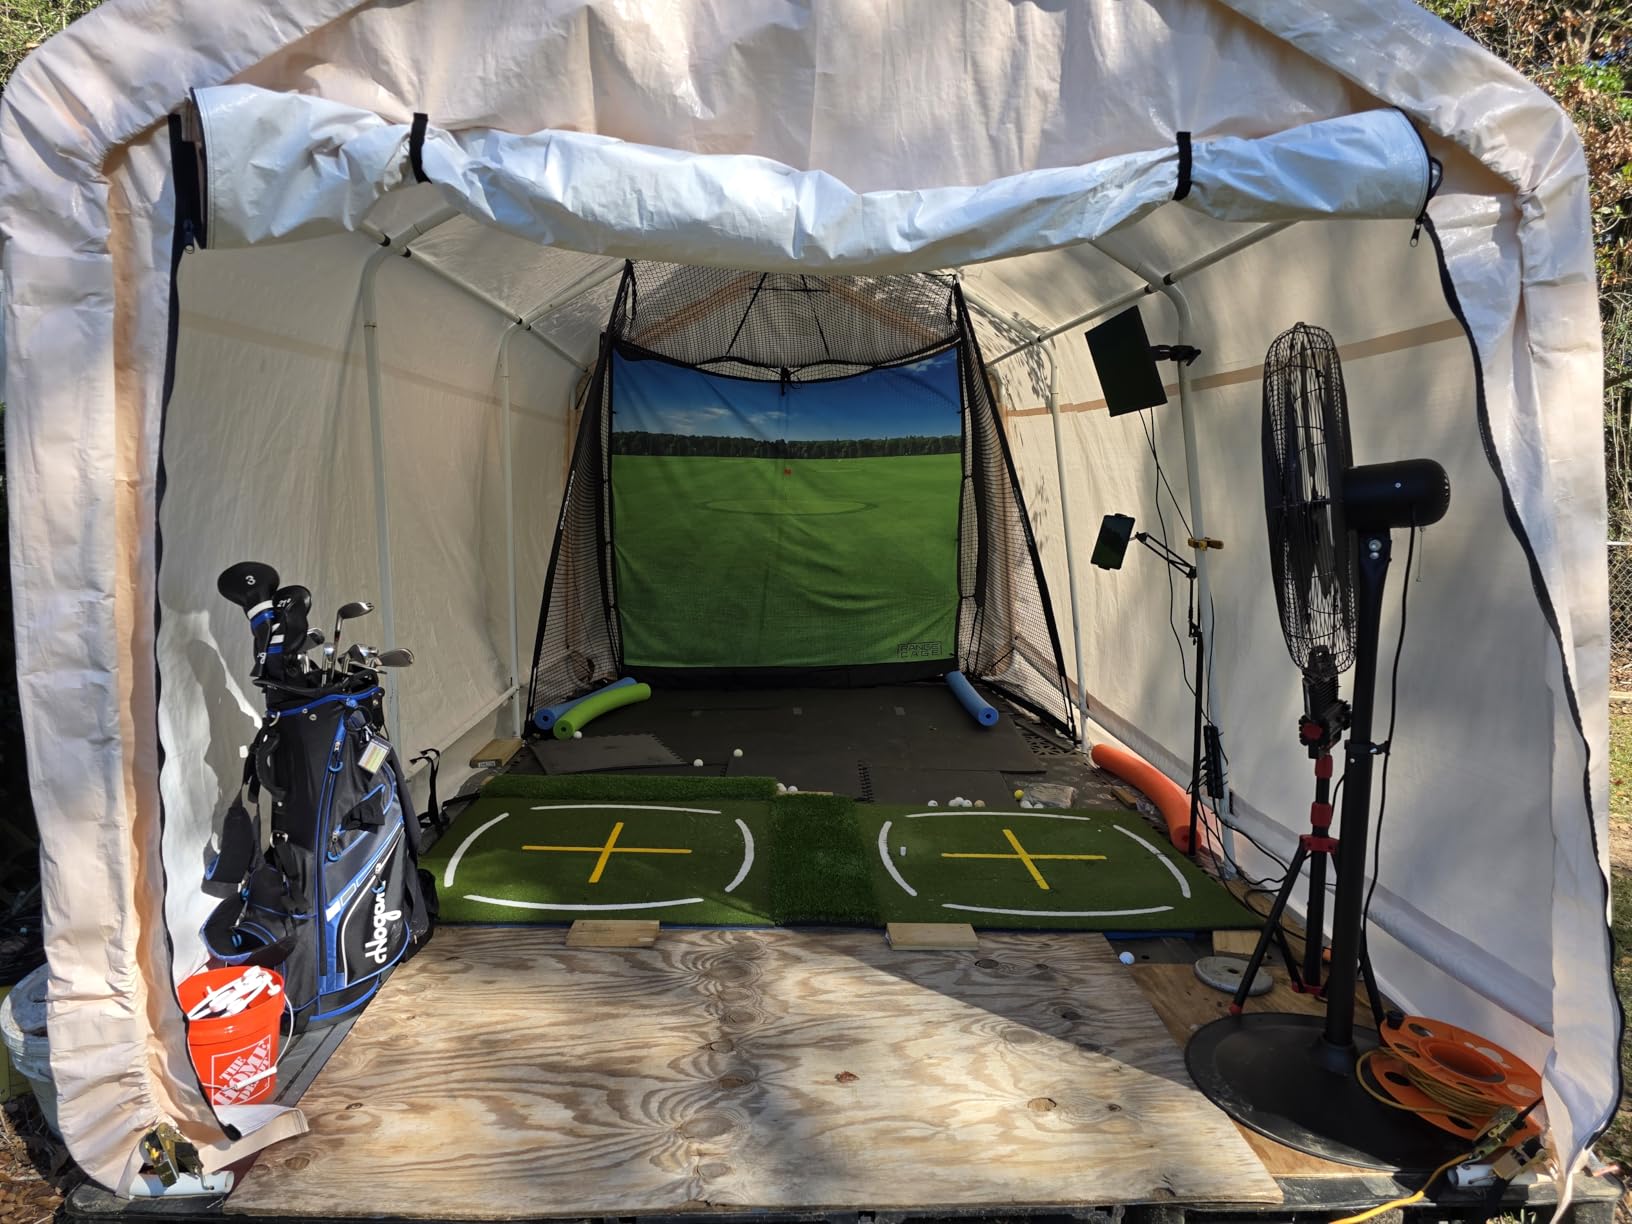
This is the first golf simulator most people actually buy, and for a reason: it is a complete containment system for a single evening. Side walls and a roof net catch the mishits that send beginners looking for their car keys. A 40-pound footprint and a carry bag mean it can live in a corner between sessions.
The high-density polyester impact screen doubles as a projector backdrop, so an entry projector will throw a usable image on it. The steel frame uses fiberglass poles with a foam-padded base, and it sets up without tools. Three variants exist, including a blank simulator screen and printed graphics.
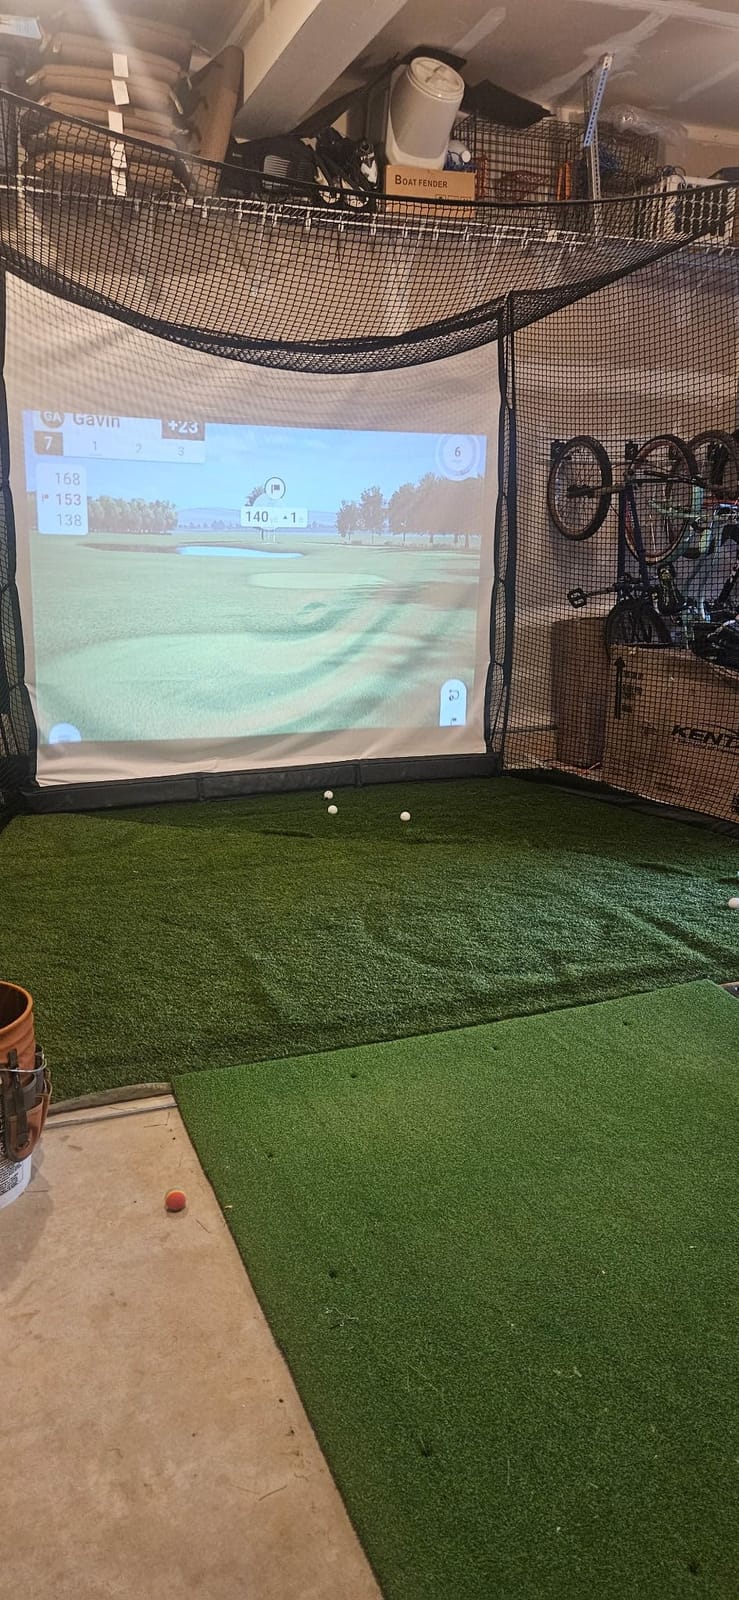
The most serious recurring complaint is ricochet. The bottom of the impact screen does not sit flush with the base rail, so low shots return toward the hitting area, and several owners added their own foam to fix it. Screen tears and divots at the base also show up quickly with real balls rather than foam ones.
Seams can arrive unraveled, and the instructions do not always match the parts included. Customer service resolves stitching issues quickly, which is the main reason this stays a strong entry pick despite the build quality complaints.
Who This Cage Fits
It fits a first garage build, a family with kids hitting into a screen, and anyone who wants a contained practice area that packs away. Nothing else in this list stores that easily.
Skip it if you take a full driver swing at full speed, or if anyone in the house plays hard at close range. The base rail and the seam quality are not built for that, and the ricochets are the reason several owners added padding.
What to Check Before You Buy
Pick the blank simulator screen variant over the printed graphics if you plan to project, since printed backgrounds fight with a projected image. Confirm the 10 ft by 8 ft footprint clears your garage door track.
Have a roll of foam and some tape ready for install day. Owners who closed the gap along the base rail report the ricochet problem largely disappears.
5. Durbles Enclosure Kit for Joint and Noise Protection
Golf Simulator Enclosure Kit with Premium HD Impact Screen, Full Safety Padding & Blackout Curtain, Home Golf Sim Setup Compatible with Launch Monitors, Indoor Cage Net Golfing Accessories (10 x 8 ft)
Three-layer HD impact screen
Alloy steel frame
Full foam safety padding
10 x 8 ft
Pros
- Thick three-layer screen mutes impact sound
- Blackout top blocks overhead light
- Padded poles and corner padding improve safety
- Works in rooms with lower ceilings
Cons
- Instructions assume ceilings above 9.9 ft
- Frame needs all 10 ft of width
- Some bounce returns off the screen
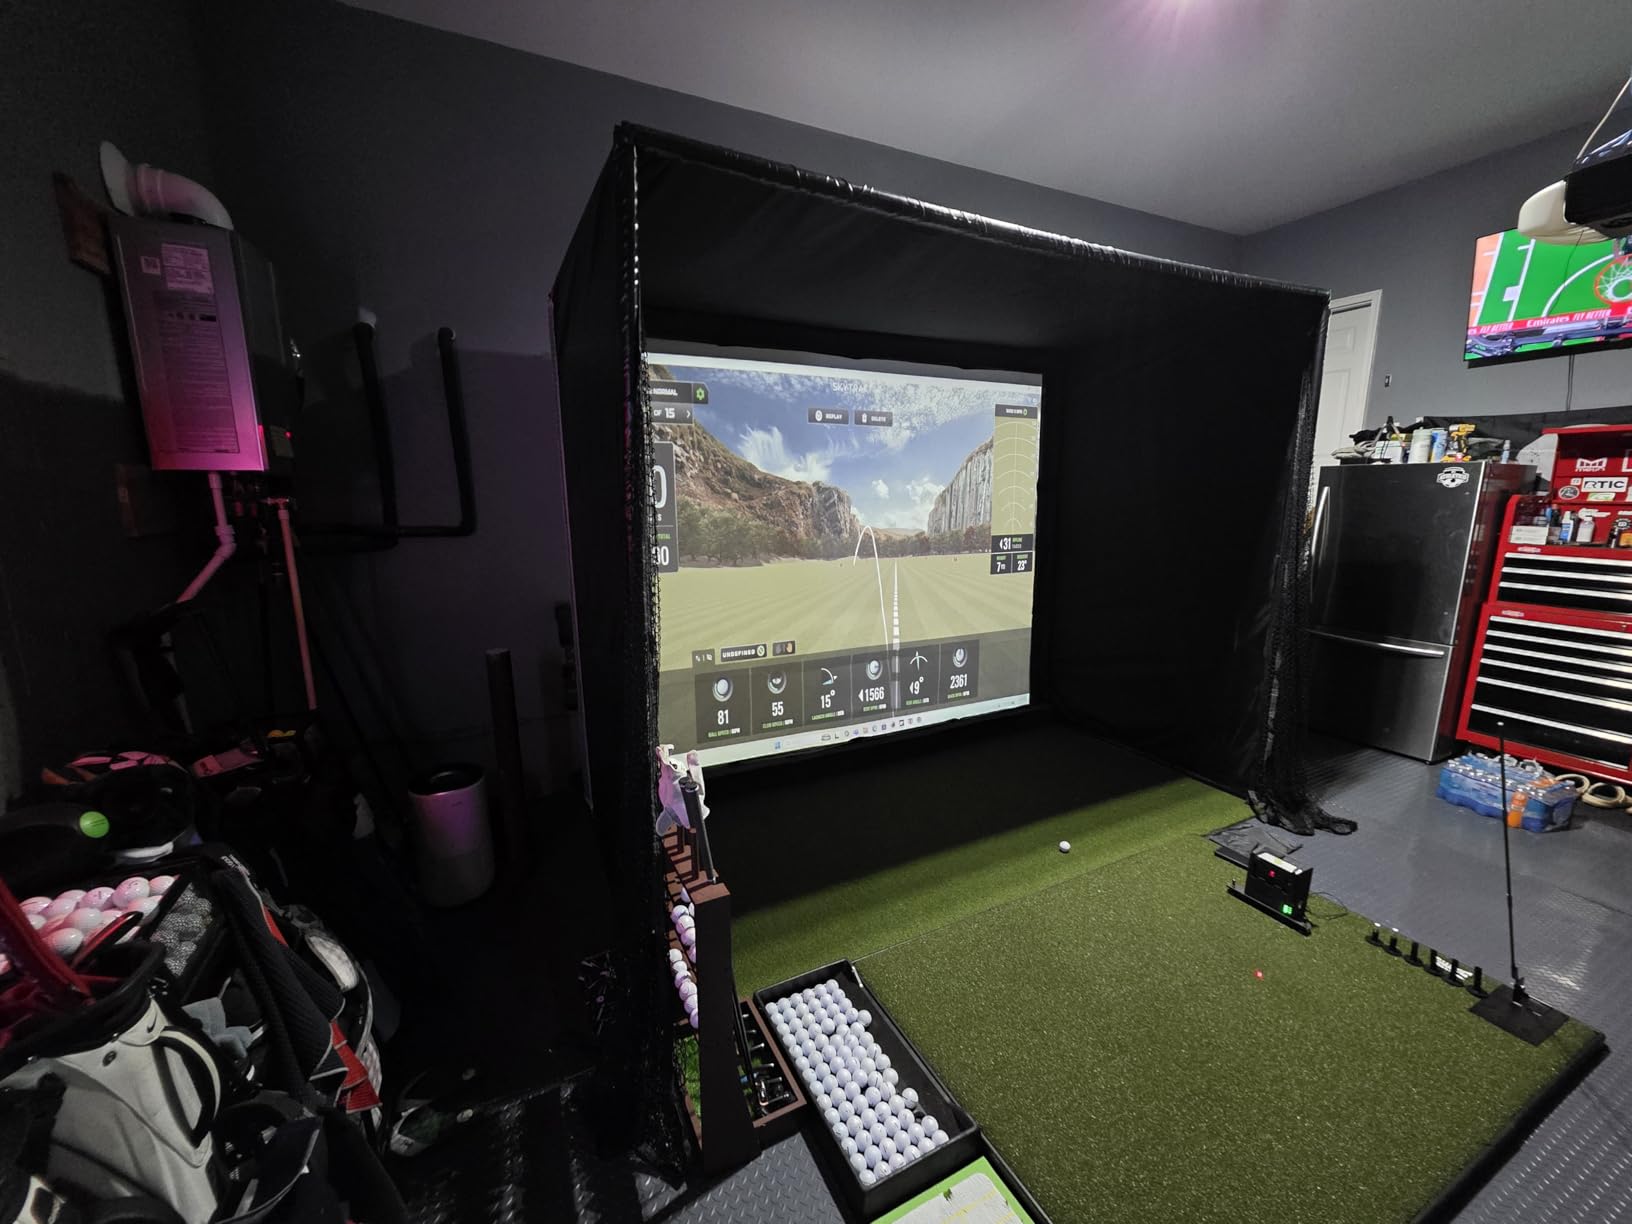
The Durbles kit exists for one reason: the screen is three layers thick. Owners describe it as noticeably spongy, and the practical result is that impact sound is muted to a level the rest of the household tolerates. In a shared-wall garage, that is a real buying criterion rather than a nicety.
It is also the only kit in this roundup with full-coverage foam safety padding on a one-piece steel frame, including padded poles and corner screen padding. It works with most launch monitors and projectors, so the Rapsodo above drops into it without adapters.
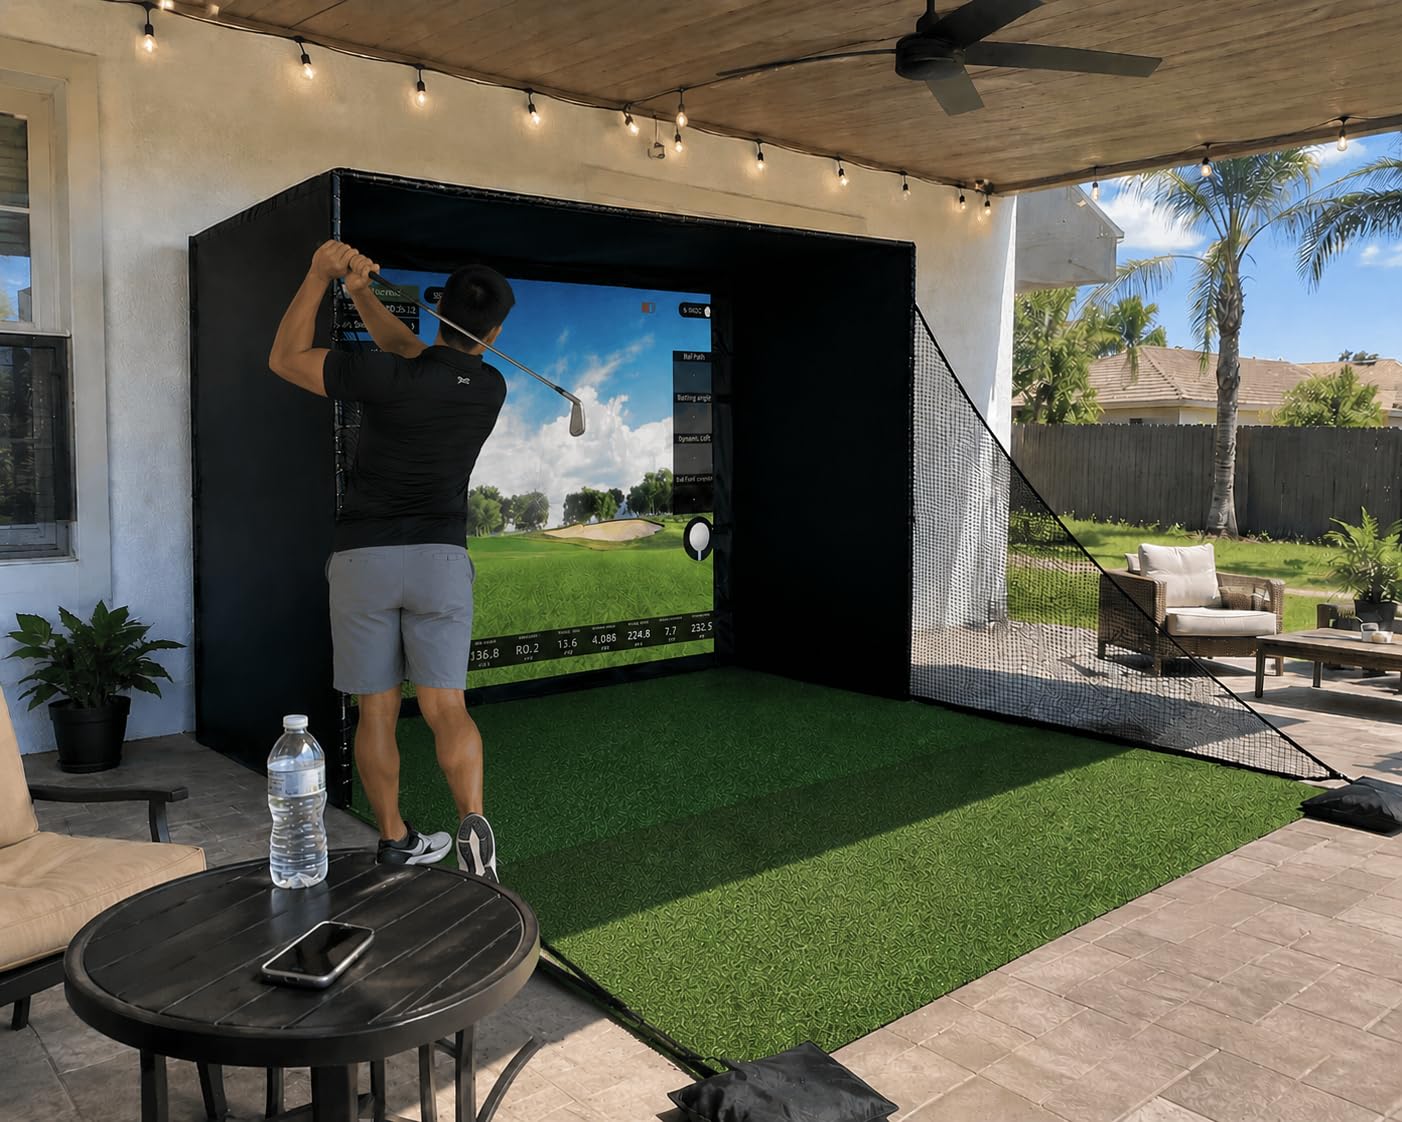
Assembly takes roughly 1.5 to 3 hours, and this is the one kit where the instructions create a genuine problem. They assume ceilings taller than 9.9 ft, so builders in a standard 9 ft garage have to improvise the top fit. Plan to assemble outside the garage and move it in, or measure twice before starting.
Two poles in one shipment arrived without foam sleeves, and the frame needs every bit of the 10 ft width with nothing to spare. One owner reported a top crossbar bending and the frame collapsing, so treat the frame as something to level carefully rather than torque down hard.
Who This Kit Fits
It fits a shared-wall garage where impact noise is a live issue, and it fits anyone whose ceiling is low but whose walls have exactly 10 ft. The blackout top enclosure handles a bare-bulb garage better than any other kit here.
Skip it if your ceiling is under 9 ft and you cannot assemble the kit outside the garage. The instructions were written for taller rooms, and improvising the top fit is how frames get bent.
What to Check Before You Buy
Measure width precisely, because the frame takes the full 10 ft with no wiggle room. Count the pole sleeves in the box before you start, since missing foam padding is a known packing issue.
Decide on assembly location in advance. A 33.88 kg kit is not something you want to lift over a finished frame in a narrow bay.
6. HOMEVOL 2-in-1 System for Chip and Putt Practice
2 in 1 Golf Simulator Net System, 10 x 8ft Golf Practice Net Hitting Net with 4K-Ready Impact Screen, Target Cloth, Foam-Padded Steel Frame Cage, Hitting Mat and Balls for Indoor and Outdoor Practice
10 x 8 ft system
Swaps screen or target cloth
Foam-padded steel frame
Mat and balls included
Pros
- Two practice modes in one frame
- Top net and side shank nets limit harsh rebound
- Includes mat
- balls
- stakes and carry bag
- Two-year manufacturer warranty
Cons
- Long-term durability is less documented
- Review record is still short
The defining feature is the swap. A two-in-one design alternates between a 4K-ready impact screen for projection and a printed target cloth with multi-hole chipping targets at varied heights. In a garage where summer is spent on chips and putting rather than drives, that flexibility is the whole argument.
Everything needed to start is in the box: the impact screen, the printed target cloth, a carry bag, the net cage and steel frame, a hitting mat, two practice balls, six ground stakes, and two side nets. The foam-padded frame with top protection net softens the rebound that frustrates beginners.
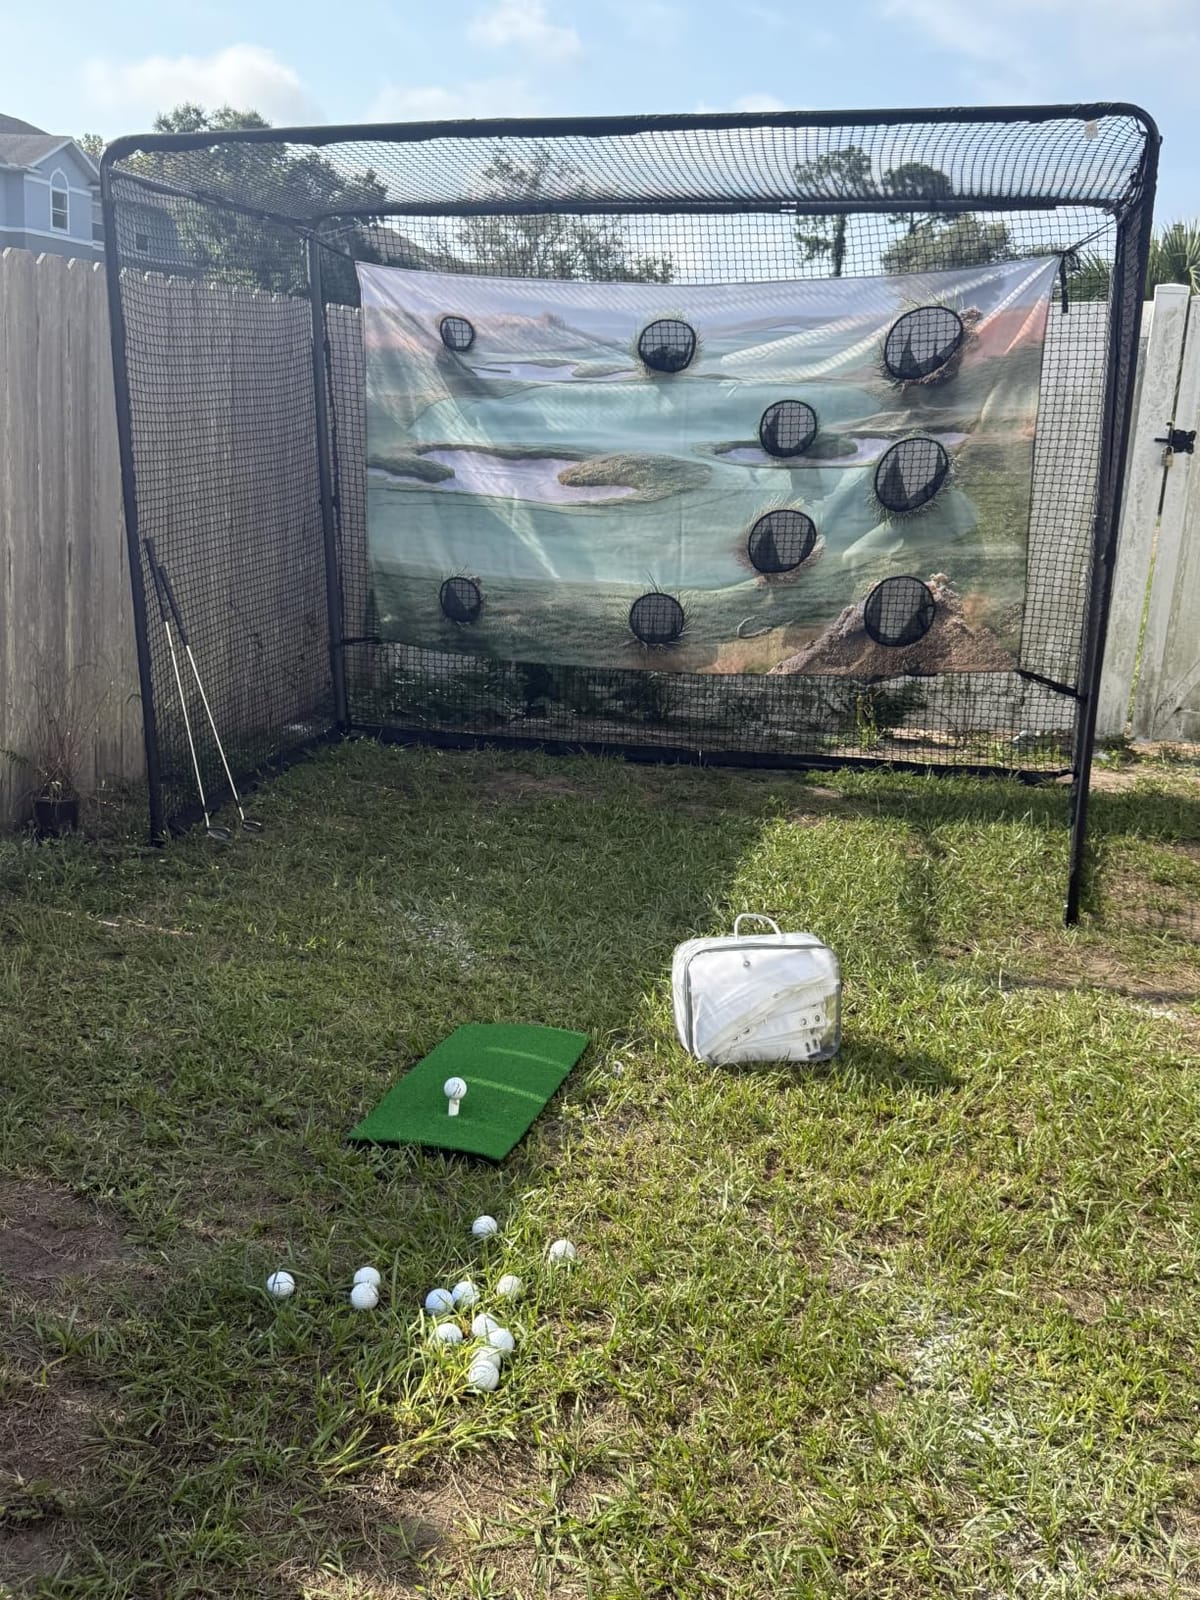
The dense, sag-resistant impact surface is the reason it rates well for projection, and the alloy steel and fiberglass construction holds a shape that cheaper two-pole nets lose quickly. Buyers rate it highly at 4.6 across 63 reviews, and the two-year manufacturer warranty is the longest in this group.
The limitation is the evidence base. Sixty-three reviews is a short record next to the 300-plus review enclosures here, so long-term durability is less documented, and there is less owner photography available to judge how the frame holds up over a few winters.
Who This System Fits
It fits a household that wants one frame to cover full swings, chips, and a target game, and it fits buyers who want a warranty measured in years rather than months. It suits a garage, a basement, or a backyard equally.
Skip it if your garage ceiling is tight and you need a tall screen. The 10 x 8 ft footprint is fixed in this configuration, so the screen size is not adjustable the way it is on multi-size kits.
What to Check Before You Buy
Confirm the 10 x 8 ft frame clears your garage door tracks and any parked vehicle. The ground stakes and side nets need a little floor area outside the frame footprint.
Decide which mode you will use most. Owners who alternate between screen and target cloth report that having both removes the friction of reconfiguring between a practice session and a family game.
7. Haokelball 10x8FT Net for Buyers Who Keep Their Gear
Haokelball Golf Simulator Cage, 10x8x6FT Net with Impact Screen for Home
10 x 8 x 6 ft enclosure
5-ply netting
Alloy steel frame
Ball return tray
Pros
- Square base outlasts cheaper two-pole nets
- No deep dip at the top of the screen
- Disassembles for storage
- Replacement nets sold separately
Cons
- Frame may need trimming to fit
- Short irons can still reach the net
- Occasional bent pipe in the box
Among owners who have already tried several nets, this one consistently rates as the most durable, and the reason is structural. The solid square base resists the twisting that deforms two-pole designs, and the 5-ply netting on a reinforced steel frame takes repeated impacts without the sag that sends shanks into the ceiling.
The reinforced top support rod and multiple tension points keep the screen flat, and the absence of a deep dip at the top is the detail buyers single out most. At 10 x 8 x 6 ft it is the deepest enclosure here, which gives a taller hitting window and more overhead protection.
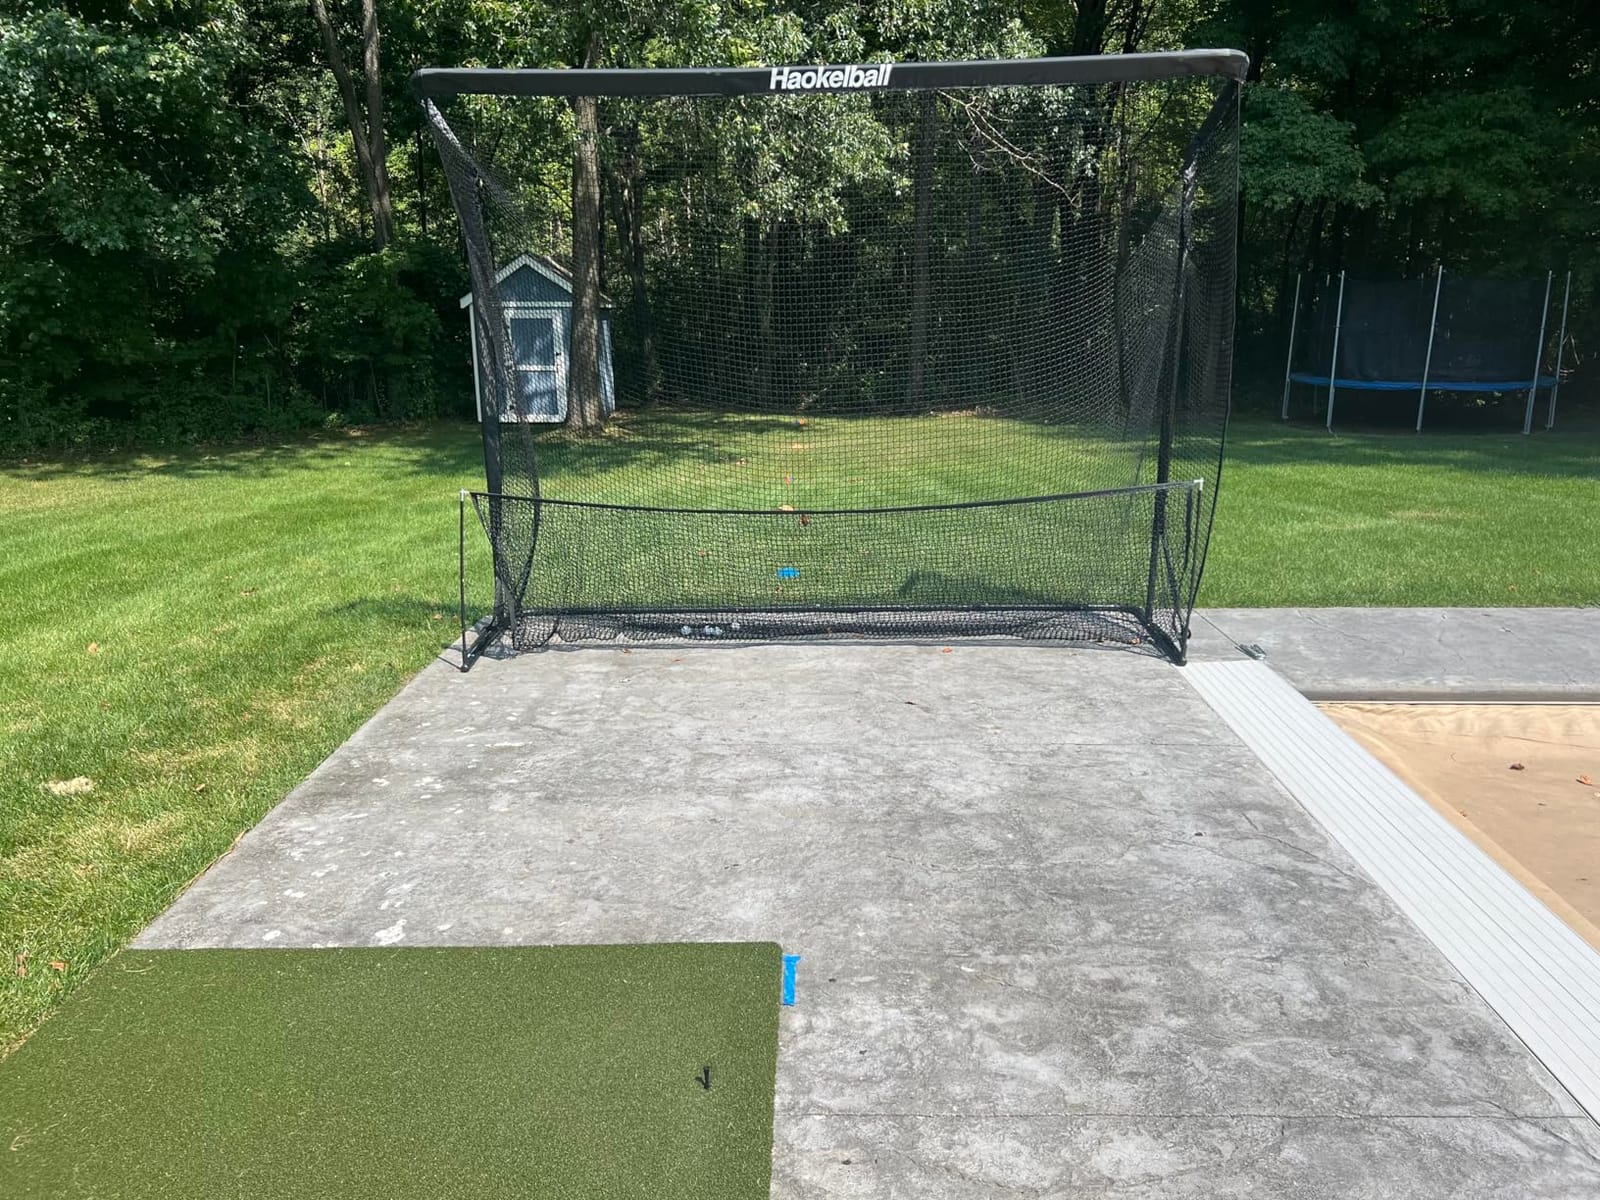
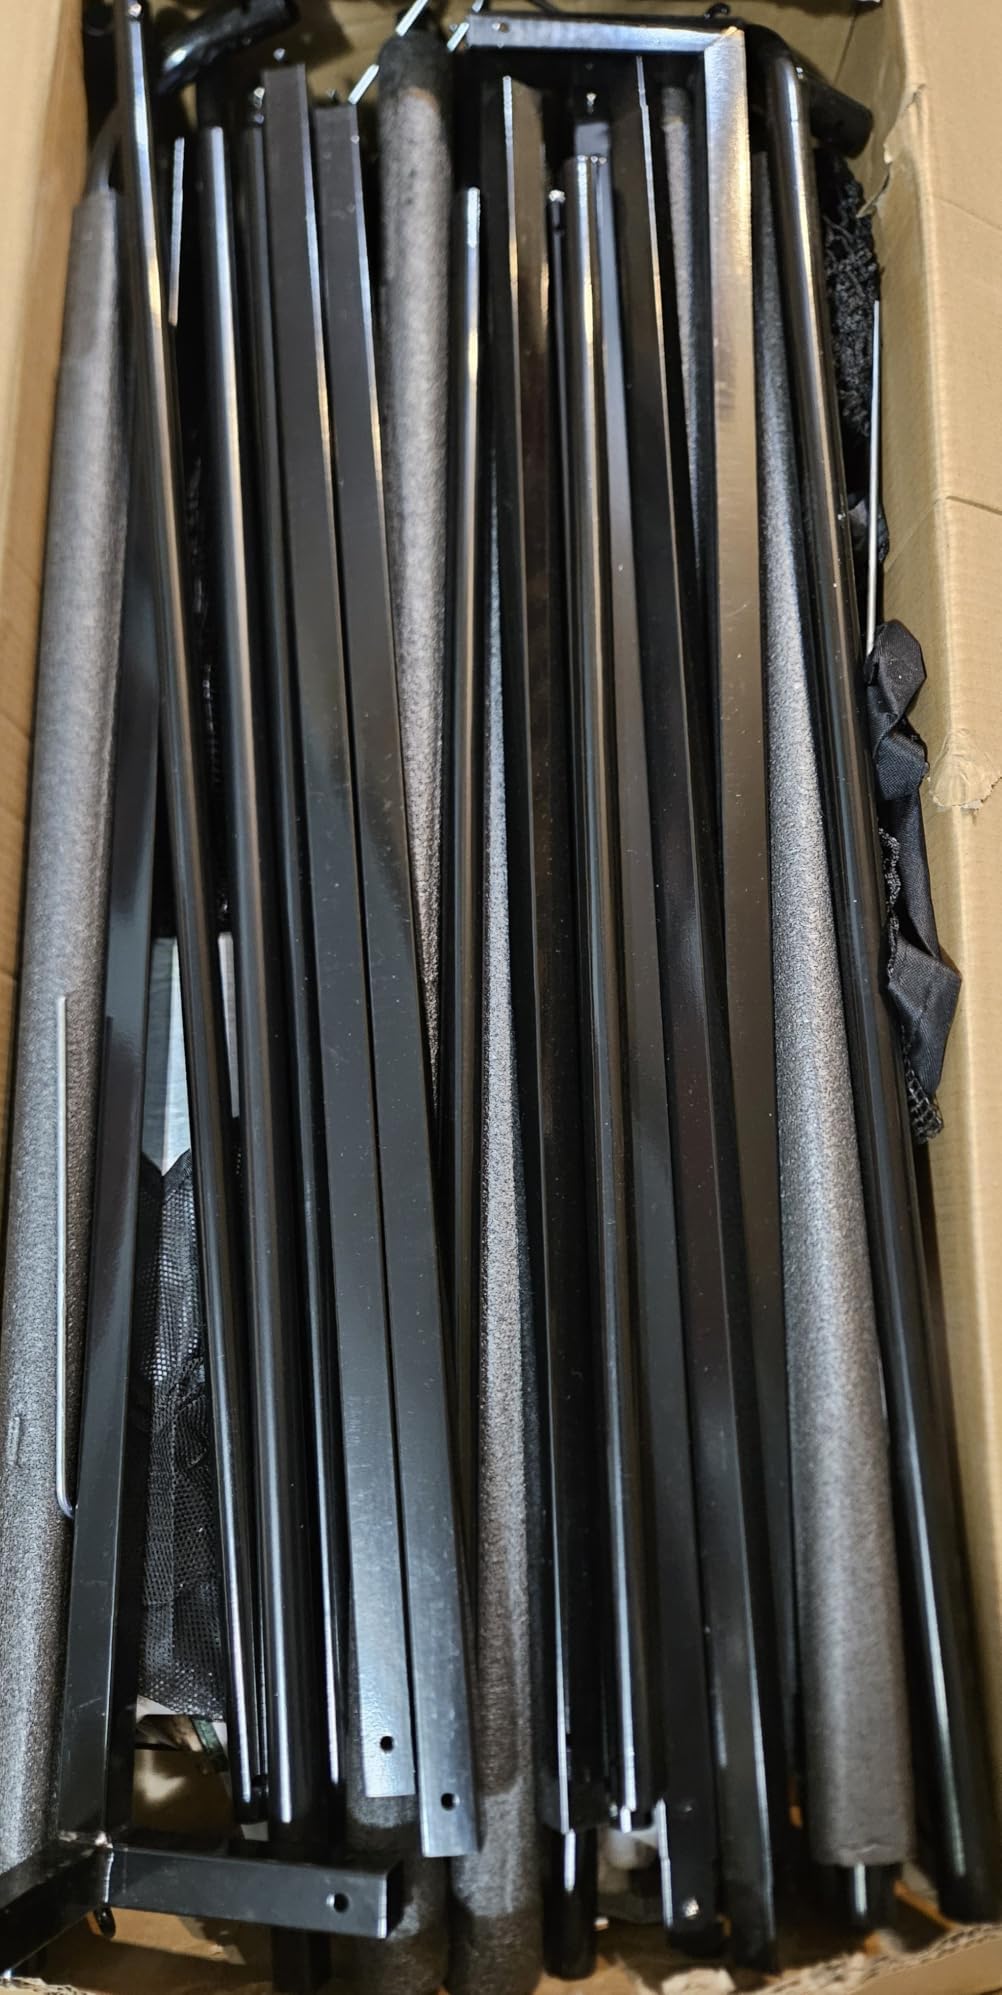
A ball return tray is included, which is more than any other kit in this list offers. It also disassembles for storage and replacement nets can be bought on their own, so a torn net is a five-minute fix rather than a full replacement. One seller provided an assembly video on request, which solved the documentation gap.
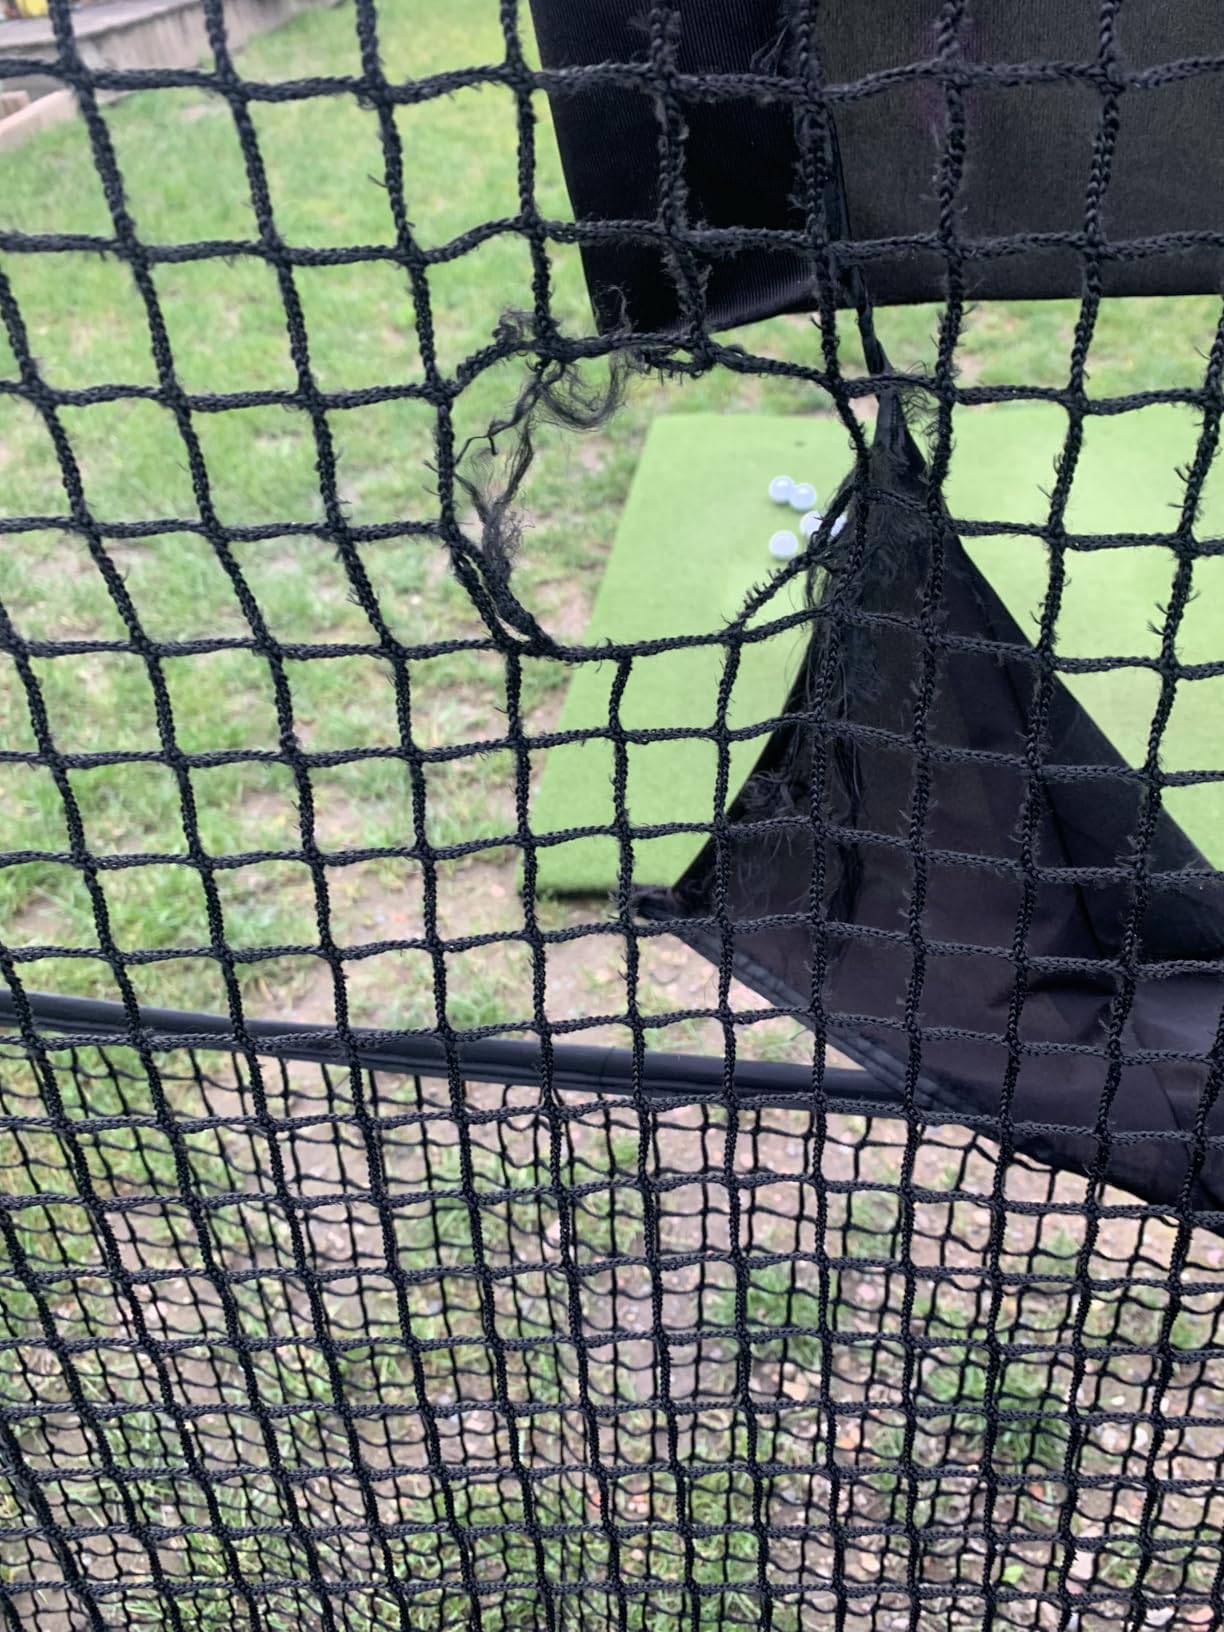
The complaints are small and specific. One owner received a bent assembly pipe that needed straightening before setup, the frame may need trimming for some spaces, and short irons can still reach the net if you stand closer than 10 feet. Ball capture after impact is inconsistent.
Who This Net Fits
It fits golfers who hit a lot of balls and expect to own the setup for years, and it fits anyone who will need to move it between the garage and the backyard. The 10-foot depth also gives the most forgiving hitting position in the roundup.
Skip it if you want projection. This is a driving net, not a projection enclosure, and a projector, launch monitor, software, and mat are all separate purchases.
What to Check Before You Buy
Check the 6 ft height against your ceiling, and check the 10 ft depth against your swing position. This is the tallest and deepest unit in the group, so it needs the most room.
Inspect the pipes in the box before assembly. Straightening a bent support rod on the ground is far easier than doing it with half a frame erected in a garage.
8. Diandian Enclosure Kit 10 x 8 ft for Fast Assembly
Diandian Golf Simulator Enclosure Kit 10 x 8 ft with 4K-Ready Impact Screen
10 x 8 x 5 ft enclosure
600D Oxford blackout cover
Dual-layer 4K screen
Click-lock frame
Pros
- Spring-button frame assembles in 30 to 45 minutes
- Cover and screen are quieter than tarp builds
- Foam padding inside the frame cuts ricochet
- Tight blackout wrap improves contrast
Cons
- One box arrived with no instructions
- Screen wrinkles and roof sag are common
- No projector mount or shank netting included
This is the fastest enclosure to put together by a wide margin. The tool-free spring-button click-lock frame goes up in 30 to 45 minutes with no tools, and at 75 pounds one person can move it solo. For a garage where the setup has to come down between sessions, that time difference matters more than any spec.
The one-piece 600D Oxford blackout cover has no light-leak gaps, which is a meaningful upgrade over tarp-style builds and shows up as better projector contrast. The dual-layer 4K-ready impact screen has mesh backing for noise reduction, and it is noticeably quieter than most kits at this level.
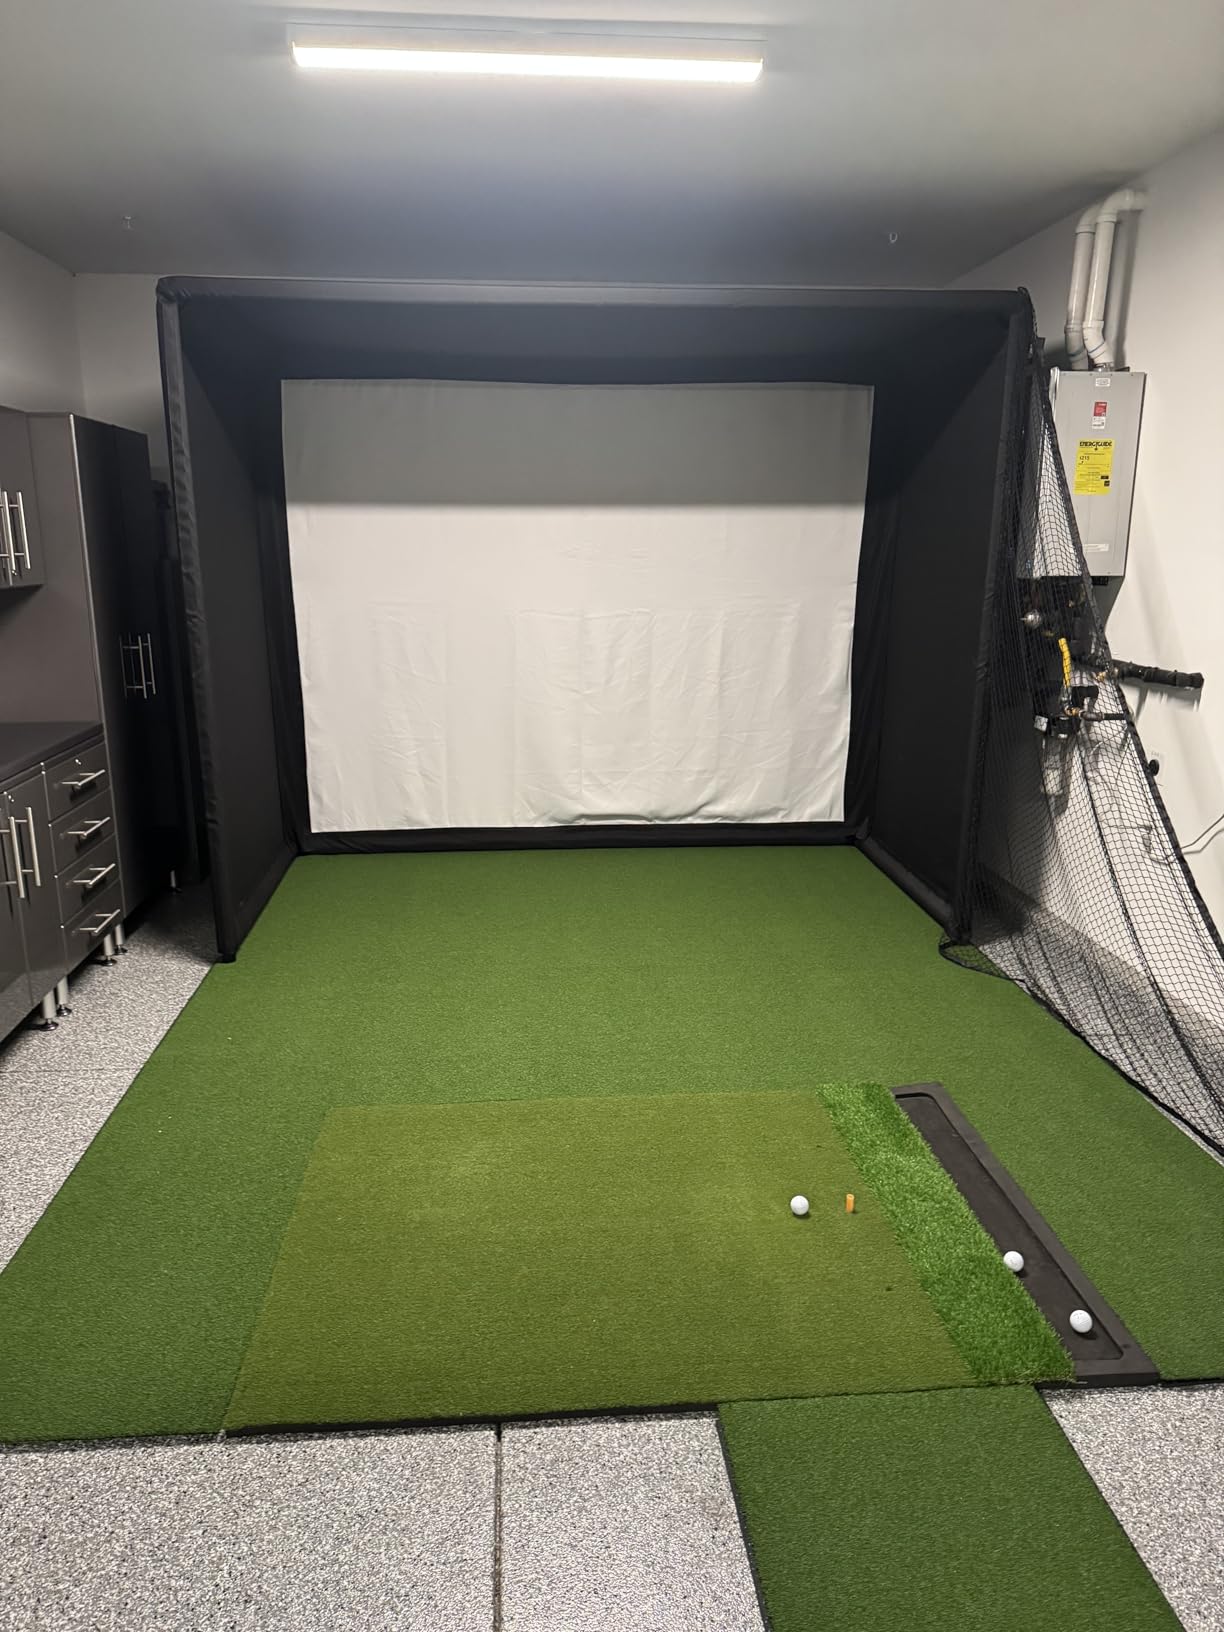
Owners frame it as the best value in its class, comparing it favourably to established kits at a fraction of the outlay. Foam edge padding inside the frame cuts ricochet return, thick foam lines the edges, and safety side nets come standard. The manufacturer recommends a minimum 9 ft ceiling.
The gaps are real. One box arrived with no instructions at all, screen wrinkles and roof sag are common complaints, and one owner had bottom screen stitching tear within weeks. There is no projector mount, no ballast bags, and no shank netting in the box, so a complete build needs more than one purchase.
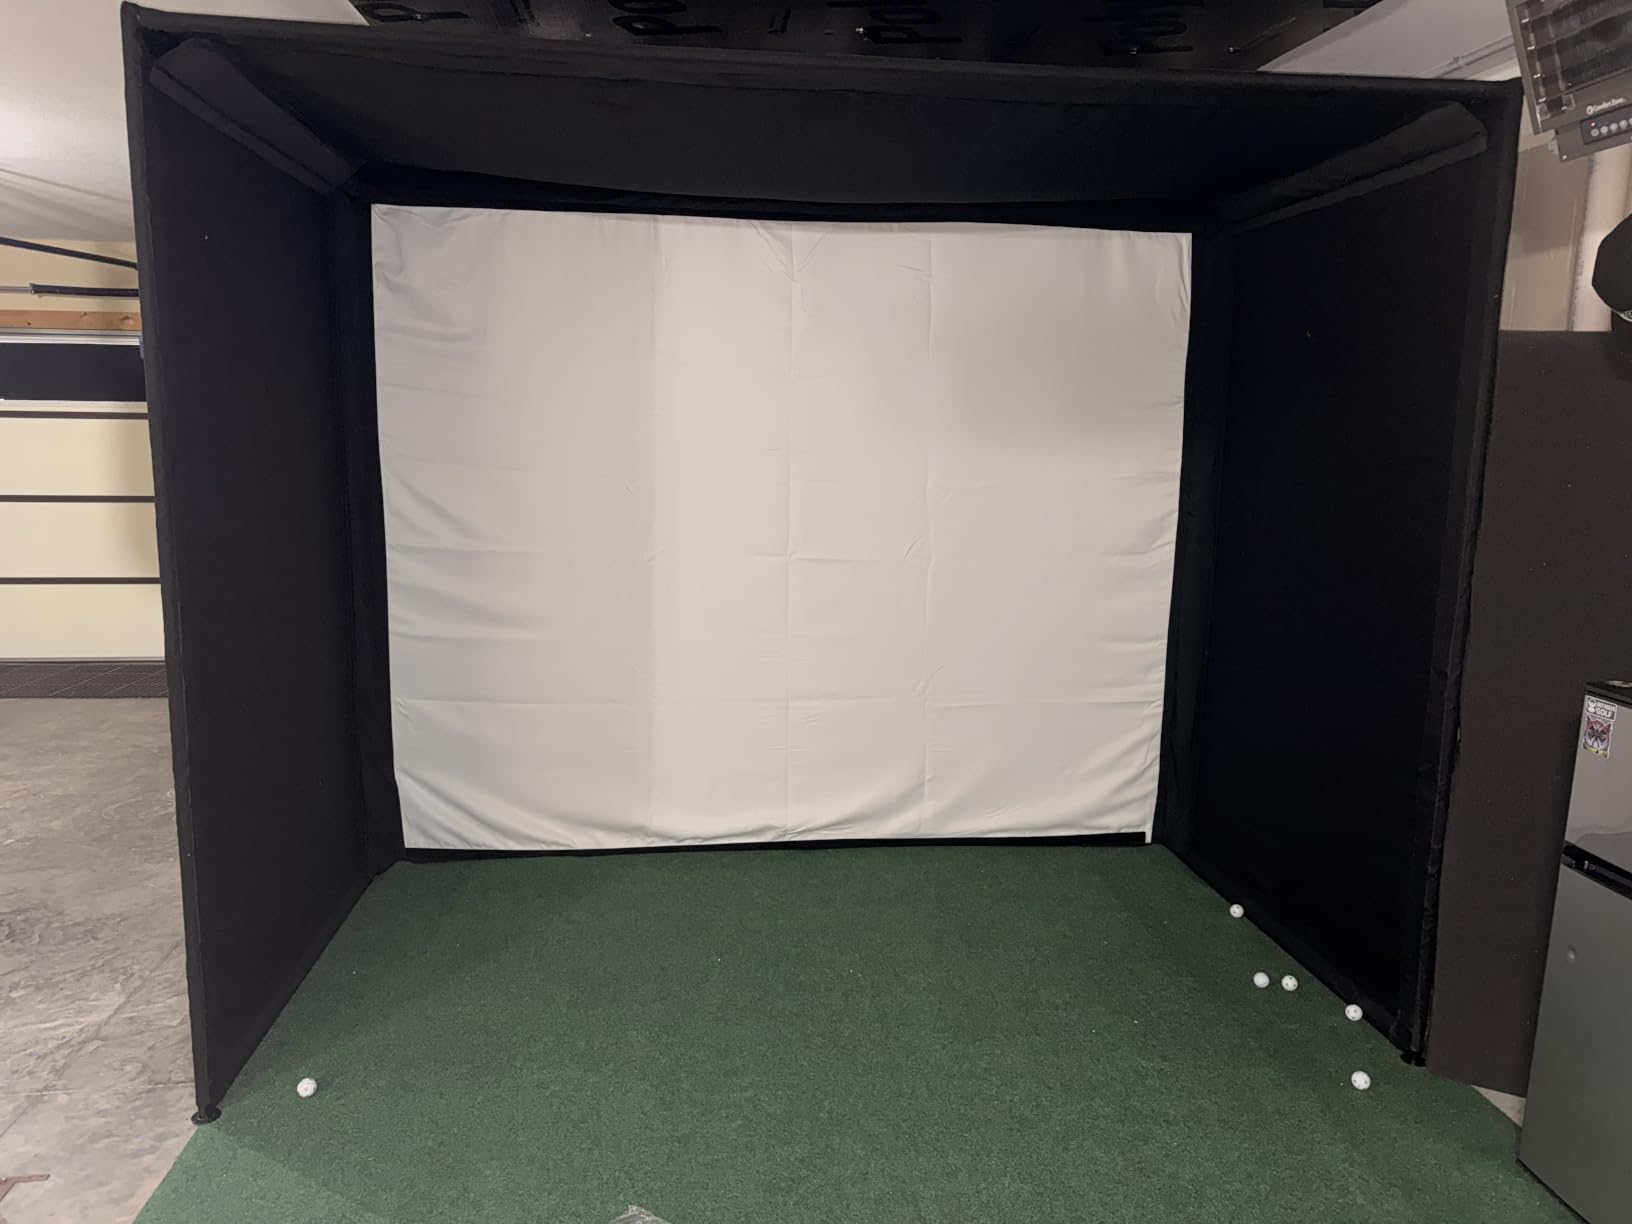
Who This Kit Fits
It fits a garage that has to keep its floor clear, and it fits buyers who would rather spend their weekend practising than assembling. The quiet screen is a bonus in a home attached to living space.
Skip it if you are hard on the bottom of the screen or want a full blackout projection room. The stitching and sag complaints point at low-height impacts as the weak point.
What to Check Before You Buy
Confirm the 9 ft recommended ceiling minimum before you order, and note the 120 inch by 96 inch item dimensions against your bay width. The cover is a one-piece wrap, so clearance around the frame matters.
Plan to buy a projector mount and ballast bags separately. Neither is included, and both are needed before the first session in a working garage.
Garage Sizing and Swing Clearance Checklist
Measure before you browse, and measure the bay with a car in it if the car is staying. The working minimum for a net or a small impact screen is about 10 ft wide by 10 ft deep with an 8.5 ft ceiling. The comfortable setup for a projector build is 12 ft wide by 15 ft deep with a 9 ft or higher ceiling.
Depth is the number most people get wrong. The community rule of thumb repeated on r/Golfsimulator is roughly 20 ft from the launch monitor to the impact screen, measured along the floor. In a shallow bay, that forces a short-throw projector and often a smaller screen. Ceiling height caps screen size, because the projector has to clear your head and still fill the image.
Then check the overhead hardware. Ceiling-mounted garage door tracks and openers are the most common physical interference, and a mid-span beam at 9 ft can cut into a full driver swing. The consensus sizing advice on simulator forums is simple: go 16:9 and buy the biggest screen your room and budget allow, because a wider image is what makes projected golf feel like golf.
For reviewing your own swing, a fixed camera pointed down the target line saves a lot of squinting. Our golf camera picks cover the mount and placement options that work in a dim garage.
Garage Door Openers, Retractable Setups, and Parking the Car
You should never hit into a garage door, and you should never try to attach a screen to one either. The door panel moves, it is not a rated impact surface, and the hardware that carries it is exactly what a full swing will reach. What the top people ask actually means is narrower than it sounds.
Two real solutions exist. The first is relocating the opener to a side-mount or wall-mount configuration, which reclaims the ceiling track running back into the bay. This is frequently the single highest-impact modification you can make to a garage, and it is the answer to the most-asked question on this topic. The second is a retractable or put-away setup, where the enclosure folds or disassembles between sessions.
Choose retractable when the car has to live in the garage. Set-up and teardown time is a genuine buying criterion, not an afterthought, and the forum consensus is that a portable full-garage build should assemble in 20 to 25 minutes and break down in 10 to 15. The GoSports Range Cage and the Haokelball net in this list are the two that come apart quickly enough for that. Choose a permanent build when the car is elsewhere and you want the largest screen the room allows.
Before deciding, factor in the wear of repeated teardowns. A permanently installed cage holds its frame tension better year to year, and every disassembly is another chance to lose a fastener or wrinkle a screen.
What a Complete Garage Build Actually Costs by Tier
A complete build is a five-part sum, and quoting only the launch monitor misleads you. You are paying for a launch monitor, an impact screen or net, a hitting mat, a projector, and software, plus the floor protection and any electrical work.
Entry practice tier. A net cage plus a mat and a starter monitor. This covers a real golf ball indoors with a little data, and it is the most common starting point in community threads. The upside is low cost per session; the limit is that projected imagery is a bonus rather than the point.
Projection tier. A blackout enclosure with an impact screen, a short-throw projector, a mat, and a monitor with software. This is where most garage builds land, and it is the tier where ceiling height and throw distance actually start to matter.
Studio tier. A larger enclosure, a ceiling-mounted projector, a higher-grade monitor, and a perpetual-licence software package rather than a subscription. Owners who play screen golf with family tend to end up here because multi-player stability matters more than raw shot accuracy to them.
Add the ongoing line to any of the three. Subscription software converts a one-time purchase into an annual cost, and the review record on the Rapsodo makes the point clearly: most features sit behind a premium membership after the included trial. If you will still be playing in five years, a perpetual licence such as GSPro, TGC 2019, or FSX Pro changes the ownership math more than any hardware upgrade.
Dust, Heat and Humidity in a Garage
Dust is the garage-specific failure mode that almost no buying guide treats as a criterion, yet it is the one that degrades accuracy. Road grit and concrete dust settle on launch monitor lenses and inside camera housings, and a dirty sensor reads spin less accurately over time. Budget for a microfiber cloth and a monthly wipe-down as part of owning the setup, not as an extra.
Temperature swings stress electronics more than steady cold does. A garage that sits near freezing in winter and hits high summer temperatures puts cycling stress on projector lamps, screens, and plastic frames. Garage golf also has to be comfortable, or you will stop using it in August.
Insulation and a mini-split solve both problems, and they are worth it in cold or hot climates because they add three to four months of usable practice time a year. On the hardware side, sealed projector engines and a stated operating temperature range are the two specs worth checking. Any launch monitor you buy for a garage should be rated to run cold-start, because a cold room is a garage’s default state in winter.
Concrete deserves a mention too. A proper mat and floor covering protect your wrists, elbows, and shoulders, and a real golf ball on bare concrete is a joint injury in waiting. A hitting strip under the mat handles the impact, and it is the cheapest line item in the whole build.
Software Licenses and Two-Handed Households
Perpetual licence or subscription is the first real fork. A perpetual licence such as GSPro, TGC 2019, or FSX Pro is bought once and keeps working, which suits golfers who will keep the setup for years. A subscription platform such as E6 Connect gives you a larger course library and more online play, but bills you every year.
The second fork is handedness, and it is the one forum users mention most. In a household where a righty and a lefty share one mat, switching setup is a recurring friction point. Overhead and floor-camera systems that read the swing without a mat position change handle both hands more gracefully than units that need repositioning.
If that describes your garage, weight the purchase toward sensors that do not care which side you stand on, and toward enclosures wide enough to move the mat without moving the frame. The wide side-net designs in this roundup help here, because the ball has somewhere to go when a righty tries a lefty swing.
Finally, budget for the startup routine. Waking a laptop, powering the monitor, firing the projector, and launching software adds several minutes of overhead to every session. A repeatable sequence matters more to whether you keep using the setup than any spec on the box.
Frequently Asked Questions
Can you put a golf simulator in a garage?
Yes, and the garage is the most common home location. You need roughly 10 ft of width, 10 ft of depth, an 8.5 to 9.5 ft ceiling, a reasonably level floor, and enough clearance above the hitting area to finish a driver swing without clipping a ceiling track or garage door rail.
Which golf simulator can be attached to a garage door?
None should be. A moving door panel is not a rated impact surface, and its rail and opener are exactly what a full swing reaches. The real solutions are a side-mount or wall-mount garage door opener that reclaims the ceiling track, and a retractable enclosure that folds away when the door needs to close.
How big of a garage do I need for a golf simulator?
The working minimum is about 10 ft wide by 10 ft deep with an 8.5 ft ceiling for a net or small impact screen. For a projector setup, aim for 12 ft wide by 15 ft deep with a 9 ft or higher ceiling. Plan for roughly 20 ft of depth from the launch monitor to the impact screen.
How much does it cost to put a golf simulator in your garage?
A complete build is a five-part sum: launch monitor, impact screen or net, hitting mat, projector, and software, plus floor protection. Entry net setups sit at the bottom of the range, projection builds land in the middle, and permanent studio builds with a ceiling-mounted projector and higher-grade monitor sit at the top. Add any annual software cost to the total.
Can I still park my car in the garage with a golf simulator?
Yes, if you choose a retractable or put-away setup. Nets and portable cages that assemble in 20 to 25 minutes and break down in 10 to 15 let you clear the bay between sessions. A permanent installation is better for screen size and stays tighter over time, but it claims the floor for good.
The Bottom Line for Your Garage in 2026
The ANYTHING SPORTS Complete Enclosure Package is our pick among the best golf simulators for garages, because it is the only enclosure that arrives with a projector mount, a true blackout cage, and side shank nets, and because its 11 ft footprint fits the narrow bays that defeat wider kits. The GoSports HD Impact Screen enclosure is the tougher, heavier buy, and the Rapsodo MLM2PRO is the one to add when you want shot data rather than scenery.
Match the build to your ceiling, not to your ambition. Clear 8.5 to 9.5 ft of overhead space, allow roughly 20 ft of depth from monitor to screen, and relocate the garage door opener before you drill a single pole. Those three checks eliminate more bad purchases than any product comparison.