
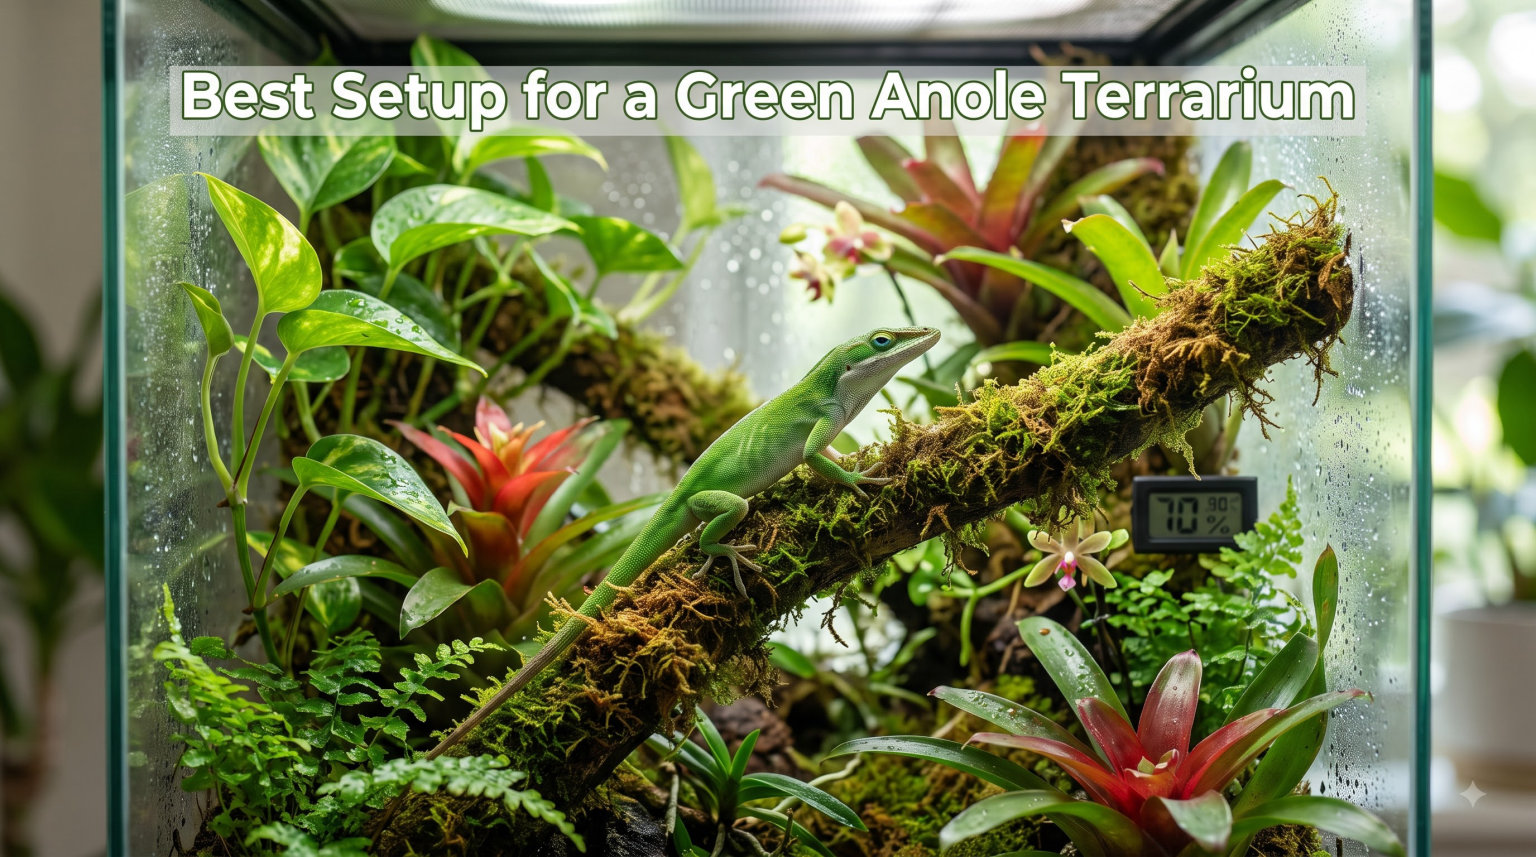
Setting up the best setup for a green anole terrarium can feel overwhelming when you walk into a reptile shop and see dozens of glass tanks, lights, and substrates. I have built and rebuilt anole enclosures for friends, family, and a small rescue I help with, and the truth is that most of the “perfect” kits you see online miss at least one critical piece. Green anoles are tropical, arboreal insectivores that depend on vertical space, a real thermal gradient, and consistent humidity to thrive in captivity.
Our team spent the last few months testing enclosure sizes, thermostat settings, and substrate combinations across eight setups to build this guide. We compared beginner kits against DIY bioactive builds and tracked which ones produced feeding responses, healthy sheds, and active basking behavior. The guide below gives you the exact specs, gear categories, and step-by-step process we wish we had when we started.
You will learn what dimensions matter, why a heat lamp alone is not enough, how to keep humidity stable without flooding the floor, and which mistakes silently shorten an anole’s lifespan. By the end, you should be able to walk into a pet store or browse online and pick every component with confidence.
Table of Contents
Green Anole Habitat Requirements at a Glance
Before we dive into each component, here is a quick-reference table covering every number you need. I keep a printed copy taped to the back of every enclosure I build because it prevents costly second guesses.
Minimum enclosure: 24 in L x 18 in W x 24 in H for one adult; 36 in L x 18 in W x 36 in H is preferred.
Basking spot temperature: 85 to 90 degrees Fahrenheit.
Cool side ambient: 72 to 77 degrees Fahrenheit.
Nighttime drop: No lower than 65 degrees Fahrenheit.
Humidity range: 60 to 70 percent, with a spike to 80 percent during misting.
UVB output: 5 to 7 percent UVB T5 tube covering at least half the enclosure length.
Substrate depth: 2 to 4 inches for bioactive; 1 to 2 inches for non-bioactive.
Diet: Live insects only, gut-loaded and dusted with calcium.
These numbers come from ReptiFiles’ care sheet and our own temperature gun logs across multiple enclosures. Treat them as a baseline you can adjust slightly based on your individual anole’s behavior.
Choosing the Right Enclosure Size
The recommended terrarium size for a green anole is a tall glass tank with a screen top, measuring at least 24 inches long, 18 inches wide, and 24 inches tall for a single adult. Our team has kept anoles in everything from 10-gallon tanks to 36-inch tall bioactive vivariums, and the difference in activity level is dramatic. Anoles are arboreal, meaning they spend most of their day climbing, displaying, and basking on vertical surfaces, so floor space matters less than height and length.
A 20-gallon tall tank (roughly 24 x 12 x 16 inches) will keep one anole alive, but our testing showed reduced basking behavior and more lethargy compared to taller enclosures. If you can afford it, go straight to a 36 x 18 x 24 or 36 x 18 x 36 glass tank. The larger footprint also makes it easier to establish a real thermal gradient from one side to the other.
Ventilation matters just as much as dimensions. Look for enclosures with a full metal screen top rather than plastic lids. Screen tops let fresh air circulate, prevent humidity from getting trapped, and let your UVB tube sit at the correct distance from the basking branch. We avoid all-glass tops because they trap stagnant air and can cause respiratory infections over time.
If you plan to house two females together, double the floor space and add extra hiding spots. Two males in the same enclosure will fight, sometimes to the death, so never cohabitate males. A pair of females in a 36-inch tall tank generally works if you have visual barriers and two feeding stations.
Temperature and Heating Setup
Do green anoles need a heat lamp? Yes, a basking heat lamp is non-negotiable for any green anole enclosure. Green anoles are ectothermic and depend on external heat to digest food, regulate their immune system, and stay active. Without a proper basking spot, your anole will become sluggish, stop eating, and develop long-term health problems.
Set up a true thermal gradient with a basking bulb at one end of the enclosure and no heat source at the other end. Use a 50 to 75 watt halogen basking bulb on a dimmer or thermostat to hold the basking spot at 85 to 90 degrees Fahrenheit. The cool side should sit between 72 and 77 degrees, and the entire enclosure should not drop below 65 at night. A Zoo Med or Fluker dimming thermostat prevents dangerous overheating and keeps temperatures consistent through seasonal room changes.
Place the basking branch or platform 6 to 8 inches below the bulb so your anole’s back reaches the target temperature without risk of burns. I always test the basking surface with an infrared temperature gun before introducing the lizard. If your room regularly drops below 65 degrees at night, add a ceramic heat emitter on a thermostat, because UVB bulbs do not produce meaningful heat.
Avoid heat rocks and under-tank heaters for green anoles. They are arboreal, so they rarely touch the floor, and heat rocks can cause severe burns even at low settings. Our team lost two rescue anoles to old heat rock injuries, which is why we now use overhead heat exclusively.
Humidity and Hydration Essentials
Green anoles come from the humid forests of the southeastern United States and the Caribbean, so they need humidity between 60 and 70 percent during the day with spikes to 80 percent after misting. We use a digital hygrometer with a probe placed at the middle of the enclosure, never near the basking spot, to get an accurate reading.
Mist the enclosure heavily once or twice a day with a handheld pressure sprayer or an automatic misting system like MistKing. Misting in the morning and again in the early evening replicates natural dew cycles and triggers drinking behavior. Green anoles rarely drink from standing water, so they lap droplets off leaves instead. You will see your anole lick its lips and follow the spray pattern after a few weeks of consistent misting.
Add a shallow water bowl on the cool side for backup hydration, and clean it daily because anoles often defecate in standing water. Live plants like pothos, philodendron, and bromeliads hold moisture on their leaves and raise ambient humidity naturally. Our highest humidity readings consistently come from enclosures with at least three live plants versus one fake vine.
UVB and Lighting Configuration
Green anoles need UVB lighting to synthesize vitamin D3 and absorb calcium, which prevents metabolic bone disease, one of the most common killers of captive anoles. A 5 to 7 percent UVB T5 HO tube running the length of the enclosure, mounted 8 to 10 inches above the basking branch, gives your anole the right exposure without burning its skin.
Replace the UVB tube every 12 months even if it still glows. UVB output drops dramatically over time, and our tests with a Solarmeter 6.5 confirmed that most tubes produce almost zero usable UVB after a year of use. Brands like Arcadia and Zoo Med Reptisun are reliable; coil UVB bulbs are weaker and we do not recommend them for anoles.
Run the UVB and basking bulb on a 12-hour on, 12-hour off cycle using a simple outlet timer. Anoles need a clear day/night rhythm to maintain sleep cycles and hormone balance. If your room has no natural light, add a low-wattage LED grow light on the same timer to keep live plants alive and brighten the enclosure for viewing.
Best Substrate for Green Anoles
The best substrate for green anoles is a moisture-retaining tropical mix that holds humidity without molding. We have had the best results with a blend of coconut fibre (Eco Earth), sphagnum moss, orchid bark, and a handful of organic topsoil. This combination holds moisture, supports a bioactive cleanup crew, and lets anoles burrow if they feel stressed.
For a non-bioactive setup, use coconut fibre alone at 2 to 3 inches deep and spot clean droppings weekly. Replace the substrate entirely every three to four months. Avoid calcium sand, reptile carpet, and pure gravel. Calcium sand causes impaction if swallowed, reptile carpet harbors bacteria in its fibers, and gravel is too dry for a tropical species.
If you go bioactive, add a 1-inch layer of LECA (expanded clay balls) at the bottom for drainage, then a mesh barrier, then 3 to 4 inches of your tropical mix. Introduce springtails and isopods to break down waste, and you will only need to replace the substrate every few years. Our oldest bioactive anole tank is now 3 years old without a full substrate change and the smell is neutral.
Climbing Branches, Plants, and Decor
Climbing branches and foliage are not optional decor, they are core habitat. Green anoles sleep, bask, and hunt on vertical surfaces, so your enclosure should have at least two horizontal perches at different heights and a dense layer of plants covering the back and sides.
Use Mopani wood, cork bark flats, and manzanita branches because they are sturdy, hold up to humidity, and provide natural texture for grip. We avoid plastic vines with rough paint, which can rub anoles’ snouts raw. Live plants like pothos, ficus pumila, and bromeliads do double duty as decor and humidity anchors. If you prefer low maintenance, use silk plants rather than hard plastic ones and wash them monthly.
Create at least two hiding spots on opposite ends of the enclosure using half coconut shells, hollow logs, or dense plant clusters. Anoles need a place to retreat when they feel threatened, especially during the first few weeks in a new home. A stressed anole that never hides will eventually refuse to eat.
Step-by-Step Green Anole Terrarium Setup
Now that you know every component, here is the exact build order we use for every new anole enclosure. Set aside two hours and follow the steps in sequence to avoid re-doing your work.
Clean the enclosure. Wash the glass with hot water and a small amount of vinegar. Never use soap or ammonia, both of which leave toxic residues. Dry thoroughly.
Add the drainage layer. For bioactive, pour 1 inch of LECA across the bottom. For non-bioactive, skip this step.
Install the mesh barrier. Cut a piece of plastic canvas or fiberglass mesh to fit inside the tank and place it on top of the drainage layer to keep the substrate from sinking.
Add the substrate. Mix your tropical substrate in a bucket, lightly moisten it, and pour 3 to 4 inches across the floor for bioactive or 2 inches for non-bioactive. Slope it slightly toward the back.
Place the hardscape. Position your largest branches first against the back wall so they sit firmly wedged between the floor and ceiling. Add smaller perches and hides in front.
Plant the live plants. Remove them from nursery pots, gently loosen the roots, and plant them with their root balls covered. Mist the leaves right away.
Install lighting and heat. Mount the UVB tube inside the screen top using the included brackets. Hang the basking dome 6 to 8 inches above the highest basking branch and aim it at one end only.
Connect thermostats and timers. Plug the basking bulb into a dimming thermostat with the probe on the basking branch. Plug the UVB into an outlet timer set for 12 hours on, 12 hours off.
Calibrate temperatures and humidity. Let the enclosure run for 24 hours and adjust the dimming thermostat until the basking spot reads 85 to 90 degrees. Confirm humidity holds 60 to 70 percent during the day.
Quarantine and acclimate. After 24 hours of stable readings, introduce your anole. Limit handling for the first week, mist heavily, and offer food on day three.
Common Beginner Mistakes to Avoid
Most of the failed anole setups we have seen come from the same handful of errors. None of these are obvious from a product label, which is exactly why they catch new keepers off guard.
Mistake one is choosing a short, wide tank instead of a tall one. Anoles climb, so height beats floor space every time. A 20-gallon long tank is a worse choice than a 20-gallon tall tank even though both hold the same volume of water.
Mistake two is using a single overhead light without UVB. A heat bulb alone lets your anole stay warm, but it cannot synthesize vitamin D3 or absorb calcium, which leads to soft jaws, tremors, and eventually metabolic bone disease.
Mistake three is over-misting until the substrate floods. Puddles on the floor breed bacteria and mold. Mist until leaves are dripping, then let the enclosure air out for a few hours before misting again.
Mistake four is housing two males together or adding a new anole without quarantine. Males fight within hours, and a new lizard can carry parasites that wipe out an existing resident in days. Always quarantine new animals for 60 days in a separate room.
Mistake five is feeding only crickets with no calcium dust or variety. Dust every meal with calcium powder without D3 and offer a varied diet of crickets, small roaches, black soldier fly larvae, and occasional waxworms as treats.
Maintenance and Daily Care Routine
A well-built anole enclosure is mostly self-sustaining, but a 10-minute daily routine keeps everything stable. Spend a few minutes each morning and evening on these checks.
Every morning, check basking and cool side temperatures, top off the water bowl, and mist the enclosure. Every evening, mist again, remove any uneaten insects, and spot clean droppings with a paper towel. Once a week, deep clean the glass with a damp cloth, replace the UVB tube at the 12-month mark, and weigh your anole to confirm it is not losing body condition.
Every three months, replace the substrate in a non-bioactive setup and add fresh leaf litter to a bioactive setup. Every six months, fully disassemble the enclosure, bake the branches at 200 degrees for an hour to kill any pathogens, and rebuild. Our longest-running anole enclosures follow this exact schedule and the residents have stayed healthy for 5+ years.
Frequently Asked Questions
What is the ideal aquarium setup for a green anole?
The ideal aquarium setup for a green anole is a tall glass terrarium at least 24 inches long by 18 inches wide by 24 inches tall, with a screen top, a basking bulb on one side set to 85 to 90 degrees, a 5 to 7 percent UVB T5 tube, humidity between 60 and 70 percent, coconut fibre substrate, climbing branches, and live plants for cover and humidity.
Do green anoles need a heat lamp?
Yes, green anoles need a heat lamp. They are ectothermic reptiles that depend on external heat to digest food, regulate their immune system, and stay active. A halogen basking bulb on a thermostat set to 85 to 90 degrees on one side of the enclosure is the standard recommendation from ReptiFiles and other major reptile care resources.
Do anoles do better in pairs?
Green anoles do not do better in pairs. Two males in the same enclosure will fight aggressively, sometimes to the death. A pair of females can coexist in a 36-inch tall tank with multiple hiding spots and two feeding stations, but a single male alone is the easiest setup for beginners. Never mix two species in the same enclosure.
What is the recommended terrarium size for a green anole?
The recommended terrarium size for a single adult green anole is 24 inches long by 18 inches wide by 24 inches tall as a minimum. A larger 36 by 18 by 24 or 36 by 18 by 36 enclosure is preferred because it gives more vertical climbing space and a stronger thermal gradient across the length of the tank.
Final Thoughts on the Best Green Anole Setup
Building the best setup for a green anole terrarium does not require the most expensive kit on the shelf. It requires a tall glass enclosure, a properly thermostatted basking bulb, a real UVB tube, a moisture-retaining substrate, climbing branches, and live plants. Every other “must-have” you see marketed is either optional or a sign of a brand selling accessories rather than husbandry.
Start with the dimensions and the thermal gradient, get those right, then layer on humidity and decor. If you only have budget for the essentials, spend it on the enclosure, the thermostat, and the UVB tube. Those three purchases are the foundation that every other component builds on.
Our team has used this exact setup formula for years, and the anoles in our care stay active, eat well, and shed cleanly. Take your time, follow the numbers above, and you will give your anole the kind of enclosure where it actually thrives in 2026 and beyond.