
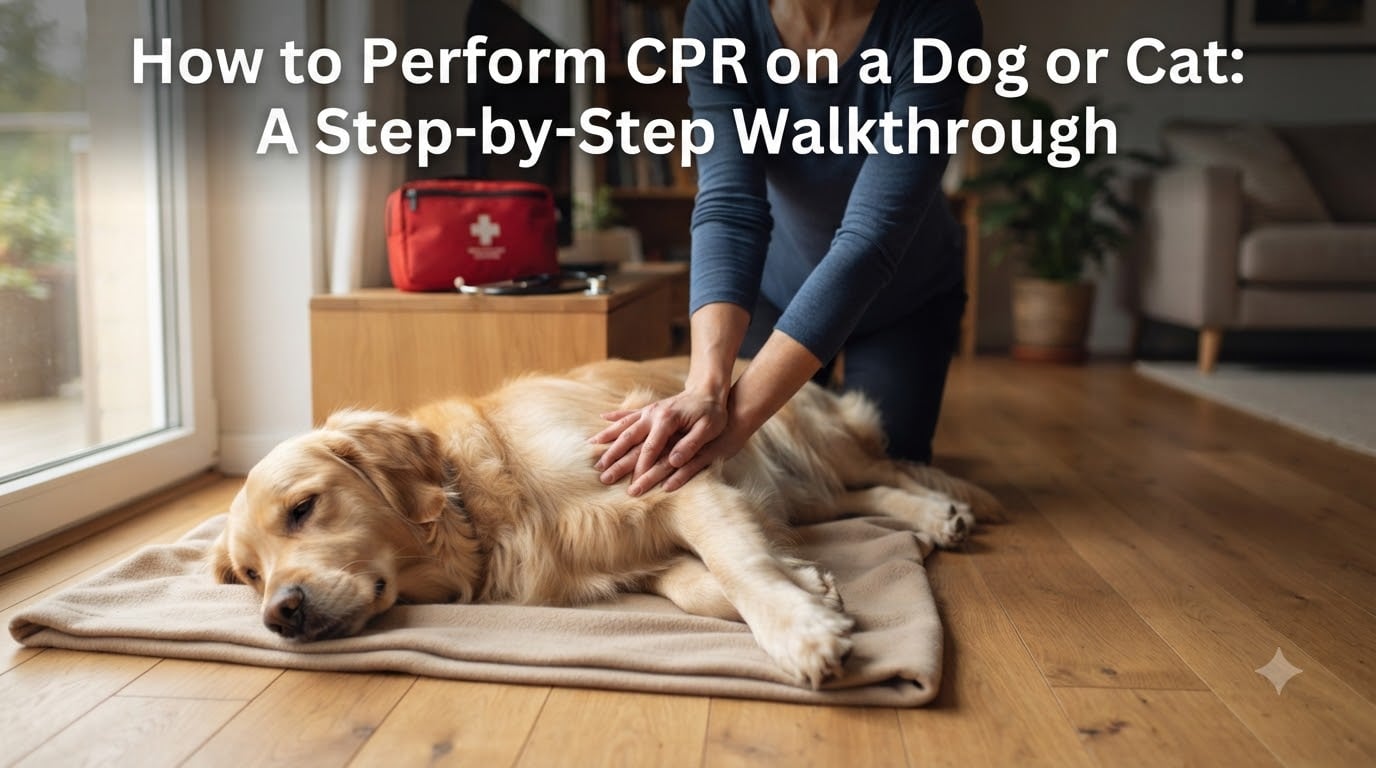
When my own dog collapsed last spring, my hands shook so badly I could barely dial the vet. In that moment I realized I had read about pet CPR a dozen times but never practiced it. Knowing how to perform CPR on a dog or cat is one of those skills you hope you never need, yet every minute counts when a pet stops breathing. Brain damage can start in as little as 4 minutes without oxygen, and the average veterinary emergency clinic is rarely that close.
I have spent the past several months working with veterinary emergency sources, including the American Red Cross pet first aid curriculum and the RECOVER guidelines (the veterinary CPR standard used by emergency hospitals), to put together this walkthrough. It is not a substitute for hands-on training, but it is the guide I wish I had that afternoon.
Table of Contents
Yes, You Can Perform CPR on a Dog or Cat
You absolutely can perform CPR on a dog or cat, and doing something is almost always better than doing nothing during a cardiac emergency. Pet CPR follows the same core principle as human CPR: combine chest compressions to push blood through the body with rescue breaths to put oxygen into the lungs. The American Red Cross teaches a simplified version for pets, and veterinary specialists use the RECOVER guidelines in clinics.
The technique your pet needs depends on whether they are a dog or a cat, their body weight, and the shape of their chest. We will walk through each variation.
Cardiopulmonary arrest (CPA) is the medical term for when the heart stops beating and breathing stops. When this happens, every second without blood flow damages organs, especially the brain. CPR is the bridge that keeps blood moving until you can reach emergency veterinary care.
Recognizing the Signs That a Pet Needs CPR
You only perform CPR on an unresponsive pet that is not breathing and has no heartbeat. CPR is not for pets that are unconscious but still have a pulse. Before you start compressions, you must confirm that the situation is truly an arrest.
Look for these warning signs together, not individually:
No rising and falling of the chest
No response when you call their name or tap firmly
Gums that appear pale, blue, or gray instead of healthy pink
No detectable heartbeat
How to check for a pulse on a dog or cat: Place two fingers high inside the rear leg, where the thigh meets the groin. This is the femoral artery. Press gently. In a healthy dog or cat you should feel a steady pulse. If you cannot feel anything for 10 to 15 seconds, your pet is likely in cardiac arrest.
On cats, the femoral pulse is also the easiest spot to check. On large or deep-chested dogs, you can also place your ear or hand directly against the left side of the chest, just behind the elbow, to listen for a heartbeat.
Preparing to Perform CPR on Your Pet
Once you have confirmed your pet is unresponsive and not breathing, you have seconds to act. Two things need to happen at the same time: start CPR and get someone on the way to a veterinary hospital.
Positioning your pet for CPR:
Place your dog or cat on a firm, flat surface such as the floor or a table.
Lay them on their right side so the left side of the chest faces up. The heart sits slightly to the left in the chest cavity, and lying on the right side lets you compress over the heart.
Extend the head and neck so the airway lines up straight.
For barrel-chested dogs like Bulldogs and Pugs, you can place them on their back, since the chest is rounded rather than side-to-side.
Calling for help while you begin: If you are alone, shout for a neighbor or family member. If no one is available, call your nearest emergency vet on speakerphone so both hands stay free. Do not stop compressions to make the call if you can avoid it.
How to Perform CPR on a Dog or Cat: Step-by-Step
These are the seven core steps our team uses when teaching pet CPR, drawn directly from the American Red Cross curriculum and RECOVER guidelines. The whole sequence should take about 60 to 90 seconds per cycle.
Step 1: Confirm your pet is unresponsive. Call their name, tap their toes, and watch for any reaction. If there is none and they are not breathing, begin CPR.
Step 2: Position your pet on their side. Right side down on a firm surface, head and neck extended in line with the spine.
Step 3: Open the airway. Pull the tongue forward, check the back of the throat for any visible obstruction, and clear it. Tilt the head back very slightly so the throat is straight.
Step 4: Give 30 chest compressions. Push hard and fast at a rate of 100 to 120 compressions per minute. Allow the chest to fully recoil between pushes. Compress the chest to about one-third to one-half of its depth. Use the technique that matches your pet’s size and shape, which we cover below.
Step 5: Give 2 rescue breaths. Close your pet’s mouth, extend the neck, place your mouth over the nose, and blow gently until you see the chest rise. Two breaths should take about 4 seconds total.
Step 6: Repeat the cycle of 30 compressions and 2 breaths. Continue for 2 minutes, then quickly check for a heartbeat or breathing. If nothing has changed, resume and keep going until your pet revives or you reach the vet.
Step 7: Get to an emergency veterinarian. CPR buys time. It is not a cure. Someone should be driving while you continue compressions in the car, or you should transport as soon as you can keep going on the move.
Chest Compression Technique by Dog Size and Shape
Compression technique is where most guides get vague. The truth is that a 6-pound Chihuahua and a 90-pound Labrador need very different hand placement, and so does a Greyhound compared to a Bulldog.
Small dogs (under 30 pounds): Use the heel of one hand. Place it directly over the widest part of the chest, near the heart. For very small dogs and puppies, you can wrap one hand around the sternum and squeeze with your thumb on one side and fingers on the other. Compress about one-third of chest depth.
Medium and large dogs (over 30 pounds): Use two hands. Place the heel of one hand over the widest point of the chest and the other hand on top. Lock your elbows and stack your shoulders over your hands so your upper body weight does the work. Compress one-third to one-half of chest depth.
Barrel-chested breeds (Bulldogs, Pugs, Boston Terriers): Their chests are deep and round rather than flat side-to-side. Place your dog on their back and compress directly over the sternum using the heel of one hand, with the other hand on top.
Deep-chested breeds (Greyhounds, Dobermans, Great Danes): Their heart sits further back than in most dogs. Place your hands closer to the middle of the chest, just behind the bend of the elbow, rather than at the widest point.
Keel-shaped breeds (Greyhounds, Whippets, Boxers): These dogs have narrow, deep chests that look like the keel of a boat. Use the two-hand method over the heart, similar to medium dogs, but position your hands slightly higher on the chest to target the heart directly.
Cat-Specific CPR Techniques
Cats get their own section because almost every published CPR guide treats them as small dogs, which leads to errors. A cat’s chest is small, their ribs are more flexible, and they need less force. Most cats weigh between 6 and 12 pounds, so the one-hand method almost always applies.
One-hand compression: Place the heel of one hand directly over the cat’s heart. Compress about one-third of chest depth, no more. If your cat is very small, you can use just your thumb and index finger wrapped around the chest.
Smaller breath volume: A cat’s lungs are tiny. Blow just enough air to make the chest rise visibly. Overinflating the lungs can damage them. A gentle puff is enough.
Same ratio and rate as dogs: Use 30 compressions to 2 breaths, at 100 to 120 compressions per minute. The RECOVER guidelines confirm these numbers apply across dogs and cats.
Common Mistakes to Avoid During Pet CPR
I have watched people attempt CPR on training mannequins, and the same three mistakes come up again and again. Avoiding them gives your pet a meaningfully better chance.
Compressing too shallow. Most people hesitate and push too gently. You need to compress one-third to one-half of the chest depth. It looks aggressive. That is correct.
Skipping the airway check. If your pet choked on a toy and their airway is blocked, chest compressions alone will not restart their heart. Always open the mouth, look for obstructions, and clear them before you begin.
Stopping too early. Pet CPR success depends on continuing until you reach a vet or your pet revives. Stopping after 30 seconds gives up the only thing keeping blood moving. If you cannot keep going, swap with someone else.
When to Stop and What to Expect?
Pet CPR is harder than human CPR in one critical way: success rates are low. Veterinary studies report survival to discharge rates of roughly 5 to 7 percent for cats and dogs who experience out-of-hospital cardiac arrest, even with optimal care. That number reflects how serious an arrest is, not whether your efforts were worthwhile.
Signs that CPR is working:
You feel a pulse at the femoral artery
Your pet takes a breath on their own
Gums return to a healthy pink color
Pupils begin to respond to light
If you see these signs, stop compressions but keep your pet warm and continue on to the emergency clinic. If nothing changes after 10 to 15 minutes of consistent CPR, your veterinarian may advise stopping based on your pet’s underlying condition.
Talk with your vet in advance about what you would want if your pet arrests. Having a plan removes a painful decision from the worst moment of your life.
Frequently Asked Questions
How do you perform CPR on a dog step-by-step?
Check responsiveness and breathing, lay your dog on their right side on a firm surface, open the airway, give 30 chest compressions at 100 to 120 per minute, deliver 2 rescue breaths through the nose, repeat the 30:2 cycle for 2 minutes, and transport to an emergency vet while continuing CPR.
What are the 7 steps of the CPR process?
The 7 steps are: (1) confirm unresponsiveness, (2) position the pet on their side, (3) open the airway and check for obstructions, (4) give 30 chest compressions, (5) give 2 rescue breaths, (6) repeat the 30:2 cycle, and (7) get to an emergency veterinarian while continuing compressions.
How to give CPR to a cat step-by-step?
Confirm your cat is unresponsive and not breathing, lay them on their right side, open the airway, use the heel of one hand over the heart to give 30 compressions at 100 to 120 per minute, give 2 gentle rescue breaths through the nose, repeat the cycle, and transport to an emergency vet immediately.
Can you do CPR on a dog or cat?
Yes. The American Red Cross and RECOVER guidelines both teach pet CPR for dogs and cats. You combine chest compressions with rescue breaths at a ratio of 30 compressions to 2 breaths, adjusting hand position and depth for the animal’s size and chest shape.
How do you give CPR to a small dog?
For small dogs under 30 pounds, use the heel of one hand over the widest part of the chest near the heart, or wrap one hand around the sternum and squeeze with thumb and fingers. Compress about one-third of chest depth at 100 to 120 compressions per minute, then give 2 rescue breaths.
What is the success rate of pet CPR?
Survival to discharge rates for dogs and cats who experience out-of-hospital cardiac arrest are roughly 5 to 7 percent even with optimal care, according to veterinary studies. CPR buys critical time to reach emergency care rather than guaranteeing recovery.
Conclusion
Knowing how to perform CPR on a dog or cat is less about memorizing numbers and more about building the muscle memory to act when seconds matter. Walk through these steps today, share them with anyone who helps care for your pet, and consider taking a hands-on pet first aid course so the next emergency is not your first practice run. If 2026 is the year you finally get trained, your future self will thank you.