
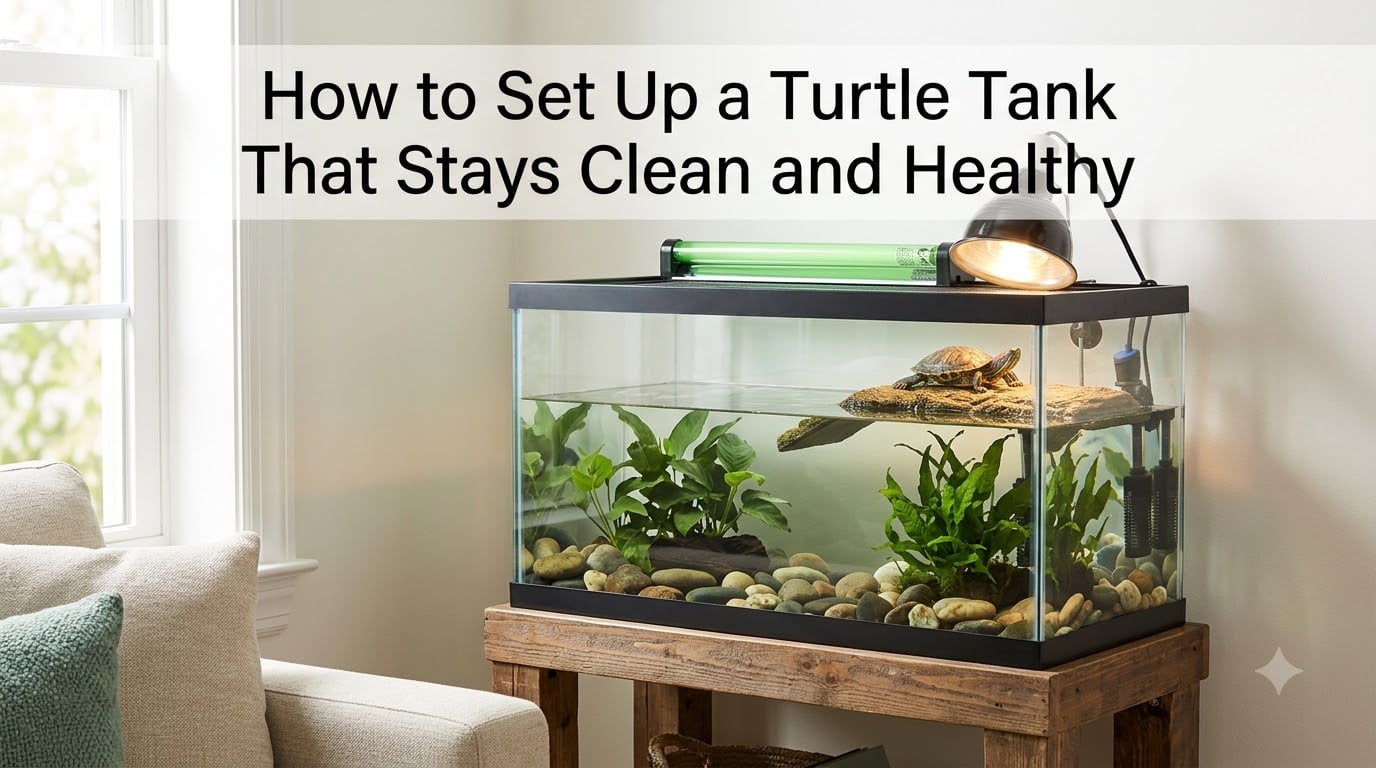
Setting up a turtle tank that stays clean and healthy comes down to a few core principles: the right tank size, strong filtration, proper UVB lighting, a functional basking area, and a consistent maintenance routine. I have kept aquatic turtles for over a decade, and the tanks that thrive all share these fundamentals. Skip any one of them, and you end up with cloudy water, smelly buildup, or worse, a sick turtle.
This guide walks you through how to set up a turtle tank from scratch, plus the small adjustments that make daily upkeep easier. Whether you are a first-time owner or upgrading an existing setup, you will find specific measurements, gear recommendations, and cleaning routines that actually work.
Table of Contents
Tank Size Requirements: Getting the Basics Right
The single biggest mistake new turtle owners make is buying a tank that is too small. Turtles grow fast, and that tiny hatchling will need a much bigger home within a year or two. The rule I follow, and one most reptile keepers agree on, is 10 gallons of water per inch of shell length.
For a juvenile red eared slider (the most common pet turtle, often sold at around 4 inches), that means starting with at least a 40-gallon breeder tank. Adult females can reach 10 to 12 inches, requiring 100+ gallons. Males stay slightly smaller but still need serious space.
Here is a quick reference for common pet turtle species:
- Red eared slider (juvenile): 40 to 55 gallons minimum
- Red eared slider (adult female): 100 to 125 gallons
- Painted turtle: 75 to 100 gallons adult size
- Musk turtle: 40 to 55 gallons (stays smaller)
- Map turtle: 75 to 100 gallons adult size
If budget is a real concern, a larger plastic stock tank or pond liner tub can be a budget-friendly alternative to glass aquariums. Just make sure it is food-safe and has no sharp edges.
Choosing the Right Location for Your Turtle Tank
Where you place the tank matters more than most people think. Direct sunlight through a window might seem like a nice idea, but it causes algae blooms and unpredictable temperature swings. I learned this the hard way when my first tank turned green within two weeks of sitting near a south-facing window.
Pick a spot with stable room temperature, away from drafts, heating vents, and air conditioners. A quiet corner on a sturdy stand (a filled 75-gallon tank weighs over 800 pounds) works best. Keep the tank away from high-traffic areas where vibrations stress the turtle.
Accessibility is another factor. You will be doing water changes, feeding, and cleaning weekly, so leave enough space around the tank to work comfortably. A nearby electrical outlet is also necessary for filters, heaters, and lights.
Filtration System: The Heart of a Clean Turtle Tank
Turtles are messy. They eat, poop, and shed in the same water they swim in. A filter rated for an aquarium two to three times the size of your turtle tank is not overkill, it is the minimum. This is the most important factor in keeping a turtle tank clean.
For filtration, canister filters outperform hang-on-back (HOB) filters in turtle setups. Turtles produce heavy bioload, and canister filters hold more media and have larger capacity. Look for a filter rated at 2 to 3 times your tank volume in GPH (gallons per hour). For a 75-gallon tank, that means a filter pushing 150 to 225 GPH.
Popular choices include Fluval, Eheim, and Marineland canister filters. Whatever you pick, use biological filter media (ceramic rings, bio-balls) alongside mechanical media (sponges, floss). The bacteria that colonize biological media break down toxic ammonia into safer compounds.
Clean the filter media every 2 to 4 weeks, but never rinse it under tap water. The chlorine in tap water kills the beneficial bacteria. Instead, rinse media in old tank water during a water change. This keeps your biological filter working at full strength.
Basking Area Setup: Land, Light, and Heat Combined
Every aquatic turtle needs a dry basking area where it can climb out, warm up, and dry its shell. Without proper basking, turtles develop shell rot, fungal infections, and metabolic bone disease. A good basking area is non-negotiable.
The basking spot temperature should sit between 90 and 95 degrees Fahrenheit for most species. Use a digital thermometer with a probe placed directly on the basking surface, not just near it. Surface temperature is what matters for the turtle.
Basking platforms come in several styles:
- Commercial turtle docks (Zoo Med, Penn Plax): Easy to install, suction to the side of the tank
- Stacked river rocks: Affordable, but ensure rocks are bigger than the turtle’s head so it cannot swallow them
- Egg crate (light diffuser panels) covered with reptile carpet: A favorite DIY option from turtle keepers on Reddit, cheap and easy to clean
- Tile or slate pieces: Heavy, stable, and easy to disinfect
Whichever option you choose, the platform should be large enough for the turtle to fully climb out of the water and have a gradual slope or ramp for easy access.
UVA and UVB Lighting Guide for Turtles
UVB lighting is what allows turtles to synthesize vitamin D3 and absorb calcium. Without it, they develop soft shells, weak bones, and serious health problems. UVA lighting encourages natural behaviors like feeding and basking.
Use a UVB bulb specifically designed for reptiles. There are two main types:
- Linear fluorescent UVB tubes (T5 HO): Provide even coverage across the entire basking area. Recommended for most setups.
- Compact UVB bulbs: Cheaper but produce a narrow beam. Acceptable for very small tanks but less effective overall.
The bulb should be 10 to 12 inches from the basking surface for proper UVB exposure. Replace UVB bulbs every 6 to 12 months, even if they still produce visible light. UVB output drops significantly over time, and your turtle will not get the benefit.
Pair the UVB bulb with a separate heat lamp (incandescent or halogen) to create the basking hot spot. UVB bulbs alone rarely produce enough heat. Position both lights over the dry basking area, not the water.
Water Temperature and Heater Setup
Most common pet turtles need water temperatures between 75 and 80 degrees Fahrenheit. Red eared sliders and painted turtles do best around 78 degrees. Sick or hatchling turtles often need slightly warmer water (80 to 82 degrees) to support immune function.
A submersible aquarium heater is essential. Get one rated for the size of your tank, and always use a heater guard to prevent burns if your turtle decides to investigate. Turtles sometimes wedge themselves against heaters, and a broken heater element in direct contact with a turtle can cause serious injury.
Place two thermometers in the tank, one at each end. Water temperature can vary significantly between the heated side and the opposite end, especially in larger tanks. Digital thermometers with probes tend to be more accurate than stick-on strip thermometers.
Substrate and Decoration: What to Use and What to Avoid
Substrate is optional in turtle tanks, and many keepers prefer to leave the bottom bare for easier cleaning. Bare bottom tanks are simple to vacuum and let waste sit on top where the filter can grab it.
If you want substrate, here are safe options that do not cause impaction:
- Large river rocks (bigger than the turtle’s head)
- Slate or tile pieces
- Sand (fine grain, can be vacuumed)
- Reptile carpet or egg crate covered with tile
Avoid small gravel, pebbles, or crushed rock smaller than the turtle’s head. Turtles explore by tasting things, and small rocks can be swallowed, causing intestinal blockages that often require surgery. This is one of the most common emergency vet visits for pet turtles.
For decoration, focus on items that provide hiding spots and enrichment. Artificial plants, driftwood, and smooth caves work well. Skip any sharp decorations that could cut the turtle’s skin.
Step-by-Step Turtle Tank Setup Process
Now that you have all the gear, here is the actual setup process in order. I recommend doing this in stages rather than rushing the turtle in on day one.
Step 1: Clean the tank and equipment. Rinse the tank with warm water only (no soap or chemicals). Set it up on its stand in the chosen location. Soap residue is toxic to turtles.
Step 2: Install the heater and filter. Place the heater on the side of the tank where water flow from the filter is lowest. Position the filter outlet to create circulation across the entire tank without pushing waste into dead spots.
Step 3: Add substrate and decorations. If using substrate, add it now before filling. Add driftwood, plants, and hiding spots. Rinse all decorations before placing them.
Step 4: Fill with dechlorinated water. Add water treated with a reptile-safe dechlorinator. Fill to a level where the turtle can swim comfortably but also reach the surface easily.
Step 5: Install lighting. Mount UVB and heat lamps over the basking area. Use a timer to provide 10 to 12 hours of light per day, simulating a natural day cycle.
Step 6: Cycle the tank before adding the turtle. Run the filter for 2 to 4 weeks before introducing your turtle. This allows beneficial bacteria to establish and prevents dangerous ammonia spikes. Many keepers use a small amount of fish food or pure ammonia to feed the bacteria during cycling.
Step 7: Test water parameters. Use a freshwater aquarium test kit to check ammonia, nitrite, and nitrate levels. Ammonia and nitrite should both read 0 ppm before adding your turtle. Nitrate below 40 ppm is ideal.
Step 8: Acclimate and add the turtle. Float the turtle in its transport container in the tank for 15 to 20 minutes to equalize temperature. Then gently release it near the basking area.
Maintenance Schedule: Keeping Your Turtle Tank Clean
A turtle tank that stays clean is not just about setup, it is about consistent upkeep. Here is the routine that has kept my tanks looking clear for years.
Daily tasks (5 minutes):
- Remove visible waste with a small net or turkey baster
- Check water temperature
- Feed the turtle (consider feeding in a separate container to reduce tank mess)
- Make sure the turtle is active and eating normally
Weekly tasks (30 to 45 minutes):
- Perform a 25 to 50 percent water change with dechlorinated water
- Clean the basking platform and remove algae
- Wipe down tank walls if algae is building up
- Vacuum substrate (or skip if you have a bare bottom tank)
Monthly tasks (1 to 2 hours):
- Rinse filter media in old tank water
- Deep clean decorations and basking platform
- Test water parameters (ammonia, nitrite, nitrate, pH)
- Inspect heater, filter, and lights for issues
Every 6 months: Replace UVB bulbs even if they still appear to work. Deep clean the entire tank by moving the turtle to a temporary container, draining the tank, and scrubbing everything with hot water only.
Common Mistakes to Avoid When Setting Up a Turtle Tank
From what I have seen in turtle forums and from my own early mistakes, here are the most common setup errors:
- Tank too small: A 20-gallon tank is fine for a hatchling for a few months, but plan for the adult size from the start.
- Filter too weak: A filter rated for the tank size is not enough. Go 2 to 3 times tank size.
- Skipping the cycling process: Adding a turtle to an uncycled tank causes ammonia burns on skin and shell.
- No UVB lighting: Without UVB, turtles develop shell deformities and metabolic bone disease over time.
- Small gravel substrate: Causes fatal impactions. Stick to large rocks or bare bottom.
- Overfeeding: Excess food decays and pollutes the water fast. Feed only what the turtle can eat in 5 minutes.
FAQ
How to keep a turtle tank clean naturally?
Feed your turtle in a separate container to reduce waste in the main tank. Use a strong canister filter rated for 2 to 3 times the tank volume. Add live plants like hornwort or java fern to absorb nitrates. Perform 25 to 50 percent water changes weekly. Avoid overfeeding, and remove uneaten food within 5 minutes.
What not to put in a turtle tank?
Do not use small gravel or pebbles smaller than the turtle’s head, which can cause fatal intestinal blockages. Avoid plastic plants with sharp edges. Skip decorations with small holes where a turtle could get stuck. Never add soap or household cleaners to the tank. Avoid heat rocks, which can burn turtles. Do not house turtles with fish that nip fins or compete aggressively for food.
How to set up the best turtle tank?
Use a tank with at least 10 gallons of water per inch of shell length. Install a canister filter rated 2 to 3 times the tank size. Provide a dry basking area with surface temperature of 90 to 95F. Add a UVB tube light positioned 10 to 12 inches above the basking spot. Maintain water temperature between 75 and 80F with a submersible heater. Cycle the tank for 2 to 4 weeks before adding the turtle.
How often should a turtle tank be cleaned?
Remove visible waste daily. Perform a 25 to 50 percent water change weekly. Rinse filter media in old tank water every 2 to 4 weeks. Deep clean the entire tank, including decorations and basking platform, every 6 months. Test water parameters monthly to catch ammonia or nitrite spikes early.
How much water should be in a turtle tank?
Water depth should be at least 1.5 to 2 times the turtle’s shell length, so the turtle can flip itself upright if it turns over. For most setups, fill the tank to roughly two-thirds to three-quarters full, leaving room for the basking platform to sit above the waterline. The water should be deep enough for the turtle to swim freely without bumping the bottom.
Final Thoughts on Setting Up a Turtle Tank
Learning how to set up a turtle tank that stays clean and healthy is really about respecting what turtles need: clean water, warm basking spots, UVB light, and space. Get those right, and your turtle can live 20 to 30 years in good health.
Start with the right tank size, oversize your filter, and build the maintenance routine before you bring the turtle home. A little planning now saves hours of troubleshooting later. Your turtle will thank you with decades of personality, color, and the kind of quiet companionship that makes reptile keeping worth it.