
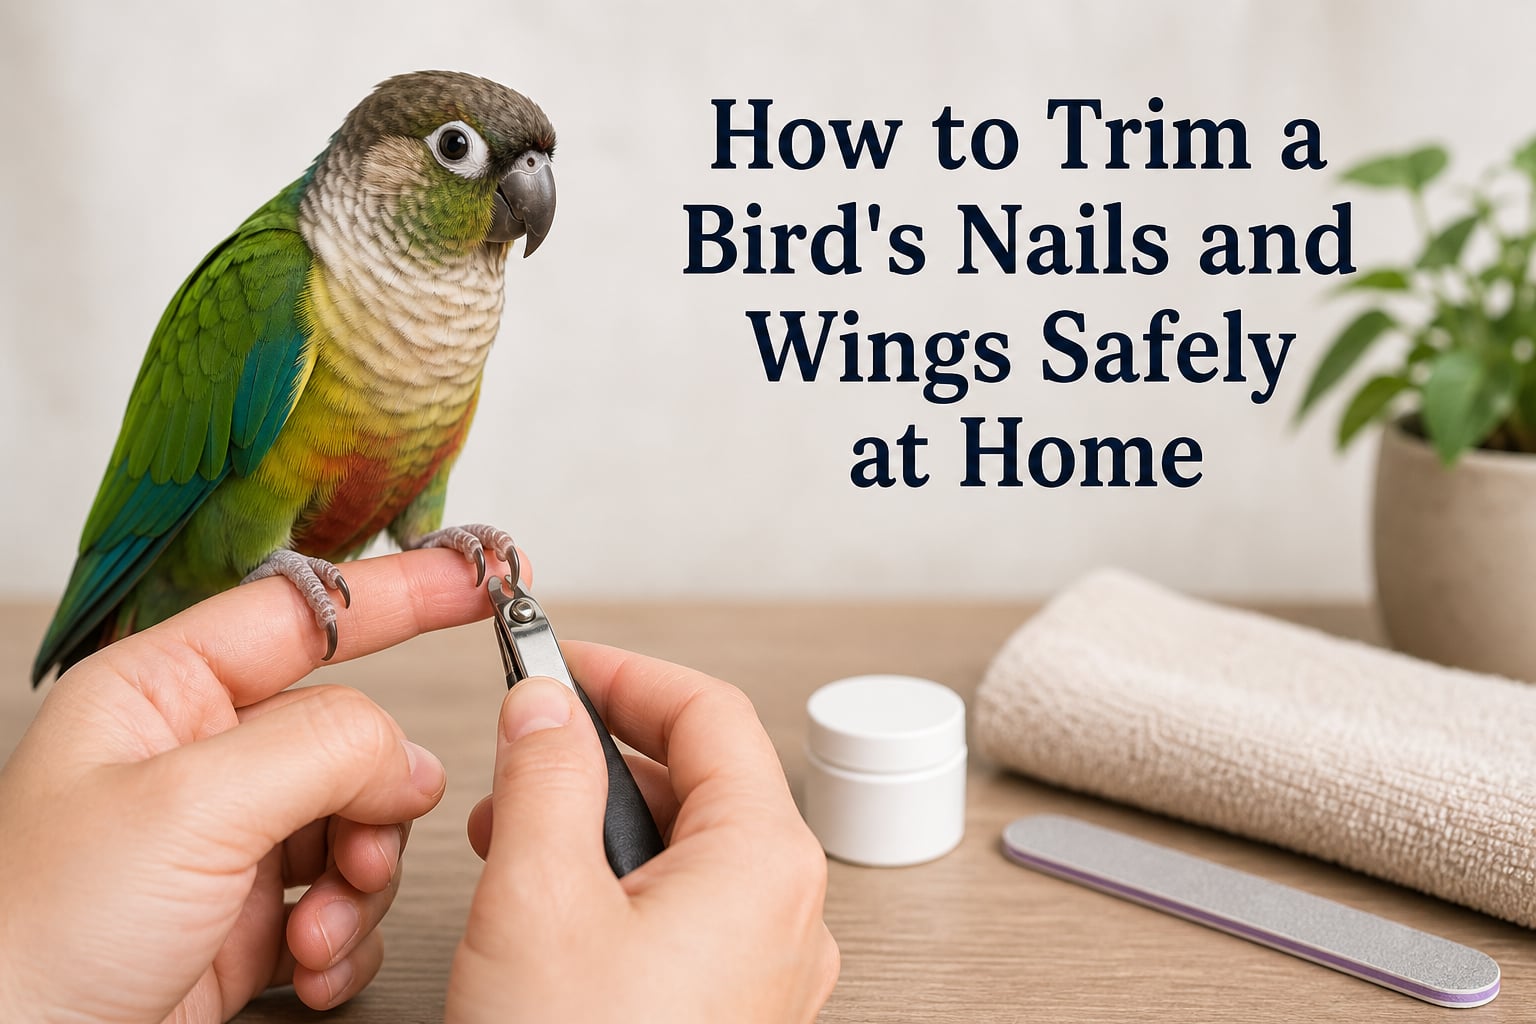
Learning how to trim a bird’s nails and wings safely at home saved me hundreds of dollars in vet visits and gave me a stronger bond with my cockatiel. After a few nervous first attempts, I now handle both routines confidently in under ten minutes. This guide shares exactly what I learned through trial, error, and conversations with avian vets, so you can skip the stressful trial period.
Most bird owners can safely groom their pets at home with the right tools and a calm approach. You will learn bird nail anatomy, the exact tools that work by bird size, a stress-free step-by-step trimming method, how to stop bleeding if it happens, and the real talk on wing clipping and its psychological effects. By the end, you will know when home grooming works and when a professional is the right call.
Table of Contents
Tools and Supplies You Need for Home Bird Grooming
Gathering the right supplies before you start makes the entire process smoother for both you and your bird. I keep a small grooming kit in a basket so everything stays together and ready.
Essential tools checklist:
Bird nail clippers: Use human nail clippers for small birds like parakeets, cockatiels, and lovebirds. For medium to large parrots (conures, Amazons, macaws), use small dog nail scissors or guillotine-style pet clippers. VCA Hospitals specifically recommends this size-matching approach.
Styptic powder or gel: This is non-negotiable. It contains silver nitrate that stops bleeding fast if you nick the quick. Keep it in your kit at all times.
Fingernail file or emery board: Use after clipping to smooth sharp edges. Birds sometimes tolerate filing better than clipping once they are desensitized.
Soft cotton towel: A small hand towel works for gentle restraint. Avoid thick bath towels, which are too bulky for small birds.
Sterile cotton swabs: For applying styptic powder or cleaning small cuts.
Bright, focused lighting: A desk lamp or headlamp helps you see the quick, especially in dark-nailed species.
Treats: Millet spray, sunflower seeds, or whatever your bird loves most for positive reinforcement.
Optional but helpful: a small flashlight for translucent nails, cornstarch as a backup hemostatic agent, and clicker training tools if you plan to desensitize gradually.
Understanding Bird Nail Anatomy: What Is the Quick?
The quick is the living core of your bird’s nail, containing blood vessels and nerve endings. Cutting into the quick causes pain and bleeding, which is why understanding its location is the single most important part of safe nail trimming.
In birds with light or translucent nails, the quick is easy to spot. It appears as a pink or red line running through the center of the nail. You simply trim just in front of this line, leaving a small buffer of clear nail between your cut and the quick.
Dark-nailed birds are trickier. African Greys, many cockatoos, and some conures have black or dark brown nails where the quick is invisible. In these cases, trim only tiny slivers at a time, no more than a millimeter per cut, and stop the moment you see a darker pink dot appear in the center of the cut surface. That dot means you are approaching the quick.
Healthy nail length is when your bird stands on a flat surface and its nails just touch the surface without curling under the toes. If the nails curl or lift the toes off the ground, they are too long. BirdTricks emphasizes that nails cut too short compromise grip, so always err on the longer side.
How to Tell If Your Bird’s Nails Are Too Long
Overgrown nails are uncomfortable and sometimes dangerous. Watch for these warning signs.
Nails curling under the toes: This is the clearest sign of overgrowth. The nail tip should rest on a flat surface, not curve around the toe pad.
Getting stuck on fabric: If your bird snags on your shirt, curtains, or cage toys, nails are likely too long or sharp.
Scratches that break skin: Wild parrots use their nails for climbing. In captivity, sharper nails mean deeper accidental scratches.
Awkward perching: A bird shifting its weight constantly or sitting on its hocks may have nails interfering with normal grip.
Toe deformities in young birds: Overgrown nails during development can permanently affect toe alignment.
Many parrot owners follow the 333 rule: grooming three body parts (nails, wings, beak check) every three months. This is a guideline rather than a strict rule. Active birds with rough perches may need trimming every 6-8 weeks. Sedentary birds may go 4-6 months between trims.
How to Trim a Bird’s Nails and Wings Safely at Home: Step-by-Step
Now for the core process. I will walk you through a safe nail trim that works for most parrot species. Take it slow on your first attempt.
Step 1: Prepare your environment. Choose a quiet room with closed doors and windows. Remove other pets. Lay your supplies on a nearby table. Birds sense stress, so calm your own breathing before starting.
Step 2: Gently restrain your bird. For small birds, cup your hand loosely over the back, with the head between your index and middle fingers. For larger parrots, a thin towel wrap with the head secured just outside the towel is safer. Never squeeze the chest; birds need free rib movement to breathe.
Step 3: Isolate one toe at a time. Hold the toe between your thumb and forefinger, applying gentle pressure to extend the nail. Keep the bird’s body supported so it feels secure.
Step 4: Identify the quick and make a tiny cut. In light nails, look for the pink line and cut 1-2 millimeters in front of it. In dark nails, snip only the curved tip. Less is more. You can always trim more; you cannot uncut a quick.
Step 5: File the edges if needed. A quick swipe with an emery board removes sharp points. Some birds tolerate filing better than clipping once trained.
Step 6: Reward and release. After each nail, offer a treat and a moment of praise. After all nails, return your bird to its cage for rest.
For single-person trimming on a larger parrot, perch your bird on one hand while using the other to handle the clippers. A well-socialized bird will sit calmly on a hand-held perch during the process.
How to Handle Bleeding If You Cut the Quick?
Even experienced groomers nick the quick occasionally. Stay calm. Your panic makes the bird more anxious, which raises blood pressure and worsens bleeding.
Immediate response: Dip the bleeding nail into styptic powder, or press a cotton swab dipped in styptic directly against the cut for 10-15 seconds. The powder’s silver nitrate cauterizes the wound quickly.
No styptic powder available? Cornstarch or regular flour works in a pinch. Press firmly and hold pressure. Avoid cauterizing sticks meant for human use, as they can damage avian tissue.
When to call a vet: If bleeding does not stop after 5 minutes of pressure, if the bird seems lethargic, or if a large portion of the nail is torn rather than cut. A small amount of blood looks like a lot on a small bird. A few drops is normal; a steady flow is not.
Aftercare: Keep your bird quiet for an hour. Skip climbing toys for 24 hours so the nail can scab over. Check the nail daily for signs of infection: swelling, redness extending up the toe, or pus.
Desensitization: Training Your Bird to Accept Grooming
Forced toweling damages trust. After two sessions of being wrapped tightly, my cockatiel started hiding every time I picked up a towel. I switched to desensitization, and the difference was night and day.
Week 1: Touch without tools. Gently touch your bird’s feet and toes during regular handling. Pair the touch with a treat. Do this 3-5 times daily for 2-3 minutes each.
Week 2: Introduce the clippers. Let your bird see and sniff the clippers. Touch the clippers to a toe without cutting. Reward immediately. The goal is “clippers near foot” equals “treat appears.”
Week 3: Mimic the cutting motion. Hold the toe, position the open clippers around the nail tip, then close them in the air without cutting. Reward. Repeat several times per session.
Week 4: Make the first real cut. Clip just one nail. Reward heavily. Stop there. Over the following weeks, add one more nail per session until you can trim all in one go.
One cockatoo owner on Reddit trained her bird to accept filing one nail at a time over six weeks using sunflower seeds as a reward. By month three, the bird stepped up willingly for grooming sessions.
Clicker training speeds this process considerably. The sharp click marks the exact moment of good behavior, making it crystal clear what earned the reward.
Wing Clipping: Methods and Safety
Wing clipping is more controversial than nail trimming, but it is a legitimate management tool when done correctly. The goal is to reduce flight altitude, not eliminate flight entirely. A bird with properly clipped wings can glide safely to the floor, avoiding the crash injuries that come from panicked flight into walls or windows.
What you are cutting: Primary flight feathers are the long feathers at the outer edge of the wing. Trimming these reduces lift. Never cut secondary feathers or coverts, which provide insulation and shape.
Two main methods:
Symmetric clip: Trim the same number of feathers on both wings. This keeps the bird balanced in flight. Recommended for most pet birds.
One-wing clip: Trim only one wing. The bird becomes unbalanced and cannot gain altitude. This is now considered outdated because it can cause crash landings and spinal injuries from uneven descent.
Step-by-step wing clipping:
Step 1: Secure your bird with a thin towel, leaving the head free and one wing exposed.
Step 2: Extend the wing gently and identify the primary flight feathers. Count from the wing tip inward. These are the longest feathers.
Step 3: Identify any blood feathers. A blood feather is a new feather still growing in; the shaft appears dark or purple because of the blood supply inside. Never cut a blood feather, as this causes severe bleeding.
Step 4: Cut 5-7 primary feathers just below the level of the coverts (the shorter feathers overlapping the base of the primaries). Use sharp, clean scissors.
Step 5: Repeat on the opposite wing for symmetric balance. Release your bird and observe. It should be able to glide gently downward but cannot sustain upward flight.
For heavier birds like Amazons and macaws, clip fewer feathers. For lighter birds like cockatiels and parakeets, clip more to achieve the same glide effect. Birds molt and regrow feathers naturally, so clipping is not permanent. Expect to re-clip every 6-12 months as feathers molt in.
The Psychological Impact of Wing Clipping
This is where the wing clipping debate gets heated, and for good reason. Honest discussion matters more than cheerleading for one side.
Many birds adapt well to clipped wings. They remain playful, vocal, and affectionate. Others show clear behavioral changes. Owners on parrot forums report birds becoming quieter, less playful, more bitey, or visibly depressed after clipping. A reduction in talking, screaming, or interactive behavior often appears within days of a clip.
The case against routine clipping: Flight is a primary need for birds. Losing flight removes their main escape response, which can cause learned helplessness and chronic stress. Some avian welfare organizations now oppose routine cosmetic clipping.
The case for selective clipping: Clipping can be a safety measure. Birds in homes with ceiling fans, open windows, mirrors, or aggressive dogs face real dangers from uncontrolled flight. A moderate clip allows gliding descent, preventing the crash injuries that send many parrots to emergency vets. Clipping also helps with bonding and taming in newly adopted birds.
How to minimize negative effects: Provide climbing opportunities, foraging toys, and out-of-cage time so the bird still exercises. Watch for behavioral changes post-clip. If your bird becomes withdrawn or aggressive, consider whether re-growing flight feathers might improve its welfare.
Feathers do grow back at the next molt, typically within 6-12 months. Clipping is a temporary decision, not a permanent one. Some owners rotate: clipped in winter when indoor hazards multiply, full flight in summer when windows stay open.
Natural Alternatives: Pedi Perches and Rough Surfaces
If you want to reduce trimming frequency, the right perches do real work. A pedi perch is a textured concrete or sanded perch that files nails naturally as the bird grips it.
Placement matters: Put the pedi perch near the food dish or favorite hanging toy, where your bird spends the most time. Avoid making it the only perch, as constant pressure on a hard surface can cause foot sores.
Mix perch textures: Combine pedi perches, natural wood branches with bark, rope perches, and flat perches. Variety prevents foot fatigue and keeps nails, beak, and skin healthy.
Natural branches: Apple, willow, manzanita, and eucalyptus branches offer both chewing and mild filing. Replace them every few months as they wear down.
Pedi perches reduce, but do not replace, nail trimming. They keep nail tips blunt between sessions but cannot shorten an already overgrown nail.
Signs You Need Professional Help
Home grooming is not always the right choice. See an avian vet or certified bird groomer if you notice these situations.
Heavy bleeding from a cut or broken nail that does not stop after 5 minutes of pressure.
Deformed or curling nails that have grown into the foot pad. This needs veterinary trimming under sedation in some cases.
Behavior change after clipping: severe lethargy, refusal to eat, or sudden aggression that lasts more than a few days.
Blood feathers broken or bleeding heavily. These need emergency cauterization.
Dark-nailed birds with overgrown nails you cannot see the quick in. Vets use specialized lighting and experience to trim safely.
Professional bird nail trims typically cost $15-30, and wing clipping runs $20-50 depending on your area. Avian vets charge more but catch health issues during the visit. Some Petco and PetSmart locations offer basic grooming services, though the experience of the groomer varies widely.
Frequently Asked Questions About Bird Grooming
Can I trim my bird’s nails at home?
Yes, you can safely trim your bird’s nails at home using the right tools and technique. Use human nail clippers for small birds like parakeets and cockatiels, and small dog nail scissors for medium to large parrots. Keep styptic powder on hand to stop any bleeding, and trim just the nail tip to avoid the quick, the blood vessel and nerve running through the nail.
Is clipping bird wings painful?
Clipping mature feathers is not painful because the feather shaft no longer contains a blood supply. However, cutting a blood feather (a new feather still growing in) is extremely painful and causes severe bleeding. Always check for blood feathers before clipping. The procedure itself, when done correctly, does not hurt but the resulting loss of flight can cause psychological stress in some birds.
What is the 333 rule for parrots?
The 333 rule is a general parrot grooming guideline suggesting owners check and maintain three body parts, including nails, wings, and beak, every three months. It is a starting point, not a strict schedule. Active birds with rough perches may need nail trims every 6-8 weeks, while less active birds may only need trims every 4-6 months. Watch your individual bird’s nail length rather than following any rigid calendar.
How to tell if bird nails are too long?
Your bird’s nails are too long if they curl under the toes when the bird stands on a flat surface, if the bird gets stuck on fabric or cage bars, if normal handling leaves deep scratches on your skin, or if the bird has trouble perching normally. Healthy nail length allows the bird to grip without the nail tip curling past the toe pad.
Can birds recover from clipped wings?
Yes, clipped wings grow back fully at the bird’s next molt, typically within 6-12 months. Feathers molt and replace naturally on a cycle. However, the psychological effects of clipping can outlast the physical feather regrowth in some birds, especially if the bird experienced stress during the clipping process. Some birds bounce back quickly; others take weeks to return to normal activity levels.
How much does it cost to get a bird’s wings clipped?
Professional wing clipping typically costs $20-50 depending on your location and the bird’s size. Avian vets may charge more but include a basic health check. Pet store grooming services sometimes offer wing clipping at lower rates, though the skill of the groomer varies. Many bird owners learn to clip wings at home after one professional demonstration to avoid ongoing costs.
Final Thoughts on Safely Trimming Your Bird’s Nails and Wings at Home
Learning how to trim a bird’s nails and wings safely at home is one of the most practical skills a parrot owner can develop. With the right tools, a calm approach, and an understanding of bird anatomy, most routine grooming becomes a quick, low-stress task you and your bird can handle together.
Start with desensitization before you ever make the first cut. Keep styptic powder in your kit at all times. Watch your bird’s behavior closely after any grooming session, especially wing clipping. And when in doubt, whether about a bleeding emergency, a blood feather, or your own skill level, an avian vet is always the right call.
Your bird depends on you for safe, comfortable care. The time you invest in learning proper grooming pays back in trust, health, and years of happy companionship.
1 thought on “How to Trim a Bird’s Nails and Wings Safely at Home (September 2026)?”